Great Lower Sugar Yogurt Choices

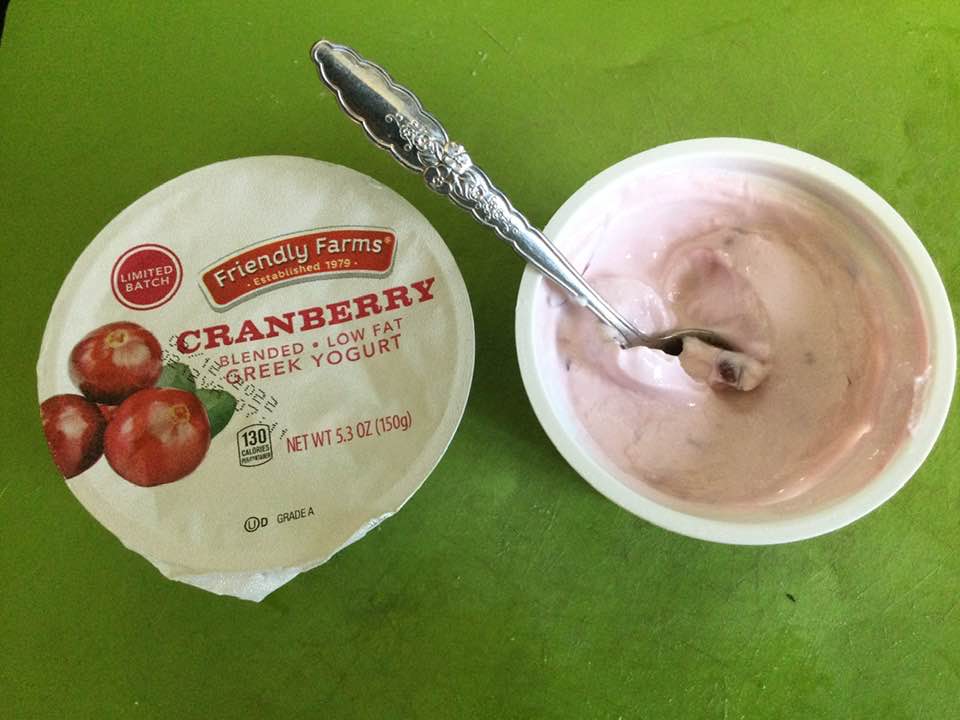
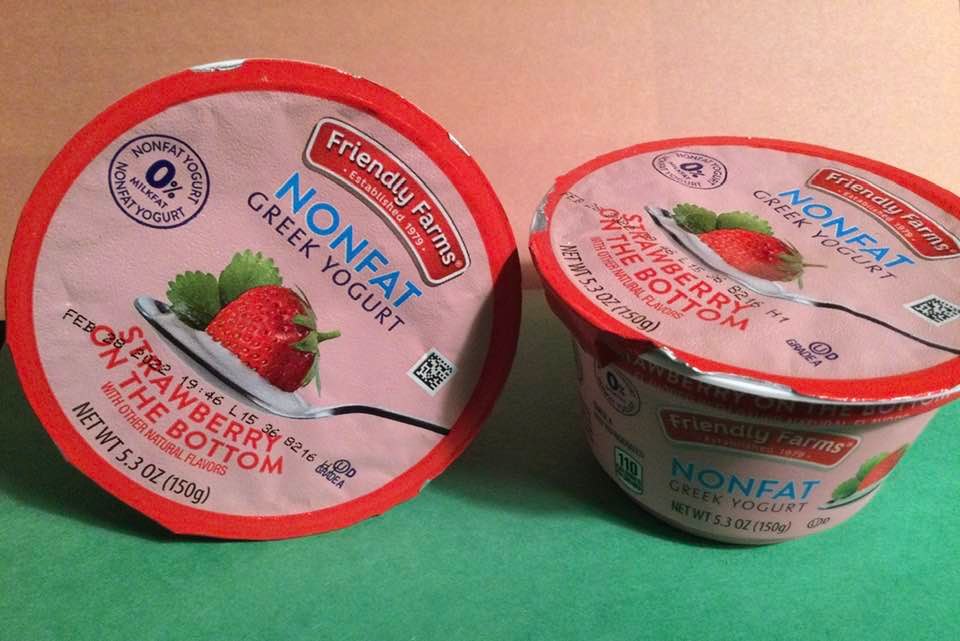
Yogurt, that’s what I like for lunch most weekdays, with a small sandwich and a tangerine. I watch these infomercials about how bad yogurt is for you due to excessive sugar. So, I try to stick to lower sugar varieties. I also buy plain organic Greek or whole yogurt to which I add homemade jam/marmalade for a change of pace and as an excellent way to use my jams. Aldi’s whole milk Greek yogurt is particularly delightful. But I have to confess a weakness for Friendly Farms Zero fat strawberry Greek yogurt in the 5.3-ounce cup. I originally though it would be weird with zero fat and avoided it for like a year but when I finally snagged some, I discovered that it tastes rich and smooth. The FF strawberry flavor isn’t overwhelming, but it isn’t weak either.  It’s super creamy and almost fluffy on my tongue. I never get tired of it. I will say the seasonal Cranberry flavor low-fat Greek yogurt is also excellent. I often get a blueberry or raspberry too. Yummers!

This is only out around Thanksgiving to New Years; delish for sure.

Another choice is Oikos blended Greek yogurt cups; 100 calories and the fruit puree is the third ingredient. 10 grams sugar. I generally buy it on sale; might get down to a buck. The strawberry is tasty.

Looking at the FF ingredients, the first one is nonfat yogurt, then cane sugar, then cream and then fruit. I happen to also enjoy Chobani less sugar Greek yogurt. Reading that label, I was shocked to find the third ingredient is water, then fruit puree. It has 10 less calories than Friendly Farm’s Greek yogurt. Both have five active yogurt cultures. The fat content is very close; 3% or 2.5%.  FF has 13 grams of sugar while the lower sugar Chobani has 9 grams. I guess I should mention that all these yogurts are gluten free. Some yogurts come with add ins in a little plastic container fastened to the top; often they are full of gluten; read those labels very closely.

The best yogurt cup out there, in my humble opinion…

I get the FF yogurt at Aldi’s. It usually is 59 cents. If the Chobani is on sale I might get it for a buck or $1.10. Double the cost. But only when it is on sale. FF is always a bargain.  Both taste great. But that price point is hard to ignore. Occasionally I surrender to buying a couple strawberry mango Dannon or a mango Chobani, but the rest of those sugar filled yogurts, at their inflated prices, do not entice me. Next time you are in Aldi’s pick up a few of the Greek yogurt cups; all the flavors are tasty; love the key lime as well as the toasted coconut one. I am not a big fan of their regular yogurt, but the Greek is head and shoulders cheaper and just as tasty as my beloved Chobani mango yogurt.  If you have jam; get a big container of plain yogurt and jam it up; very tasty, healthy and satisfying to eat homemade jam in yogurt. I feel virtuous as I am not adding any sugar; just my jam I made last year. Sure, yogurt may not be as healthy as we once thought but if you make good choices and go with lower sugar it is healthish and delish! Enjoy!

Christmas Stollen, 2.0….Even Better!

Gluten-Free Holiday Stollen Yield: two 10″ loaves

The classic Christmas stollen bread is made with yeast. Shush, don’t tell your gluten eating friends that this quicker, easier gluten-free version, made with baking powder as the rising agent, is even tastier in my humble opinion. Filled with dried fruit and toasted almonds and covered with a layer of melted butter and powdered sugar, this is more like pastry and is delicious with a cup of coffee or tea. Great choice for when company is coming as it isn’t that much work or time needed to create this masterpiece. Everyone will think you slaved all day to bake it. No need to tell them how easy it is! Its origins are Germanic but it isn’t heavy or dry; flaky and tender, pastry perfection. If you are searching for the perfect gluten free holiday treat; look no further. I cannot say enough good things about this treat. It is loved by all, and that second loaf makes a wonderful gift. I am looking forward to enjoying stollen this afternoon; in the oven baking right now!

I first made it 3 years ago, lost the recipe; had to get it again from the King Arthur Flour’s web site customer service center as they had removed it from their recipe rotation. They said it needed some tweaking. I disagree, it is just delectable although shaping it can be rather messy. It is far easier made without yeast which adds steps and can be finicky. I frankly don’t miss the yeast like I once thought I would. This dough is very tender and flavorful, I have been known to eat leftover tidbits raw it is that tasty. My family adores this pastry treat and will do nefarious things to get more stollen at Christmastime.

Notes: You could use orange rind instead of lemon rind and the dried fruit selection is entirely up to your tastes or your pantry. If you dislike the raisins substitute more dried fruit. One more good thing; it doesn’t require aging like a fruit cake. As soon as it cools you can cut a fat piece and enjoy a slice of heaven on earth!

Adding the butter
Butter is now integrated into dough using pastry cutter

Dough

2 1/4 cups King Arthur basic blend Gluten-Free Flour

1/2 cup granulated sugar

1 1/2 teaspoons baking powder

1/2 teaspoon salt*

3/4 teaspoon xanthan gum

1/2 cup (8 tablespoons) cold butter

3/4 cup ricotta cheese, part-skim milk type, let warm a bit to get it close to room temp. Can use whole milk ricotta if that is what you have.

2 large eggs, room temp

1 teaspoon vanilla extract

Grated rind of 1 small lemon; or 1/4 teaspoon lemon oil, or 1/4 teaspoon lemon extract

1/2 cup golden raisins

1/2 cup of your favorite dried fruits, chopped to 1/2″ pieces Yes, dried, not fresh. (I do apricots, cherries, currents, raisins or peaches/pears)

1/3 cup slivered almonds, toasted and cooled

—————

*Reduce the salt to 1/4 teaspoon if you use salted butter.

dried fruit and citrus zest

Topping

the dried fruit is mixed in!

Adding the toasted almonds
Adding the wet mixture into the dry dough
formed stollen ready to bake
baked and powdered
More powdered sugar sprinkled on using a sieve

4 tablespoons butter, melted

2/3 cup confectioners’ sugar

Directions

1. Preheat your oven to 325°F. Lightly grease a baking sheet, or line it with

parchment.

2. Whisk together the flour, sugar, baking powder, salt, and xanthan gum in a mixing bowl.

3. Cut the cold butter into small chunks, then blend it into the flour mixture to form uneven crumbs.

4. In a separate bowl, mix together the cheese, eggs, vanilla, and flavors.

5. Toss the fruit and almonds with the flour mixture until evenly distributed. Then combine the wet and dry ingredients, mixing until most of the flour is

moistened.

6. Turn the dough out onto a lightly floured work surface, and knead it two or three times, until it holds together. Divide it in half.

7. Pat each piece of dough into an 8″ x 7″ oval about 1/2″ thick.

8. Fold each piece of dough roughly in half, leaving the edge of the top half about 1/2″ short of the edge of the bottom half. Should you fold the long way, or the short way? The long way will give you a longer, narrower stollen, with shorter slices; folding the short way will give you a wider, fatter stollen, with longer slices.  I do the long way, your choice.

9. Use the edge of your hand to press the dough to seal about 1″ in back of the open edge; this will make the traditional stollen shape. It’s also the familiar Parker House roll shape, if you’ve ever made them. The dough will probably crack; that’s OK, just smooth it out as best you can.

10. Carefully place the shaped stollen on the prepared baking sheet.

11. Bake the stollen until they’re very lightly browned around the edges and on top, about 40 minutes. A cake tester inserted into the center should come out clean.

12. Remove the stollen from the oven, and transfer them to a rack. Brush them each with 2 tablespoons melted butter. Sprinkle heavily with confectioners’ sugar.

13. Allow the stollen to cool, then brush with butter again, and sprinkle with sugar again. Wrap in plastic wrap until ready to serve; serve within a week. If desired, sprinkle with additional sugar just before serving.

14. Yield: two 1-pound stollen loaves. I like to freeze one for another occasion if I am not gifting it right away. Enjoy!

Homemade Chili Rellenos and Super Easy Mexican Rice Made in an IP

Chili Rellenos and Mexican Rice

Chilly nights make me long for spicy food and I turn to Mexican dishes as well as Indian curries. They can warm your tummy and brighten up a dull day with vibrant flavors. Curries and Mexican food can be hot as in super spicy; depends on the pepper type and quantity added. I love zingy food but, my idea of spicy is probably on the mild side compared to many folks. Of course, you can always up the spicy ingredients, the jalapeno pepper in this comes to mind. Or cut back if you want it milder.

One of my favorites that I don’t get to eat these days are chiles rellenos. Spicy peppers stuffed with cheese, battered and fried. I bought a few poblano peppers at the farmer’s market for this purpose. I had Mexican cheese in the fridge. The rest of the ingredients were on hand. I do say that next time I will try it with Monterrey Jack cheese; in many of the recipes I previewed in my search for a suitable one that was the cheese of choice. I think it would have a bit more flavor and more melty quality so I do suggest you use that. I made 4 peppers; the recipe I altered was for 6, next time I will do six for sure. I did find the poblanos to be on the hot side for me. Thinking Anaheim for next time. I’m always tweaking recipes to make them more perfect, for me anyway!

The Mexican rice was to be from scratch and I wanted to go a bit more healthy; I used par cooked brown rice; cooked it 7 min in my IP. I think 6 minutes would be enough. If you use regular brown rice you will need to cook it much longer; more like 25 minutes so I suggest the par-boiled rice for quicker cooking.

I started the peppers; charred them in my broiler for about 5-6 minutes on opposite sides and then covered and let stand 10 minutes while I got the rice going. Once it was in the IP and the lid on I went back to the chile rellenos recipe and they both were done around the same time. Success!

Chili Rellenos

Pepper Ingredients:

6 big mildly hot peppers; choose Anaheim or Poblano

3 eggs, separated

6 sticks of Monterey Jack cheese; ½ inch dimeter and the length so they fit inside the pepper.

¼ cup white rice flour mixed with ¼ tsp. sea salt; on a plate

Canola oil to put 1/4-1/2 inch deep in medium fry or sauce pan. 1-2 cups

Sauce ingredients;

1 Tbsp mild olive oil

2-3 Tbsp. minced onion

¼ tsp. cumin

4 ounces tomato sauce (half an 8 ounce can; the rest gets used in the Mexican rice)

Directions: turn on oven to broiler. Place the whole peppers on a piece of aluminum foil on a small sheet. Broil 5-6 minutes until charred; take out and turn over with tongs or fingers. Do other side 5-6 minutes. Do stay near by to yank out before they get over done. Cover with foil and let stand 10 minutes. Then peel off skin of peppers, don’t worry if you can’t get all of it. Then cut a slice in one side and remove all the seeds. Then stuff the pepper with a fat stick of cheese. Fasten with 1-2 toothpicks to keep cheese in. Place on plate until you are ready to finish the dish.

Mexican Rice

Ingredients:

3-4 Tbsp. mild olive oil

1 ¼ cup par boiled brown rice (do not rinse)

¼ cup chopped onion

½-1 jalapeno pepper minced, no seeds unless you want it hotter

1 tsp. minced garlic

1 ½ cup water mixed with one veggie bouillon cube

4 ounces tomato sauce *the other half of the 8 oz can

1 carrot diced

½ cup frozen peas

Directions: turn IP onto sauté. Add oil, let warm a moment and add brown rice, stir with oil; let brown for 2 minutes. Add the onion and cook 2-3 minutes. Add minced pepper and garlic. Stir and cook 2-3 minutes. Add broth you created with water and bouillon cube, the tomato sauce and the chopped carrot. Stir up and put the lid on. Cook under pressure 6-7 minutes. Let stand 10 minutes. Release pressure, open, add peas, put lid back on (no need to lock) and let stand 2-3 minutes. Open, fluff gently with fork so peas are getting a bit blended in without breaking the rice grains. Serve and enjoy! This would be perfect with almost anything Mexican like tacos or enchiladas.

Continuation of peppers: while the rice cooks in the IP: fry those pepper babies up!

Use a small electric mixer to whip whites in a medium mixing bowl until they are stiff and then add egg yolks one at a time and blend briefly to make an even mixture. Heat the oil on your stove until hot but not smoking. I used an 8 inch fry pan that would hold 2-3 peppers at a time. Then roll the stuffed peppers one at a time in flour mixture. Next, dip them in the egg fluff coating and gently lay one in the hot oil. I tried to get as thick a coat as possible and cover the entire pepper. Get a second one ready and put it in there too. Turn them over gently once the bottom is a nice medium brown. I used a long big metal spoon with holes in it, tongs might help. As they get done remove them to a oven safe plate lined with paper towels. Add a third once you take the first pepper out. And so on; Put the plate in the oven warmed to 200 degrees while the rest fry. Meanwhile I put the sauce oil and onion in a small pan and let them cook 2-3 minutes. I added the cumin and stirred it. Cooked 30 seconds, added tomato sauce and cooked on low for 4-7 minutes.

Serve by placing some sauce on the plate and top with the fried peppers; 2 per person. Add Mexican rice to the dinner plate. I had a salad too afterwards to settle my fiery tummy, LOL! Those poblanos were a bit hot for me! Still delish…Ole!

Chili Con Carne with a Twist

Our PA weather is chilling down. Need something to warm up your tummy and tired of turkey? Try some homemade chili. So easy; one pot, if you like beans in it this is your recipe. And a little something different; cubes of yam. Yeap yam, it picks up all those spicy flavors. Great with cornbread, I had some leftover from Thanksgiving; put it in the freezer and it tastes fresh. I used ground beef, you can use turkey, venison, or use a plant-based ground meat substitute. This is somewhat spicy but not too much, my tummy can no longer handle the really spicy stuff. You can up the spice or tone it down a bit.  Your chili, your choice. Enjoy!

Need something special!

Angie’s Sort of Spicy Chili Con Carne

Ingredients

1 1/3 lb. ground beef, 90 percent is what I used

Cooking spray

1 medium onion; chopped into ½ cup dice

4 garlic cloves, minced

1 medium poblano pepper diced

2/3 cup diced green or red bell pepper

3 tsp. chili powder

½ tsp. cumin

½ tsp. smoked paprika

½ tsp. coriander

½ tsp. cinnamon

¼ tsp. red pepper flakes

1 Tbsp. Worcestershire sauce

1 28 ounce can crushed tomatoes

¼ cup red or white wine (one you would willingly drink!)

1 1/3 cups peeled and cubed yam; roughly that amount

1 cup water

1 tsp. kosher salt

¼ tsp. ground black pepper (more if you want it)

1 14 oz can large kidney beans, rinsed and drained

1 14 oz can small red beans, rinsed and drained

Directions:

Spray la arge wide 4 qt. pot with cooking spray, heat and add ground meat. Let brown as you break it up and spread out the meat. After turning it once add the onions. Cook, stirring a lot, until meat isn’t pink. Add minced garlic; stir in, cook 30 seconds. Add all spices, stir well; cook a minute. Add wine, stir, Add crushed tomatoes. Use cup of water to rinse tomato can and add all to pot. Add diced yams and Worcestershire sauce. Cover and simmer on low at least 30 minutes; I cooked mine for more like an hour. I stirred it a lot, at least every 10 minutes taking care to scrape the bottom so nothing is sticking. I had to go out so I shut it off, put the lid on and restarted it when I returned. It’s flexible that way. Then add kosher salt to taste; I put in 1 tsp. Add the beans. Stir in carefully and cook 15-25 more minutes. Taste and adjust salt, add more ground black pepper if wanted. Honestly it is even better after a good rest in the fridge; the flavors will blend further. Great with corn bread. I didn’t add any toppings; it was just right without any additions but you can go to town with scallions, grated cheese, or what ever you like. Enjoy!

Get a hunk of cornbread and dive in!

Holiday Baking: GF Safety for You Non-Celiacs

This post is a brush up for folks who have gf relatives coming by over the holidays. Or if you have someone new in your social circle and you want to know how to cook a gf meal for them.  Let’s start with the basics. Did you know that once a person with celiac disease stops eating wheat it becomes even worse when they do accidentally consume a food containing gluten?  After I quit wheat I thought that I could cheat once in a while and not really suffer any consequences.  Not so. It is like your body becomes incredibly sensitive to all gluten substances and even a tiny bit is too much. So your caution is so important for the health of your guest.

A few examples of how to get glutened if you are a celiac: if I splash beer on my hands while serving it at a friend’s house it is so easy to forget and touch your face/lips. Glutened! And I hate to be in anyone’s kitchen as they bake with regular flour; super easy to get sick from that exposure.  There are multiple ways to be contaminated by homemade food that should be safe: salad dressing may not be gluten free due to trace amounts of flour in it. If the cook sprinkles seasoned salt or spice mixes on my rice or potatoes, it is likely uneatable for a celiac.  The reason is that manufacturers often put all purpose flour in seasoning mixes to facilitate flow and to create a smooth mixture of spices.  This is why many things that appear safe are not; “seasoning mixes” are the culprit that makes rice pilafs and many other boxed mixes often uneatable by celiacs. 

This image has an empty alt attribute; its file name is turkey.jpeg

Christmas is in a few days.  Beware, many turkeys have brine that contains some gluten; I got sick that way  my second gf holiday season. Butterball turkeys fresh or frozen are gluten free.  Plus, a turkey stuffed with regular bread stuffing is unsafe for someone with celiac to eat even if they don’t touch the stuffing.  Really. You need to buy or make a gluten free stuffing; either based in rice, gf cornbread or just buy a bag of gluten free bread to make your stuffing. Aldi’s has gluten free stuffing for both chickens and turkeys. And ham; often it has been brined in a solution that has some wheat in it; read the label carefully!

Even GF pasta can be contaminated if it is drained in a colander that is used for wheat pasta.  The gluten in pasta is extra sticky and it is nearly impossible to get all of it off a colander.  So, many times pasta that should be safe gets contaminated when the cook drains it in a colander that has tiny particles of wheat gluten sticking around the strainer holes. Restaurants that advertise GF menus need to have dedicated equipment like strainers, colanders, pots and utensils. I often ask about the pasta pot and colander when I attempt to safely eat pasta at a restaurant. So cooking pasta for your gf guest can be quite problematic.

A few people seem to feel celiacs are exaggerating or being over cautious.  When in reality all that caution is necessary to eat safely and avoid gluten.  It only takes a tiny amount of gluten to contaminate food or drink.

So if you are cooking for someone with gluten intolerance, be sure to take extra caution and your meal will be a success for everyone enjoying it! When shopping for the meal  ingredients you have to read the label even if it says gf, regardless just to be sure as occasionally food is labeled GF and the ingredients say wheat in the list. Do read the labels, it is best to cook from scratch, and remember that all wheat varieties including spelt are unsafe as are all purpose flour, barley and rye flour/berries. Don’t use your old wooden cutting board or wooden spoons with ruts and gashes that may harbor gluten and any pans you use must be super clean. In fact, if you bake a cake I urge you to use either new pans or buy throwaway ones as tiny bits of the last cake are likely clinging to that lovely pan of yours. Gravy can made using white rice flour, cornstarch, brown rice flour or even sweet rice flour. If you add broth to the turkey or ham pan be sure it says gf on the package. You can get gf stuffing in a box at Aldi’s. there are redi-made gf crusts and gf graham cracker crumb crusts available to make lovely desserts. Or box/packaged crust mixes you can use for your gf pie. Even a teaspoon of regular flour is way too much; get the gf flour out. The tiniest amount is enough to make your celiac friend feel so ill their meal enjoyment will be spoiled. 

If you want an easy stuffing; try this one!
Bob’s Red Mill makes many gf flours of high quality that you can use for gravies.
A yummy gf crust to make your special dessert with.

And if you eat out in a restaurant over the holidays don’t roll your eyes when the person at  your or the next table starts to ask pointed questions on ingredients and method of preparation with respect to gluten.  They are just trying to eat a safe meal out.  Sometimes this experience is kinda a roll of the dice for us celiacs so be patient and polite if you come into contact with this situation when you are dining out.

In summary; now you can see how important it is to have products that are labeled gluten free and why your friend with celiac has a zillion questions when you invite them for a holiday get together! Be understanding and extra careful. They just want to enjoy a meal with you without feeling terribly sick afterwards.