Instant Pot Advice for My Peeps

If you haven’t heard of an Instant Pot electric pressure cooker, you will now! I got mine almost a year and a half ago.  Bought it on Black Friday for almost half price; great deal! Purchased a cookbook and a glass lid for slow cooking.  I was very excited and not a little bit scared of using the big black device.  Mine is a six quart 7 in one, lots of features, some I still haven’t used. One of my girlfriends had been bugging me to investigate and get one as she knows how much I love to cook. It was slightly daunting to use it at first. But I tried out recipes from the little cookbook it came with and my full sized one I got for ten bucks. Almost everything I have made has been a resounding success.  I have used it infrequently as a slow cooker – I think it runs a bit hotter than my old slow cooker which was only about 2-3 years older and now resides in the basement on a shelf.

instant pot 2

So, let me tell you some of the things I love to make in it. I use it a lot with bone-in chicken thighs; it cooks them in about 16 minutes once it comes to pressure.  That means that when I lock the lid down it takes a bit of time to fully heat up and get pressurized; that time is not counted in the recipe cooking time.  Some people put frozen meat in recipes and so it can add quite a bit of time to the process. Once you lock it and it starts the process you can walk away and do any chore or activity you like. I also often saute things before starting the pressure cooking process. Yes; it sautes! This is a favorite task the IP does for me. I regularly saute onions/celery and such for a bit then add meat to cook for a while before the next step of pressure cooking or I do that in reverse; brown meat; remove it while I cook veggies then I add the meat back in as well as water or broth. Which brings me to one other important fact; it must have a cup of water or broth for it to pressurize.  I generally cook enough for 4-6 meals so I have enough but if you cook small amounts there is a 3 quart model; a friend of mine recently acquired one of those and loves it for her smaller needs. The other day I made rice pilaf in it which it does very well, I forgot a portion of the water and the rice came out a bit crunchy; I added the missing water and pressured it for 5 more minutes and it was fine.  Lesson learned; make sure you put in the right measure of liquid.

sausages in soup

Sausages in a soup base

In the back of my cookbook are charts for how long to cook meats, grains, etc.  They are invaluable. I use them all the time. Now that the IP has been in my kitchen for a while I adapt non-pressure cooker recipes to it. The charts help me judge how long to cook.

gumbo

Sausage gumbo


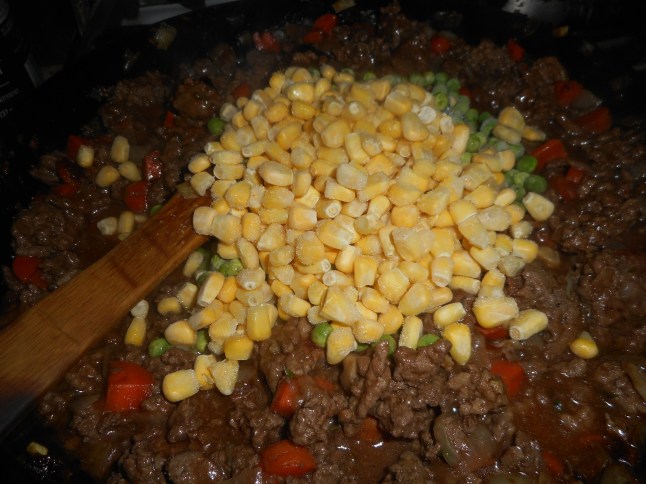
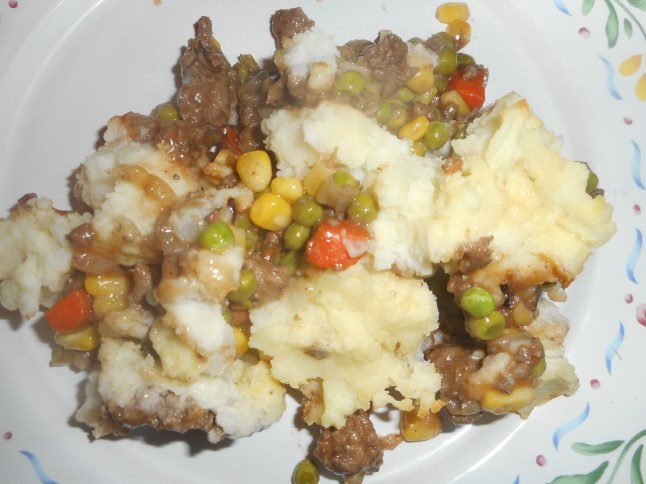
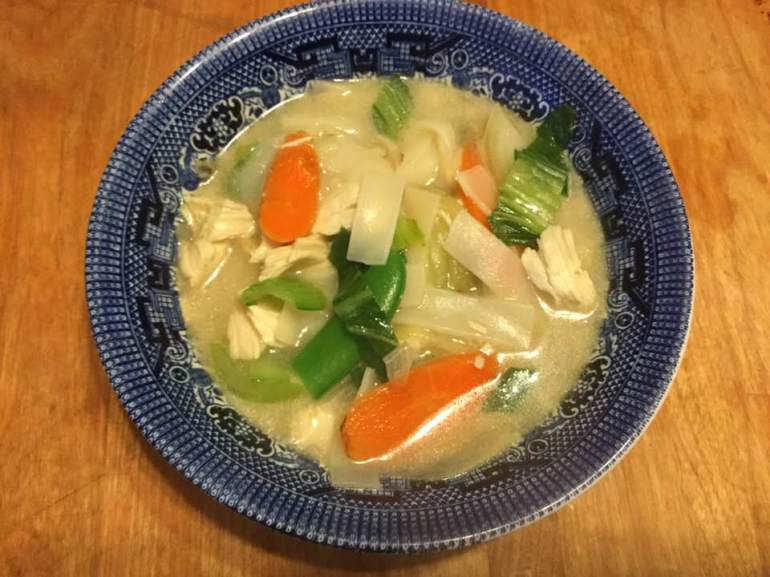
Other things I make in the IP are ribs; I cook them on the trivet that came with it and then lay them on foil on a baking sheet, slather in BBQ sauce and pop them in the oven or broiler for 10-15 minutes, so tender and delish! I have done baby backs, spare ribs and beef short ribs which do not get the oven step.  I have made some yummy stews and soups in there: beef vegetable stew, chicken noodle or rice soup or other soups. It cooks the beef really quickly. I have used it to make bean soups as well. Beans cook pretty quickly under pressure.  You can make a rotisserie style chicken in it; love that one!

There are settings for stewing and rice as well as a few other things. I do love rice made in it; perfect and fluffy, never burnt, never runs out of water.

shrimp-risotto

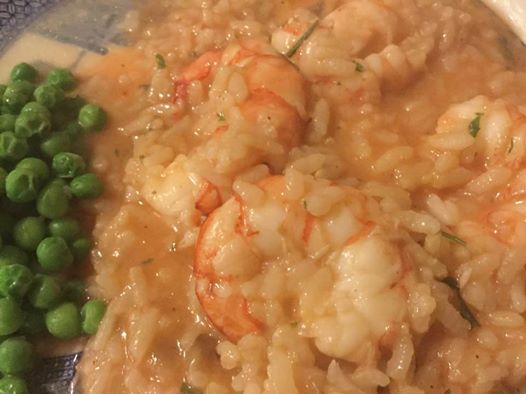
I’ve made risotto in it a few times and it is great as no stirring needed. If you don’t have the patience for risotto on the stove top this is a super alternative cooking method.

The other food I like to make is yogurt. I started doing that fairly recently, as I realized it would actually save me money and my sister who got one for Christmas says it tastes wonderful. So, with a bit of advice from her I did just that and found out it was indeed creamy and delightful. I get organic milk from Aldi’s to make mine and it makes a big difference. Great flavor and texture and once you’ve done it a couple of times it is quite simple.  I add a spoonful of jam or marmalade and I have a healthy and delish yogurt for lunch or a snack. And I get to use my glass lid for a change, LOL!

I haven’t used it for sweets yet, although I plan to; just ordered a small cheesecake pan; 7 inch size to fit inside the inner pot as my other latch cheesecake pans are too large for it. I plan to use it for several other things that can be steam baked like this recipe for caramel custard I discovered in my new IP Indian cookbook!

Folks in my IP Community fb group say IP cheesecakes are fantastic. Plan to test that and see if it’s true.

So, if you are thinking of buying an electric pressure cooker, I do recommend it for a number of things. It is one more great way to cook. I love that I can set it and go out to the yard and it finishes and keeps warm until I am ready to eat. That is my favorite thing about my IP!

Shrimp Risotto Made Easy

I love this recipe: fast, easy and delish. We all want easy recipes that taste great, don’t use too many pots/pans and are budget friendly.  I needed something quick that would use my instant pot electric pressure cooker (IP) as my  sisters were down for Easter and we were hoping to make supper in our mom’s assisted living room.

I had some shrimp in the freezer and all the usual ingredients for risotto.  I had read lots of comments on how good IP risotto was but had resisted until I tried this recipe…. being a lover of the traditional endless stirring method.  It still took as long as hand stirred risotto to make but was much easier for a meal made outside my kitchen and it was fresh and ready to enjoy.

Note: I made this again recently using Asiago cheese and was not a real big fan of that flavor; a good quality chunk of Parmesan is what you need for the best result. Other than that it came out with a perfect texture; for that version I put the peas right in the risotto after releasing it; stirred for a minute and it was ready to serve!

shrimp-risotto

IP Shrimp Risotto, serves 4

1 lb large to extra large shrimp; thawed and shelled

4 tbsp. butter divided

1 small yellow or red onion finely chopped

1 ½ cups Arborio rice

2 tbsp. vermouth or dry white wine

4 ½ cups low sodium great quality chicken broth

1 tsp. sea salt

¼-1/2 tsp. fresh ground black pepper

2 minced garlic cloves

Finely grated rind of one small lemon

¼ cup finely chopped fresh herbs like parsley, rosemary, tarragon, thyme or

2 tsp dried herbs (same ones)

1/3 cup freshly grated good quality parmesan cheese

Directions: Heat IP and add 2 tbsp. butter, melt and add onion, cook 4 minutes, add rice and cook 1 minute, add vermouth and cook 30 seconds, add 3 cups room temp chicken broth, salt and pepper and put lid on. Seal it and set for 9 minutes on manual pressure, do a quick release, add the minced garlic and then the shrimp the rest of the broth. Stir well and cook 5 minutes on Sauté.  Stir frequently. Turn it off and then add the zested lemon and the herbs, stir.  Add the cheese, stir and serve.

Notes: I think you might be able to cut ¼ cup broth; mine seemed just a tad too loose/wet. It was not quite as creamy as hand stirred but the process was a lot easier and a quick clean up.  We had a side serving of a salad.  The result was a gourmet meal that could be made anywhere; perfect for our situation. Enjoy!


Revised from original post from Spring 2017. No recipe changes.

Baked Alaska Pie: Amazing

Everyone loves ice cream.  In my family, everyone loves a pie. So I was looking for something different when I saw a recipe somewhere, can’t remember where but it fit my search requirements plus it was gorgeous but somehow I lost the recipe so I did my best to replicate it for my family. We had it over the Easter weekend. It was a big hit.  Remember baked Alaska? A dessert of the 70’s? It is a fancy construction of a layer of yellow cake topped with a mound of ice cream and then covered with a thick layer of meringue which is briefly baked in the oven to brown the meringue lightly. Well, introducing the Baked Alaska Pie!  Gingersnap crust, coffee ice cream and the traditional meringue topping. Not as heavy because the pie crust is ¼ the thickness of the layer of cake in a standard baked Alaska and gingersnap is a pow of a flavor compared to the blandness of yellow cake. The coffee ice cream pairs with it exceptionally well but I am betting chocolate ice cream would be crazy good too! I suppose you could do a graham cracker crust but what would be the fun in that? The meringue is not overly sweet and is fluffy perfection with the ice cream and cookie crust.

This dessert is remarkably easy to do but you must have patience as there are several steps and a lot of chilling in the freezer.  If you are not needing to be gf you can use a regular gingersnap crust.


Baked Alaska Pie

Ingredients

7/8 of a box of gluten free gingersnaps

1/3 cup melted butter

Most of a carton of coffee ice cream

5 egg whites

½ tsp. cream of tartar

Pinch of salt

1/3-1/2 cup granulated sugar

Directions: Use your food processor, blender or a baggie and a rolling pin to reduce the cookies to a fine crumble. Pour them in a mixing bowl, add the butter, stir well and pour into a 9 inch pie tin. Press across the bottom and up the sides. Bake at 350 for 6-9 minutes; take out before it browns much. Let cool completely before next step.

Let the ice cream warm a few minutes so it isn’t rock hard and is easily scooped.  Fill the pie crust with the ice cream; spread it to cover evenly and mound it slightly.  Put in freezer for 2 to 3 hours.

Make the meringue: put the room temp egg whites in a mixing bowl, add the salt and the cream of tartar. Beat until it is in soft peaks. Add the sugar a spoonful at a time while it beats to the stiff peak stage. It should be glossy and hold a stiff peak of curled meringue. Get the pie out of the freezer and quickly mound the meringue over the pie making absolute sure you cover every bit of ice cream with lots of meringue which will act as insulation.  Chill for 2-4 hours in freezer. Heat oven to 400 degrees. Slide the frozen pie in for 4-8 minutes until lightly browned, if possible return to freezer for 30-60 minutes. Cut into wedges with a sharp knife and dig in. Enjoy

alaska pie 2

Not a very pretty picture; just doesn’t convey the incredible flavor. I took this of a leftover slice out of my freezer; we were too busy eating it to take pictures that day! So it lost some of the browned topping in my freezer. It was very pretty when we first cut the pie.

Hearty Shepherd’s Pie ‘Cause it Still be Like Winter!

Been cold for weeks: I think we all are craving warm comfort food.  I made this several weeks ago for Joe and probably will be making it again next weekend; belated birthday  special meal. The potato crust is satisfying and the gravy chock full of meat and veggies is richly flavored.  This is an Alton Brown recipe with a few minor changes.  I added red wine, more veggies and I sometimes leave the egg out when I make the potato crust.   The red wine makes the gravy taste perfect. Plus I used different meat and changed the flour to make it a gf choice.

I know the list of ingredients might seem a bit daunting but it does go together fast. Just chop all the veggies first and brown the ground meat while your potatoes cook.  I have used homegrown potatoes for the crust; oh so flavorful and homegrown peas and local corn in the filling.  Yumm!  The leftovers made a great lunch.  Sure warms the tummy on a chilly day.

In the past I have used a bit over a pound of meatloaf mix and some ground turkey meat.  Another time it was ground chuck with a touch of meatloaf mix.   This most recent version was a mixture of venison and ground pork.  It was delish. The traditional meat is ground lamb; also tasty.  You can use plain ground beef or even just ground turkey.  All work fine.  I also have a completely different recipe for a vegetarian shepherd’s pie full of veggies with amazing gravy!

curry, shepherds pie, banana cream pie 019curry, shepherds pie, banana cream pie 020

curry, shepherds pie, banana cream pie 021

curry, shepherds pie, banana cream pie 027

Delish Shepherd’s Pie

Ingredients

For the potatoes:
2 pounds russet potatoes
1/3 cup half-and-half
3 tbsp. unsalted butter
3/4 teaspoon kosher salt
1/4 teaspoon freshly ground black pepper
1 egg yolk (optional)
For the meat filling:
2 tablespoons canola oil
1 cup chopped onion
3-4 carrots, peeled and diced small
2 cloves garlic, minced
1 1/2 pounds ground lamb, beef, venison or meatloaf mix
1 teaspoon kosher salt
1/2 teaspoon freshly ground black pepper
2 tablespoons rice flour
2-3 teaspoons tomato paste
1 cup chicken broth

½ cup dry red wine
1 teaspoon Worcestershire sauce
2 teaspoons freshly chopped rosemary leaves
1 teaspoon freshly chopped thyme leaves
1 cup fresh or frozen corn kernels
1 cup fresh or frozen English peas
Directions

Peel the potatoes and cut into 1/2-inch dice. Place in a medium saucepan and cover with cold water. Set over high heat, cover and bring to a boil. Once boiling, uncover, decrease the heat to maintain a simmer and cook until tender and easily crushed with tongs, approximately 10 to 15 minutes. Place the half-and-half and butter into a microwave-safe container and heat in the microwave until warmed through, about 35 seconds. Drain the potatoes in a colander and then return to the saucepan. Mash the potatoes and then add the half and half, butter, salt and pepper and continue to mash until smooth. Stir in the yolk until well combined.

Preheat the oven to 400 degrees F.

While the potatoes are cooking, prepare the filling. Place the canola oil into a 12-inch saute pan and set over medium high heat. Once the oil shimmers, add the onion and carrots and saute just until they begin to take on color, approximately 3 to 4 minutes. Add the garlic and stir to combine. Add the lamb, salt and pepper and cook until browned and cooked through, approximately 3 minutes. Sprinkle the meat with the flour and toss to coat, continuing to cook for another minute. Add the tomato paste, chicken broth, Worcestershire, rosemary, thyme, and stir to combine. Bring to a boil, reduce the heat to low, cover and simmer slowly 10 to 12 minutes or until the sauce is thickened slightly.

Add the corn and peas to the meat and gravy mixture, stir for a few moments. If it seems very thick with really no gravy, add up to 1/2 cup water to thin it a bit (it will get thicker as it bakes) and spread evenly into an 11 by 7-inch glass baking dish. I have a lovely oval ceramic casserole Joe gave me that is perfect for shepherd’s pie.  Top with the mashed potatoes, starting around the edges to create a seal to prevent the mixture from bubbling up and smooth with a rubber spatula. Place on a parchment lined half sheet pan on the middle rack of the oven and bake for 25 to 30 minutes or just until the potatoes begin to brown.  The sheet pan is to catch any drips from the bubbling casserole. Remove to a cooling rack for at least 15 minutes before serving.  No sides needed unless you want a green salad? Enjoy!

curry, shepherds pie, banana cream pie 028

Messy photograph doesn’t do the rich flavor justice…..

I searched long for a good recipe that had corn in it as that was what my guy wanted, I was dubious but this is such a tasty mixture I am a convert to corn in my shepherd’s pie!

Recipe courtesy Alton Brown, 2008, foodnetwork.com

Read more at: http://www.foodnetwork.com/recipes/alton-brown/shepherds-pie-recipe2.print.html?oc=linkback

Originally posted in my blog in early 2016.

Zingy Coconut Chicken Soup

Cold weather, sniffles, chilly fingers: all great reasons to make soup, especially chicken soup.  But I found myself wanting something more, a big bowl of soup with a ton of flavor and some zip in it. So I threw together a quick soup using some broth I made the other day in my Instant Pot electric pressure cooker; to make the broth I put in the roasted chicken carcass and a bit of celery and carrot plus lots of water on for 30 minutes on high pressure and after straining I had a nice container full of rich chicken broth.  I added lots and lots of veggies as well as some great aromatics: slivered fresh ginger and a big clove of garlic. To pull the flavors together I poured in half a can of light coconut milk and added a handful of broken up raw rice noodles (any brand of wide rice noodles will work). Added some cubed roasted chicken and in no time at all I was slurping down this excellently flavored chicken coconut stew. It was like I was eating at a beach soup shack in the islands feeling the warm sea breeze through my hair…  Light zingy flavor and tender chicken with lots of fresh vegetables.  Man, was it yummy and healthy!  Totally guilt free and naturally gluten free if you are careful in choosing your broth.

Angie’s Zingy Chicken Soup

2 medium sized carrots cut on diagonal into thin coins

2 celery stalks, cut on thin diagonal slices

1 onion cut down the top to bottoms, peeled and cut into long strips

1 tbsp. mild olive oil

1 large garlic clove minced

½ cup chopped green cabbage

2 baby bok choy cut into one inch lengths, bases cut in quarters or eighths

1 quart chicken broth; preferably homemade

4 rounds of thinly sliced fresh ginger cut into narrow strips

½ a can of light coconut milk

1 cup pea pods, cut off ends

½ to 2/3 cup broken wide rice noodles

Pinch crushed red pepper flakes (I use a bit less then 1/8 tsp unless you like it spicier; just add more)

1-2 cups cubed or torn in small pieces cooked chicken (I use leftover roasted chicken breast)

Directions: Sauté carrots, celery and onion in large soup pot in the hot oil on medium heat: about 4-5 minutes, do not brown, add garlic; cook 1 minute, add bok choy and then the broth.  Heat to nearly boiling and add the ginger and cabbage, cook 1-2 minutes. Add the coconut milk, rice noodles, red pepper flakes and  cook on low heat for 5 minutes; add pea pods and cook 4 to 5 minutes until noodles are cooked through. Add the cubed or torn chicken meat in the last minute to warm it.

Notes: The amounts of veggies are as fluid as you want to be; leave out something you dislike or don’t have or use more/less of any veggie. The critical ingredient for the flavor is the fresh ginger; without it you have very bland soup. I have used frozen snow peas when I couldn’t find fresh in the store.  My favorite coconut milk for this soup is organic light coconut: thin and wasn’t too strongly coconuty. Perfect for this stew although regular coconut soup does work. I used baby bok choy but a couple stalks of regular bok choy will work just as well; might need to cook slightly longer than the baby choy. If you use store broth: Kitchen Basics has really good gf chicken broth; one 32 ounce box container should do it.  I also buy inexpensive gf chicken broth at Aldi’s.  I used home roasted chicken breast but you could use a rotisserie bird, although I suggest you check for gluten free before choosing that route as some stores make their birds with ingredients that make it not gluten free so not safe for those with celiac disease.

Enjoy!

chicken soup in bowl