Pear Spice Muffins…Another Snack Option

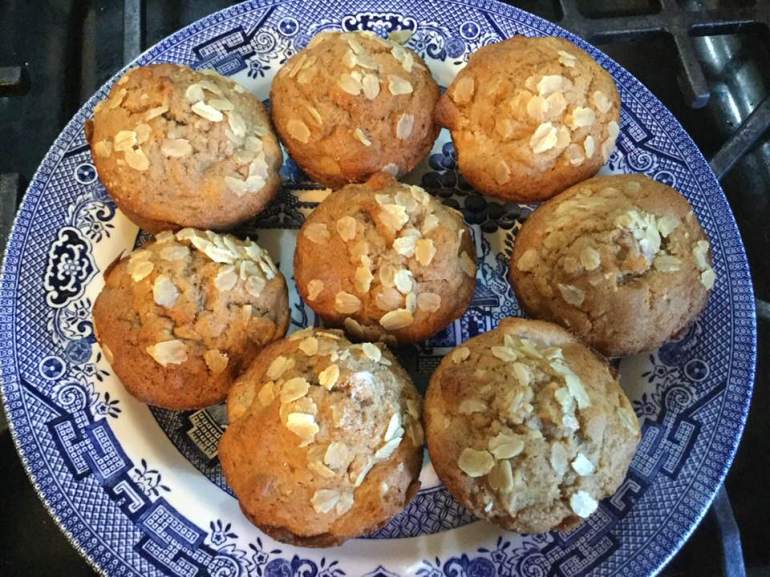
I had few portable baked snacks and a few bosc pears so I figured it was time for a new muffin recipe. This is a riff off a recipe out of Annalise Robert’s cookbook; Gluten-Free Baking Classics. It is  similar to my recipe for apple nut muffins that I created from her banana muffin recipe. If I had to have just one GF cookbook hers would be the one for me.

Do use a fairly firm pear; I used a bosc which is naturally great for baking but almost any firm pear will do. Notice I didn’t say “hard”. Nope to that; not gonna taste great.  Don’t chop them super fine or big; 1/3 inch dice is good.

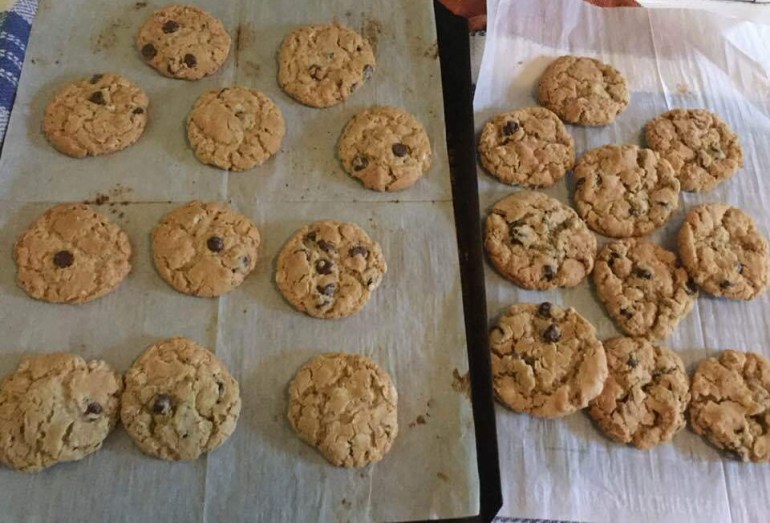
I always enjoy eating a muffin still warm out of the oven. It is smart to freeze any you won’t eat in 2 days; ziplock freezer bag works great.  They make super snacks.  These  muffins are kinda delicate; if you want to take them on a hike or car ride put them in a plastic food box – the rigid sides will keep your muffins safe from crushing.

Pear Spice Muffins              

2 cups brown rice flour mix (see below)

2/3 c granulated sugar (can use coconut palm sugar: just increase milk by 2 Tbsp.)

1 tbsp. baking powder

1 tsp. baking soda

¾ tsp xanthan gum

¼ tsp salt

1 1/2 tsp cinnamon

skimpy 1/2 tsp. nutmeg

1  1/2  c chopped firm pear; peel and core! (about 2 pears)

½ c chopped walnuts

2 large eggs beaten

½ c milk, 1 or 2 percent

½ c canola oil

DIRECTIONS:  Heat oven to 375, placing the rack in middle of oven.  Spray muffin pans with cooking spray.  One batch makes 14-16 muffins.

Mix all dry ingredients in bowl of stand mixer or big bowl

Add pear chunks and walnuts; stir to coat them with dry mix

Combine milk and oil,  Beat in eggs.  Add liquids to big bowl; stir until blended.

Fill muffin pans 2/3 full.  I use a big serving spoon and fill it about half way to dump in each muffin space. Sprinkle the top with a bit of raw old fashioned oatmeal; 2-3 Tbsp. should do it or try  cinnamon sugar.

Bake 20-24 min until golden brown. I used my convection setting and did them for 17 minutes. Perfect. Do not over bake or they will taste dry.  Rest five minutes and then remove from the pans and cool on a rack.

Freezes well for up to 3 weeks.  Keeps in fridge (well wrapped) a few days.

Brown Rice Flour Mix base mix
2 c brown rice flour

2/3 c potato starch

1/3 c tapioca flour

Sweet and Sour Pork Stir Fry

This is another old school entrée. But old school often means very tasty and not too fancy (read complicated!) This is in that category. Lots of veggies, amazing flavor and super easy. I can’t think why I haven’t made it yet this winter.  So we had it the other day for supper. As easy and as tasty as ever. I simplified my Betty Crocker recipe just a bit. Feel free to add more or less veggies and vary them; just need that pineapple and some pepper for sure! Be sure that your soy sauce is GF: La Choy is my favorite brand.

Notes; use all the pineapple if you like lots of it. You can add raw bean sprouts instead of the celery or try sliced water chestnuts. Add them with the pea pods. If you hate any of these veggies sub in something else; I used some sliced zucchini in my most recent version; about a cup of it, added with the pepper chunks. I love lots of veggies.  You can add a bit more sugar and vinegar if you like your sweet and sour more pronounced. The chili sauce makes it a bit spicier.   Serves 4.

Sweet and Sour Pork

Ingredients:

¾ lb pork cubes

¼ cup rice flour mixed with 1.5 tsp. ground ginger
2-3 Tbsp. mild olive oil

2 Tbsp. cider vinegar

2 Tbsp. reduced salt gf soy sauce

1 tsp. Worcestershire sauce

2 Tbsp. brown or white sugar

2 tsp. chili sauce (optional)

1 tsp. sea salt

¼ tsp. black pepper

1 large onion, diced

1 large red pepper, diced in large chunks

2 celery ribs cut thin on bias

1 cup zucchini rounds

2 garlic cloves minced

1-1.5 cups pea pods ( I cut the blossom ends off before cooking)

¾ can drained pineapple chunks canned in juice; save juice for sauce

2 Tbsp. cornstarch, mix with half the pineapple juice

Hot cooked rice; I prefer brown rice but what ever floats your boat!

DIRECTIONS:

Roll pork cubes around to coat with flour blend. Add 1-2 Tbsp oil to wok, Heat and add pork. Stir fry (chow) on high using a big spatula or spoon to toss: brown all sides. I have a wonderful tool with a rounded front edge which is perfect in a wok; can’t stir fry without it! While the pork browns mix vinegar, soy sauce, Worcestershire sauce, brown sugar, chili sauce and salt/pepper. Dump into medium sauce pan, add the pork once browned, cover and cook on low for 15-20 minutes until tender. While it cooks make rice. When you got that going and have 10 minutes left on the pork, reheat wok and add 1 Tbsp. oil to wok, add onion, stir for 2 minutes, add celery, and stir 2-3 minutes. Add red pepper and zucchini , cook a minute, add garlic, cook another minute. Add pea pods, stir fry 3 minutes. Add back the chicken and sauce. Stir and add the cornstarch slurry and pineapple chunks. Cook a minute and then add most of the rest of the pineapple juice. Cook another minute; add more juice if too thick. Adjust seasoning. Serve over hot rice. Enjoy!  sweet and sour pork on plate


Aldi’s Brownie Mix vs Scratch GF Brownies

Box mixes are generally not my favorites for baking as they can be full of stuff I don’t want to ingest like excess salt, sugar and fats. So I rarely buy them. But recently I bought a gf brownie mix from Aldi’s for less than two bucks. It can be used for chocolate chocolate chip cookies but I made the classic brownies with my box. They came out very tasty. The flavor is that of very dark chocolate and the texture is extra fudgy. They were easy to make and even non celiacs enjoyed their fudgy goodness. brownie mix I tried something different and had my last brownie with flakes of pink Himalayan sea salt on top. The fat ones are the best for this. I do have a big jar of fine grind pink salt from Aldi’s which is great for most uses but not for this; go big and flaky.  I happen to like chocolate with sea salt so I reasoned this could work too and it did. Very nice contrast; try it sometime!

Still, I personally like the scratch brownies I usually make much more as they have the perfect balance between cakey and fudgy. I use top end baking chocolate which gives a superior result. So they rein supreme as the best gluten free brownies I have tasted. Frankly they are even better than my old wheat flour brownies.  Here is the link to my brownie recipe made with the gf flour blend I prefer; King Arthur’s All Purpose GF flour blend: https://myworldwithoutwheat.com/2018/02/14/brownies-to-love/  If you want a great Valentine’s Day treat I suggest this recipe; super easy, super fast and super yummy. They also stay fresh longer than any gf cake I have made.  Tomorrow will be snowy here in eastern PA. Perfect day for baking a sweet treat! Enjoy!

Chocolate Chip Peanut Butter Oatmeal Cookies and Range Decisions….


We baked cookies last Tuesday which was a snow day for both of us. That was fun; my grandson helped form the balls to make chocolate chip peanut butter oatmeal cookies.  Gluten free of course. They were very simple to create and very tasty. Look on pinterest and you should find them! https://glutenfreeonashoestring.com/gluten-free-oatmeal-peanut-butter-chocolate-chip-cookies/

chocolate chip oatmeal cookies

They baked fine; yummy mildly peanut buttery…we ate a bunch and then I tried to bake a quiche a few hours later for our supper. Neither oven would turn on, there had been troubles of late; had to run the broiler the other day to get it hot and then oven came on.  No such luck today.  I ended up broiling it in the upper oven which has that capability. Scorched quiche; yummy in the less than black area of it…at least we were able to enjoy a supper before I set out to find a new range. I have gas heat and a gas stove. Love gas cooktop; loved my gas oven a bit less; my now defunct ovens always had a lot of difficulty maintaining a set heat. scorched quiche

I did a lot of research and settled on a Frigidaire one oven with 2 power burners, 5 total burners, grate top for sliding pots from burner to burner and it goes the full top so more room for a big pan. I also wanted self-cleaning and a convection oven. Got that and even a quick preheat cycle. The range got here in only 3 days and it was installed within 30 minutes of the truck arriving.

So far, I love it; nice even heat in oven; holds temp and is certainly not lower than correct temp I set it for. Range top burners heat well and the timer is easy to set. I haven’t tried the convection setting yet but I plan to!  I baked some tartlets; put the shelf down to the very lowest it goes; just above the metal bottom. My tartlet crusts baked perfectly; can be difficult to get a browned crust when baking gluten free pie dough in a regular oven. My old range had a smaller upper pizza oven which was awesome for pies and pizza because of the bottom heat which cooked/browned them perfectly. But double oven equals double the price. Just not doable or justifiable. I got as much range as I could afford and I am very satisfied so far.  My biggest hint for regular ovens: I strongly suggest you bake all pies at the lowest level of your oven for a nicely brown crust.

stove

I think it’s a beauty!!

Do your homework in researching ranges and be sure you are clear on what features you really want so you are satisfied with what you bought rather than wishing for something you might have selected…

Aiden and me

No more scorched quiches or under baked pies. My new range is wonderful and we are a pair of happy bakers!

GF Flour Choices and a Few Personal Words….

Wanna know what flour blends I favor? It took me a few months or maybe years to figure this out for my cooking style. First, I bought a zillion weird and a few typical gf flours. Tried to bake with each and every one of them. Found out a few kinda suck and stopped using them. Others are used infrequently but have real value for a few recipes that they match to. If you are new to gluten free or just trying to get into baking gf this post is for you.

My favorite blend is King Arthur’s Gluten Free All-Purpose blend; made of three flours; brown rice, potato starch and tapioca flour. It is versatile. It makes great pie crust that my family really loves. I use it in most of my muffin recipes. I use it for gf pasta making and for cookies that wow.  Get some and give it a try. I actually make my own blend (same exact blend as KA’s basic all-purpose flour) as it is cheaper but you can buy it at your local grocery store in a  box.


king arthur flour

Another blend I like very much is Better Batter, the copycat version you can find on glutenfreeonashoestring. I make a batch and keep it in the freezer so it stays fresh. Great for quick breads, desserts and pastries.

If you want a cup for cup replacement flour there are some good options; Cup 4 Cup or King Arthur’s Measure for Measure flour.  They can be used in your favorite recipes for the most part.

king arthur flour

white rice flour

White rice flour or cornstarch work well for breading things and thickening. I always keep both on hand. Ditto for tapioca flour which I use in my blends and some other recipes. Gotta have it available. I also keep sweet rice flour to use in my main blend and in a few recipes. It adds flakiness in my pie crust. Potato starch is great in my basic blend and a few other blends/recipes. Another must have.

I use sorgum flour in a number of recipes including my delish buttermilk pancakes. It has a nice flavor compared to things like quinoa flour or bean flours. Uggh on them! I still have some in my freezer but I NEVER willingly use them. I do have some chickpea flour but rarely have a need for it.

Occasionally I use teff flour; in small amounts. It makes breads darken and seem like rye or pumpernickel breads.   But, it can give a muddy flavor if you use too much. Coconut flour is another flour I keep in the freezer but only use occasionally.  It can dry out a recipe if you use too much so  use sparingly.

I just got some cassava flour to use to make flour tortillas.  I hear it is fantastic.  I’ll let you know how that goes…

My suggestion is that you start with one or two blends and a couple single flours that can be used in combination. I rarely ever use just one flour except for breading or thickening. A great blend is critical.

Don’t let all the flour choices discourage you.  Try a few and find out what works for you. Some need to be frozen or refrigerated especially if you don’t use them up rapidly; check for that storage information so your flour blend that costs a lot doesn’t get rancid on you.  Have fun!

A personal note. I am sorry I haven’t blogged much lately. Been struggling somewhat. I was diagnosed with breast cancer in July and had a partial mastectomy in early August. On the first of October I started radiation therapy and it has sucked my energy and focus away from most of my enjoyable hobbies including this blog. I hope to feel better soon; 3.5 more weeks to go! At least I won’t lose my hair, LOL! I have done a bit of baking and cooking but due to my low energy I seldom can find it in me to write. This will change in November I hope.  Peace and happy gf cooking!