Banana Muffins…Tried and True

Sometimes you find that the bananas you got only a few days ago are getting squishy and you have no desire to eat sticky overripe fruit.  This recipe is perfect for those days.  This muffin recipe is my own version of muffins from Annalise Roberts’s wonderful cookbook: Gluten Free Baking Classics.  They are easy to make, perfect in texture and totally yummy.  My family and friends love them for snacks. They were my first kind of gf muffins and were so tasty and foolproof they launched my love of gf muffins.

I have subbed in chopped apples for some of the mashed bananas or applesauce will do too.  Sometimes I add ¼ cup currents, raisins or dried cranberries.  They add a tasty surprise when you bit into your muffin.  If you are not a fan of nuts leave them out.  Sometimes I leave out the nutmeg, or add extra cinnamon.

I do love to sprinkle them with chunky sugar; used for fancy baking.  Sometimes I ice some for company and we have them for dessert.  They were banging good that way. I feel no guilt; these muffins are low fat, low sugar and totally yummy, even when left un-iced!   muffin with frosting

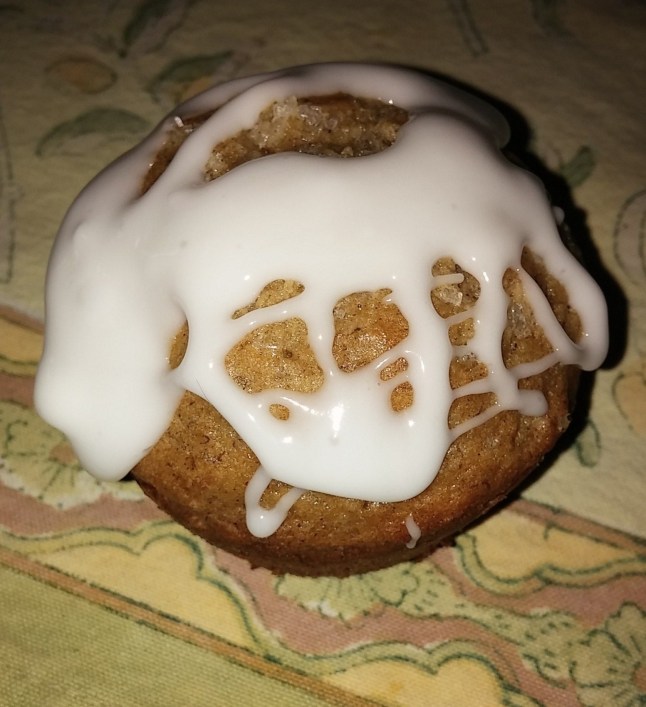
I freeze any I won’t eat in 2 days; in a Ziplock freezer bag.  They make super school or work snacks and I sometimes take a couple on a hike, wrapped carefully so they don’t turn to banana nut crumbs on the way up the mountain!

Here are some I made on 6-1-16; they have a streusel topping and some chocolate chips added for extra yummy.

Banana Nut Muffins

2 cups brown rice flour mix (see below)

2/3 c granulated sugar or coconut palm sugar

1 tbsp. baking powder

1 tsp. baking soda

¾ tsp xanthan gum

¼ tsp salt

1 tsp cinnamon

¼ tsp nutmeg

1 c packed ripe mashed banana

½ c chopped walnuts

2 lg eggs beaten

½ c milk, 1 or 2 percent plus 2-3 extra tbsp. if you use the palm sugar

½ c canola oil

Directions: Heat oven to 350 degrees, placing the rack in middle of oven.  Spray muffin pans with cooking spray.  One batch makes 12-16 muffins.

Mix all dry ingredients in bowl of stand mixer or big bowl

Add bananas and walnuts; stir to coat them with dry mix

Combine milk and oil and.add liquids and eggs to mixing bowl; stir until blended.  Sometimes I add ¼ c dried cranberries which is a nice addition.

Fill muffin pans 2/3 full.  Bake 18-24 min until golden brown. Do not overbake or they get dry.  Remove immediately from the pans and cool on a rack.  I like to sprinkle the muffins with big sugar granules before baking for crunch.   Freezes well for up to 3 weeks.  Keeps in fridge (well wrapped) a few days.

Brown Rice Flour Mix base mix  (same as King Arthur basic gf flour blend)
2 c brown rice flour

2/3 c potato starch (not potato flour)

1/3 c tapioca flour


Spring Pea Soup

Spring is a great time for a light flavorful soup.  One that celebrates healthy eating: this is food code for fresh vegetables.  Pea soup sounded good but I couldn’t find a recipe for a creamy pea soup, looked at a few veggie soups and combined them into this recipe.  I used frozen peas; fresh ones are hard to find and pricy. peas

Tips: You need to blend this up – blender or food processor.  You might want to put a kitchen towel over the blender in case of flying hot soup! Don’t boil it once you add the half and half; will curdle.  I used homemade chicken broth – use a good quality broth if you can’t make your own.

The flavor is not just peas; you have the other veggies and the broth not to mention the butter and half/half.  It is not too thick or too rich.  As Goldilocks said “just right.”  It is a lovely springy shade of green and would make a perfect first course for a dinner party or just for your family.  My mom loves soup for supper and she adored this one. Healthy, quick to make and packed with flavor: that’s what I want these days in a soup. On a hot day it would be lovely cold. Chill the bowls before filling and serving.

pea soup 013

Spring Pea Soup

Ingredients

1 medium onion

1 celery stalk

2 cups frozen peas: ½ cup peas and rest (see below)

1.5 tbsp. butter

3 cups chicken broth

1 ½ cups peas (rest of 2 cups)

½ cup half and half

1.5 tbsp. butter

4 tsp. gluten free flour blend; I used my favorite brown rice/potato starch/tapioca mix (See my pie crust recipe for the blend or use King Arthur’s blend; same thing.)

Directions

Cut the onion into small dice, same for celery.  Heat a medium saucepan: 1/5-2 qt size, add 1.5 tbsp. butter. Add onion, celery and cook 3 minutes.  Add first measure of peas.  Stir and cook 1 minute.  Add broth.  Cook 15 minutes.  Add rest of peas.  Cook 3 minutes.  Let cool slightly, puree in blender in 2 batches, keep lid on tight, can cover with kitchen towel in case of liquid escapage.  Return to sauce pan while you make the rue.

Heat second amount of butter in a small sauce pan and add flour when it is melted.  Stir and cook a minute, add ½ tsp salt and a sprinkle of white pepper.  Add the half and half, stir well until lumps are gone.  Add a ladle of soup to it and stir until fully blended.  Add back to the rest of the soup. Heat stirring constantly until hot but not bubbling.  You can thin it with more broth or water if it is too thick. Serve hot and enjoy the flavor of spring in your soup spoon.

Originally posted by me in May 2015

A Note on Updates

Just a brief note to my blogs readers. I am very glad if you chose to follow me and get my posts via email but I have a suggestion.  Before making any of my recipes; check my post on line. I do update the recipes sometimes, and you might be sorry if you don’t check the on line version for any revisions.  Case in point; I had not placed salt on the ingredients for the potato leek soup I posted last week.  When I made it Sunday I realized that if you use unsalted broth you really need to add salt to the finished soup so I went back and added the salt in as an ingredient.  Other recipes get revised to for a variety of reasons including newer, better recipe versions, ingredient amount changes and tips or hints I think of after the post was published…so I suggest looking the recipe up on my blog before attempting it and that way you will have the most recent version.


Happy cooking!

Rhubarb Sour Cream Crumb Pie

Rhubarb is plentiful so it is a perfect choice for a spring dessert.  This is easy to make even though it has several steps.  Sour cream rhubarb pie is different from any other rhubarb pie I make because the texture is delightfully light, almost fluffy. It has a touch of crumbs on the top; they are added after it bakes a while.  I think this adding of crumbs later help keep them from sinking into the raw pie and keeping it from becoming rather cake-like as my rhubarb custard pie turns out.  I never made this pie before so it was a new experience and everyone loved it…will be making it again for sure! It is my adaption from a recipe off of a website called Mary/The Kitchen Paper.

The GF crust will work for any pie you wish and the GF crumb topping is q great pie topper.  I store any leftover crumb mixture in a sealed container in the fridge; keeps a few weeks.  What I am giving you is my mixture of a couple of recipes. I know it has several steps but each one is easy and you can use these crust and crumb recipes for other pies.

Angie’s GF Rhubarb Sour Cream Crumb Pie

Crust:

1 c plus 2 tbsp brown rice flour mix (at bottom of recipe)

2 tbsp sweet rice flour

1 Tbsp. granulated sugar

½ tsp xanthan gum

¼ tsp salt

6 Tbsp. cold butter cut into 6 chunks

1 large egg

2 tsp fresh orange or lemon juice

————

Spray 9 or 10 inch metal pie pan with cooking spray, dust with white rice flour.

Mix dry ingredients in bowl of stand electric mixer.  Add butter and mix until crumbly and resembling coarse meal.  Add egg and juice.  Mix until it comes together into big chunks.  Shape into a ball with your hands. Put it on a crust sized piece of wax paper (14 x 14 inches more or less), flatten the crust ball some; put on top of it another piece of wax paper and chill it all in your fridge 15-20 minutes while you chop the rhubarb into ½ inch chunks.

Filling:

5 to 6 cups (if you use the ten inch pie pan) cut up fresh rhubarb – place in medium bowl

Mix with

1 c sugar

3 tbsp. rice flour

½ tsp cinnamon

———

Roll out pie crust between the two sheets of wax paper, try to get the thickness even, no thick middle! Peel off one side of paper and place in pie pan, centered.  Remove other slice of wax paper.  Crimp edges all around.  Fill with dry rhubarb mix.

Topping: Pour evenly over this mixture:  3 eggs beaten lightly with 1 cup sour cream, and1 tsp vanilla extract.  I did use light sour cream and it worked fine.

Place in 400 degree oven and bake 15 min, lower to 350 degrees and bake 30 minutes more.  Top with crumbs and bake 20-25 minutes until the crumbs are lightly browned.  I think next time I will bake it five more minutes so my crumbs are browner. Cool at least 2 hours before serving.  Enjoy!rhubarb sour cream pie 010

Crumb topping

Put all four ingredients in the same mixing bowl you made the bottom crust in and mix well with mixer paddle until crumbs form.

¾ c brown rice flour mix

½ c sugar

½ tsp xanthan gum

1/3 c cold butter cut into six chunks

Sprinkle the top of the pie with crumb mix; use as much as you like.  I like about a cup of the mixture.  Up to your personal taste.

Brown Rice Flour Mix
2 c brown rice flour

2/3 c potato starch

1/3 c tapioca flour

Potato Leek Soup

What a chilly spring! Cold nights and days mean my tummy craves warm comforting soup.  This leek potato soup fits the bill and then some.   It is also known as vichyssoise: the fancy French name for pureed leek and soup. My mom used to make it when I was a kid, in the summer she served it chilled and in the winter it is perfect hot from the pot. Both versions are awesome.

I love to make this recipe as it gives me the opportunity to yank out my boat motor blender and let it go!  It is a small, hand held immersion blender that is fun and effective although it often leaves a few chunks of potato and leek in my soup which I kinda like.

I used half and half to make it creamy.  The original recipe uses heavy cream but I wanted to lighten the fat load, sometimes I use plain whole milk.  I have a friend who makes it with nonfat milk, in my mind that is going a tad too far in that austere direction.  Don’t use less than 2 percent if you want a rich creamy texture and great mouth feel. You could mix some cream and some milk.  Whatever works for you or is in the fridge!  Note: if your chicken broth is unseasoned you will  need to add salt for sure; taste and add as much as you desire; I have added salt as an ingredient for that reason.  If you use broth containing salt taste before adding any additional salt.

You can guild the lily by sprinkling this with chopped fresh chives, nice but not necessary.


Mom’s Potato Leek Soup

Ingredients

2 tbsp butter

1 medium onion, diced small

3 leeks; white and pale green parts only, chopped into small rounds

3 medium russet potatoes, peeled and diced

3-4 cups chicken broth

¾ cup half and half

¼ tsp. mace or nutmeg

1-2 tsp. sea salt to taste: depends on salt level in chicken broth used

Directions

I use my heavy bottomed small soup pot.  Heat the butter, add the onion bits and leek slices. Cook 4 minutes.  Add 3 cups gluten free chicken broth.  I really prefer Kitchen Basics; says GF on box and tastes great.  Heat to boiling, add the diced up potatoes, cook 15 minutes or until potatoes are done.  Add more broth if it seems low in liquid.  I add up to 4 cups broth and then I add water to thin it further if needed.  I usually poke the potatoes with a fork to check for almost falling apart status.  Turn off and let stand 10 minutes.  Use an immersion blender to puree the mixture. Can also use a blender or a food processor for this action but in any case, be very careful not to burn yourself with a splash of hot soup. Add half and half, half the salt and the mace.  Blend them in until it is smooth. Add more salt if you desire.  White pepper is good as a seasoning too.  Great hot or well chilled once we reach that lovely season of summer heat that makes a chilled soup seem fabulous.  Right now, it is practically the last thing I want to eat.

Anyway, enjoy it hot or cold.  This recipe is an adaption from The Joy of Cooking, a handy resource volume for classic recipes like this one.  Great taste never goes out of style.

Originally posted March 2015.  Slightly revised.