Japanese Eggplants with Ground Chicken or Pork: Delightful!

There is this recipe for chowed eggplant with ground pork that I make often when I can find skinny Japanese eggplants. Chowed means stir fried.  It comes out great every time I make it, slight addiction is my position on this recipe. This latest version uses ground chicken thigh meat instead of ground pork. If you get tired of pork or don’t eat it this is an excellent choice.  I bought it at Valley Farm Markets; their meats can’t be beat for flavor and value! I suppose you can used ground chicken breast too. Anyway, it worked very well.

I added some sticks of fresh zucchini from my garden  and a bit of sliced cabbage.  It was delish for sure. The original recipe is by Jeff Smith, out of his cookbook, The Frugal Gourmet Cooks Three Ancient Cuisines; China, Greece and Rome. It is full of great recipes; where I got my potsticker and other dim sum recipes.  No judging here of Chef Smith; just enjoying great food…

Notes; can change out zucchini and or cabbage, for green beans, carrots, pea pods…but you can’t change out the eggplant.  Ground pork is excellent this way as well. Can use yellow onion rather than green if you prefer; cook a bit longer than scallions if you do.  You could also serve this with rice noodles; the wide kind you let soak in boiling hot water for ten minutes; that’s all the cooking it needs.

Angie’s Eggplant with Ground Chicken

1 lb skinny Japanese eggplant

1 tsp salt

½ tsp. light soy sauce, gf

1 ½ tsp. dry sherry or rice wine

½ tsp. grated fresh ginger

½ lob ground chicken, preferably thigh meat

2 tbsp. mild olive oil or peanut oil

2 cloves of garlic minced

3-4 green onions sliced in 1 to 2 inch lengths and cut in half if white part

1 cup zucchini strips; long rectangle shape

2/3-1 cup sliced green cabbage; not too thin

1 tsp. toasted sesame oil

Pinch sugar

Directions:

Cut unpeeled eggplants into ½ inch thick diagonal slices and cut each in half the long way. Sprinkle with salt, let stand ½ hour draining in a colander.  Pat dry with paper towels.

Mix meat with soy sauce sherry and fresh ginger, let stand 20 to 30 minutes.

Slice or chop veggies.

Heat wok and add 1 tbsp. oil. Add ground meat mixture and flatten a bit; cook until browned lightly; flip over and brown other side; no pink showing; chop up with utensil and set aside.  Add rest of oil and then garlic, cook 30 seconds, add eggplant, cook until it appears more than half done; about 5 minutes; then add zucchini and cabbage, stir for 4-5 minutes, add sesame oil and green onions. Stir a minute, add pinch sugar, wok until cabbage is crisp tender.
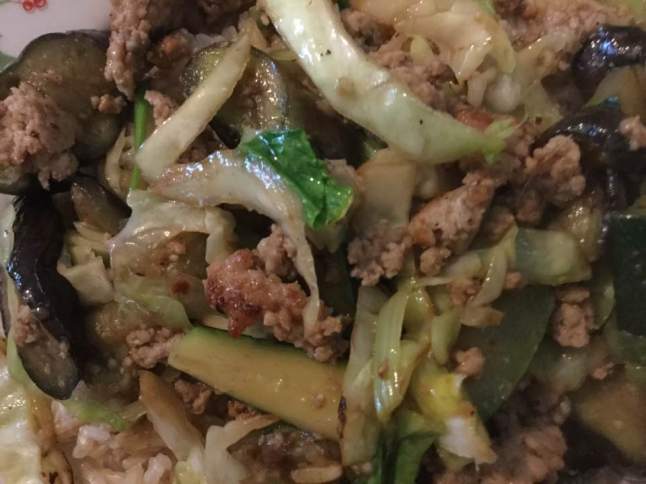
eggplant stir fry on plate

Serve with brown or white rice.  I made my brown rice in my handy instant pot pressure cooker.  I did a cup of long grain brown rice, 1 ¼ cup water, 1 tsp. oil, ½ tsp. sea salt; Manual high pressure for 20 or so minutes, ten minutes natural release.  Easy peasy.


Tabouli Salad…GF of Course!


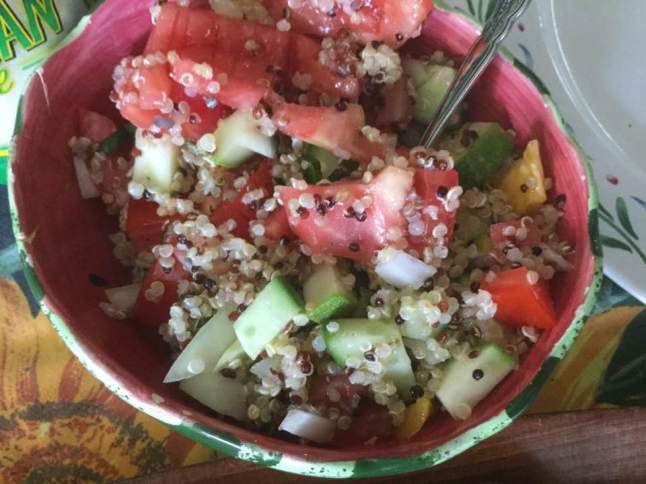
I love fresh summer salads on hot days, for parties, for supper alone or with a loved one. They pair well with grilled proteins and dress up a meal that was so so before you got out the chilled bowl of pretty salad.  There are a few salads I had to give up due to ingredients like bulgur wheat, farro, orzo pasta.  Or so I thought. I now use quinoa and make a wonderful tabouli salad; the quinoa replaces the bulgur wheat very nicely.  I particularly like the three color blend of quinoa for this purpose.  You cook it on the stove top, cool it few minutes and it is ready to use.  This quick to make and refreshing salad is very healthy. If you didn’t know it, quinoa comes from Peru and has a fair amount of protein in it; great for vegetarians. I like it’s refreshing flavors.

tabouli salad

Angie’s GF Tabouli Salad

Ingredients

1 cup dry quinoa

2 cups water

½ tsp. salt

——-

1/3 cup finely diced sweet onion

2/3 cup finely diced burpless cucumber

½ cup finely diced raw zucchini

1/3-1/2 finely diced orange bell pepper

1 large ripe tomato, diced

2 tbsp. finely chopped fresh mint

3-4 tbsp. EVOL of excellent quality

2-3 tbsp. red wine vinegar

½ a lemon; juiced and zested

Kosher salt and black pepper to taste

Directions:  Mix the quinoa, water and salt in a medium saucepan, bring to a boil, cover tightly and cook 15 minutes. Uncover and cool.

Dump cooled quinoa in a large mixing bowl.  Add the veggies and drizzle with the olive oil and then sprinkle with the vinegar and lemon juice.  Add kosher salt and freshly ground black pepper to taste.  Chill at least 30 minutes before serving so flavors can blend and it chills. An hour is better.  My amounts for the veggies are approximate and if you don’t like something; don’t use it.  The mint is really what makes it taste perfect so try it before you decide to not use it. If you hate it; use fresh chopped parsley instead of mint.  I also don’t measure the oil and vinegar; taste and add more if you want more. Don’t make a sopping wet salad; shouldn’t be any extra dressing in the bottom of the bowl.  Put it in a nice serving dish before you bring it to the table. Chill the dish if it is a hot day.

Notes: I grate the lemon peel into the salad before I juice it, easiest. It keeps 2-3 days in the fridge; you could make it the day before if you need to.  For that add the tomato and mint the day you are serving it. Try to get a beautiful tomato that is fully ripe and a tender zucchini makes the best quality salad here. Yes, raw zucchini; it doesn’t taste like that much but it adds something to the mix and your company will never know it isn’t cuke if you don’t tell them!  Enjoy this naturally gluten free summer salad.

Seafood Cakes

Once at the Springtown Inn I had the most delicious seafood cakes, this was 8-9 years ago.  Well, to be honest, maybe twice I had them. Anyway, they were made with two or three different seafood proteins I think they had shrimp and crab but it was such a length of time that I can’t remember for sure.  Anyway, I had long wanted to create a similar dish.  Searched for a recipe and not finding one that was really close I took one from Food Network and modified it.  The recipe featured small sized cakes with a fresh salsa on top, made by Robert Irvine. I didn’t do the salsa and I made a few changes to the cakes.

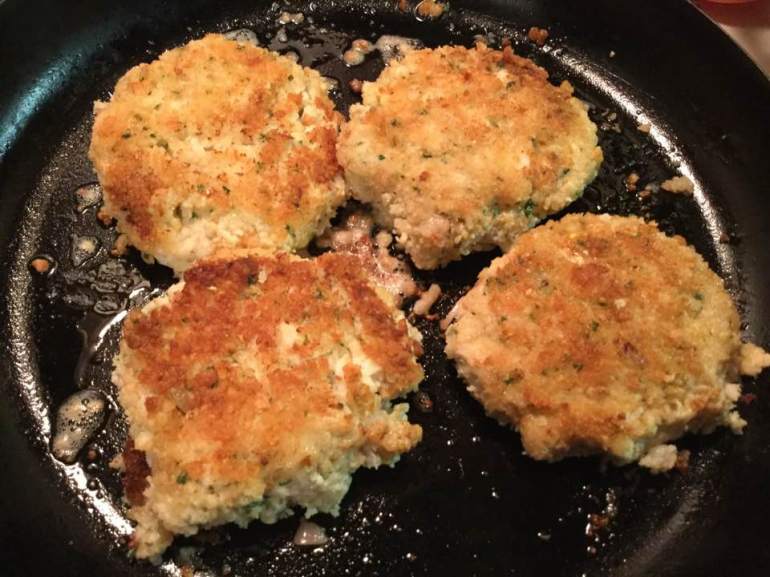
I made them two different versions; lobster, shrimp and crab and one with flounder instead of the crab.  Both were easy to construct and delightful. The flavor is delicate and light. I didn’t make a sauce in the interest of that delicacy plus it was easier and included less calories. We agreed they were fine all alone but go right ahead and made a sauce of your choice. Mr. Irvine suggests a sauce of equal parts crème fresh and sour cream.  I might try that next time!

seafood cakes frying

Angie’s Seafood Cakes

¼ lb medium raw shrimp; peeled and no tails

a 4oz. lobster tail, removed from shell and still raw

1/3 lb raw flounder or crabmeat

2 tbsp. finely chopped shallots

2 tsp. finely chopped fresh parsley

1/3 cup gf bread crumbs, preferably panko plus more if desired for coating cakes

1 tsp. garlic powder

Half a lemon, zested

1/3 cup Mayonnaise, might need a tad more….

2 tbsp. finely grated parmesan cheese (I made one version without)

1-2 tbsp. mild olive oil

Directions:

Chop the raw lobster tail into chunks. Put the seafood in a food processor, process briefly until fairly small particles but not even close to a paste.  Dump in a big bowl, add the shallots, parsley, bread crumbs, garlic powder, zest, mayo and cheese, stir to blend well. Don’t overblend; stop as soon as it seems fairly even. If you like; before stirring add salt and pepper to taste; maybe ½ tsp. sea salt, and ¼ tsp. pepper. Form into 4 cakes. If you want them crunchy on the outside gently press into some more bread crumbs to crumb both sides.  Put on a large plate and chill an hour so they hold their shape.

Heat the oil in a large non-stick skillet to hot and fry them about 3 minutes to a side; do not let burn!  I turned down the heat after a minute so they kept cooking but at a temperature less likely to turn them dark brown. But don’t use low temps or you will get a greasy cake!

seafood cake with risotto

Serve with some rice pilaf and your favorite vegetable; asparagus comes to mind! I made pea risotto which was divine.

Ravioli with Greens

After a busy day everyone wants a quick and tummy filling meal.  Mine has to be gluten free.  I was looking for a meal that would use up some plain frozen raviolis I bought at Wegmans. They are quite tasty but they needed a sauce, some veggies and a protein component.  I had some unopened flower shoots, tender stems and leaves from a second year collard plant. So I went for it.  T hen I made it another time; first with canned chopped clams added and next with freshly fried chunks of chicken breast.  Both were delicious and so simple to throw together.  I had the clam version with parmesan cheese freshly grated on top.  Perfect quick supper for one.

You could use broccoli rabe or broccolini for this recipe. I happened to have all these flower shoots on my collard plant just begging to be used in a creative and tasty way. This is a riff off my homemade gnocchi with clams and bitter greens recipe I love but heck of a lot quicker to make.


Angie’s Ravioli with Greens

Serves one

Ingredients

4-5 frozen cheese ravioli

A handful of broccoli rabe (1/4 to 1/3 of a pound) or collard bud stems or broccolini

1 tbsp. EVOL

1 garlic clove

½ small can chopped clams or ¼ lb chicken breast

2 tbsp rice flour if using chicken

A pinch of red pepper flakes

1 tsp. butter

Sea salt and freshly ground black pepper to taste.

Directions

Put on a quart of salted water to boil. When boiling drop in the ravioli and cook them about 6 minutes; 1 minute less than the bag says is a good plan.  Drain well, set them aside to add later and try to save a ¼ cup of the liquid for later.

In a mini wok or sauté pan heat the EVOL, if you are making the chicken cut it in small chunks, dust in the flour until well coated, and fry 4-7 minutes until golden on more than one side and done.  If they are fat chunks they will take longer.  Sometimes I flatten chicken breast chunks a bit to help them fry faster.  Remove from pan and set aside.  Add the minced garlic clove, stir. Add the broccoli rabe and the red pepper flakes, stir and cook about 4 minutes until well wilted. Add the drained cooked ravioli and clams or chicken chunks you cooked earlier.  Stir well, cook a minute or two.  Add the butter and toss once.  Sprinkle with sea salt and pepper and serve.  Enjoy!

Spicy Chicken Tenders

There are a lot of commercial food items that I don’t get to eat anymore, specifically most fast food being a major no no.  I miss crispy chicken like I used to enjoy at Wendy’s.  When I saw this recipe referenced on facebook I immediately went to the site, read the recipe and decided I had to try it.  I had some chicken breast tenders and all the ingredients except the gf Bisquick.  I looked on Glutenfreeonashoestring and lucky me; she has a recipe for making your own gf Bisquick; it is attached to a recipe for mini breakfast pancake bite muffins. I had the flours needed; white rice, potato starch and tapioca flour plus the add ins of baking powder, baking soda, salt, and sugar.  Easy peasy to put a double batch together; I will keep it in my freezer in a Ziplock freezer bag; sure have been wanting some of that Bisquick!

I lowered the hot sauce to half, ditto for the cayenne powder as I was pretty sure I didn’t want it so spicy; do as you wish. It was simple to do; mix the spices with the Bisquick, mix the hot sauce with the water, dip the chicken in the spices, then the hot water and back in the spiced flour and fry. The second time I made this I used a non stick stainless steel pan and 1/4 inch canola oil.  It was almost like deep frying but not quite.

I didn’t eat it as a sandwich the first time; had two juicy tenders with a baked potato and some summer squash.  It was very tasty and not too spicy for me.  I had it in a gf bun for a meal, complete with lettuce, tomato and mayo, and it was wonderful. You can also cut the chicken up into chunks, pound them briefly and you have lovely fingers that are somewhat smaller, great for kids. Fried chicken tenders are not something I would eat every week but it sure was yummy! I think this recipe is well worth trying even if you just buy some gf Bisquick.

Gluten-Free Spicy Chicken Sandwich (like Wendy’s)


2-3 Tbsp. Frank’s Red Hot Sauce  (the second time I made this I used another red hot sauce so it doesn’t have to be Franks to turn out great)

1/2 c Water

1/2 c Gluten-Free Bisquick

1 Tsp. Sea Salt

1-2 Tsp. Cayenne Pepper (use 1/2 tsp. if you want it close to mild)

1/8 Tsp. Fine Ground Pepper

1/4 Tsp. Paprika

1/4 Tsp. Garlic Powder

1 lb. Chicken Breast tenders – pound them a bit if they are very fat; you want it ½ inch or thinner.

Mix together the Gluten-Free Bisquick, Salt, Cayenne Pepper, Pepper, Paprika and Garlic Powder in a low bowl.  I used a wide soup bowl.

In a separate cereal bowl mix together Frank’s Red Hot Sauce and water. In a  high-sided sauté pan heat 1 cup of canola oil – it should come up about 1/2 inch the side of the pan depending on the size of your pan. I started it on medium heat and put in a candy thermometer to regulate the temperature; I got it pretty hot; 350 degrees before putting in the chicken.  Or use my frying pan method I described above; less oil for that and no thermometer needed. Take one chicken breast tender at a time and dredge it in the GF Bisquick mixture, then roll it in the hot sauce/water mixture and then put it back in the Bisquick mixture and roll it to coat.  This can get messy; try to keep one hand dry and one for the water/hot sauce part. I slid one into the hot oil and then a second one. Cook chicken for about 5 minutes, until they are golden brown and no longer pink in the center (I used a meat thermometer just to make sure).

Remove from the oil and drain on paper towels to blot any excess oil. If you have the oil hot enough they shouldn’t be greasy. If you want a sandwich, serve on a gf bun and top with mayonnaise, tomato and an additional piece of lettuce.

Go ahead, indulge in this delicious chicken and I promise you it will be a hit with your family!

Adapted from creativecookinggf.wordpress.com, February 2011.

Reblogged from a post in August 2015. Minor changes.