Spring Pea Soup

Spring is a great time for a light flavorful soup.  One that celebrates healthy eating: this is food code for fresh vegetables.  Pea soup sounded good but I couldn’t find a recipe for a creamy pea soup, looked at a few veggie soups and combined them into this recipe.  I used frozen peas; fresh ones are hard to find and pricy. peas

Tips: You need to blend this up – blender or food processor.  You might want to put a kitchen towel over the blender in case of flying hot soup! Don’t boil it once you add the half and half; will curdle.  I used homemade chicken broth – use a good quality broth if you can’t make your own.

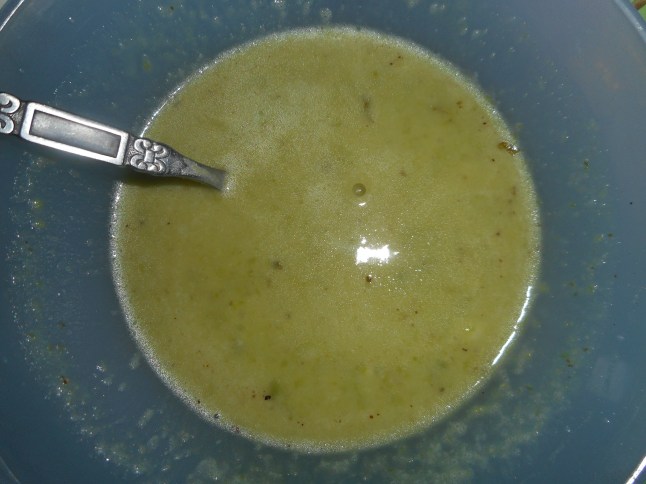
The flavor is not just peas; you have the other veggies and the broth not to mention the butter and half/half.  It is not too thick or too rich.  As Goldilocks said “just right.”  It is a lovely springy shade of green and would make a perfect first course for a dinner party or just for your family.  My mom loves soup for supper and she adored this one. Healthy, quick to make and packed with flavor: that’s what I want these days in a soup. On a hot day it would be lovely cold. Chill the bowls before filling and serving.

pea soup 013

Spring Pea Soup

Ingredients

1 medium onion

1 celery stalk

2 cups frozen peas: ½ cup peas and rest (see below)

1.5 tbsp. butter

3 cups chicken broth

1 ½ cups peas (rest of 2 cups)

½ cup half and half

1.5 tbsp. butter

4 tsp. gluten free flour blend; I used my favorite brown rice/potato starch/tapioca mix (See my pie crust recipe for the blend or use King Arthur’s blend; same thing.)

Directions

Cut the onion into small dice, same for celery.  Heat a medium saucepan: 1/5-2 qt size, add 1.5 tbsp. butter. Add onion, celery and cook 3 minutes.  Add first measure of peas.  Stir and cook 1 minute.  Add broth.  Cook 15 minutes.  Add rest of peas.  Cook 3 minutes.  Let cool slightly, puree in blender in 2 batches, keep lid on tight, can cover with kitchen towel in case of liquid escapage.  Return to sauce pan while you make the rue.

Heat second amount of butter in a small sauce pan and add flour when it is melted.  Stir and cook a minute, add ½ tsp salt and a sprinkle of white pepper.  Add the half and half, stir well until lumps are gone.  Add a ladle of soup to it and stir until fully blended.  Add back to the rest of the soup. Heat stirring constantly until hot but not bubbling.  You can thin it with more broth or water if it is too thick. Serve hot and enjoy the flavor of spring in your soup spoon.

Originally posted by me in May 2015

A Note on Updates

Just a brief note to my blogs readers. I am very glad if you chose to follow me and get my posts via email but I have a suggestion.  Before making any of my recipes; check my post on line. I do update the recipes sometimes, and you might be sorry if you don’t check the on line version for any revisions.  Case in point; I had not placed salt on the ingredients for the potato leek soup I posted last week.  When I made it Sunday I realized that if you use unsalted broth you really need to add salt to the finished soup so I went back and added the salt in as an ingredient.  Other recipes get revised to for a variety of reasons including newer, better recipe versions, ingredient amount changes and tips or hints I think of after the post was published…so I suggest looking the recipe up on my blog before attempting it and that way you will have the most recent version.


Happy cooking!

Potato Leek Soup

What a chilly spring! Cold nights and days mean my tummy craves warm comforting soup.  This leek potato soup fits the bill and then some.   It is also known as vichyssoise: the fancy French name for pureed leek and soup. My mom used to make it when I was a kid, in the summer she served it chilled and in the winter it is perfect hot from the pot. Both versions are awesome.

I love to make this recipe as it gives me the opportunity to yank out my boat motor blender and let it go!  It is a small, hand held immersion blender that is fun and effective although it often leaves a few chunks of potato and leek in my soup which I kinda like.

I used half and half to make it creamy.  The original recipe uses heavy cream but I wanted to lighten the fat load, sometimes I use plain whole milk.  I have a friend who makes it with nonfat milk, in my mind that is going a tad too far in that austere direction.  Don’t use less than 2 percent if you want a rich creamy texture and great mouth feel. You could mix some cream and some milk.  Whatever works for you or is in the fridge!  Note: if your chicken broth is unseasoned you will  need to add salt for sure; taste and add as much as you desire; I have added salt as an ingredient for that reason.  If you use broth containing salt taste before adding any additional salt.

You can guild the lily by sprinkling this with chopped fresh chives, nice but not necessary.


Mom’s Potato Leek Soup

Ingredients

2 tbsp butter

1 medium onion, diced small

3 leeks; white and pale green parts only, chopped into small rounds

3 medium russet potatoes, peeled and diced

3-4 cups chicken broth

¾ cup half and half

¼ tsp. mace or nutmeg

1-2 tsp. sea salt to taste: depends on salt level in chicken broth used

Directions

I use my heavy bottomed small soup pot.  Heat the butter, add the onion bits and leek slices. Cook 4 minutes.  Add 3 cups gluten free chicken broth.  I really prefer Kitchen Basics; says GF on box and tastes great.  Heat to boiling, add the diced up potatoes, cook 15 minutes or until potatoes are done.  Add more broth if it seems low in liquid.  I add up to 4 cups broth and then I add water to thin it further if needed.  I usually poke the potatoes with a fork to check for almost falling apart status.  Turn off and let stand 10 minutes.  Use an immersion blender to puree the mixture. Can also use a blender or a food processor for this action but in any case, be very careful not to burn yourself with a splash of hot soup. Add half and half, half the salt and the mace.  Blend them in until it is smooth. Add more salt if you desire.  White pepper is good as a seasoning too.  Great hot or well chilled once we reach that lovely season of summer heat that makes a chilled soup seem fabulous.  Right now, it is practically the last thing I want to eat.

Anyway, enjoy it hot or cold.  This recipe is an adaption from The Joy of Cooking, a handy resource volume for classic recipes like this one.  Great taste never goes out of style.

Originally posted March 2015.  Slightly revised.

Berry Berry Tart

Sunday supper, wanting a pie to serve, no seasonal fruit available. Not interested in stone fruit imported from Chile or California/Florida berries.  So I turned to the partial bag of mixed berries in my freezer.  What I had wasn’t quite enough so I added a half cup frozen peaches chopped up.  T hey didn’t change the flavor much but added a bit more volume and a different color. The tart with the crumb and almond topping was delightful and yet subtle.  Not hugely sweet and quite pretty with the berries all cooked up. Winner!

I used Annalise Robert’s crust recipe and flour mixture. I think this crust tastes terrific and has a wonderful texture.  If it is chilled it is easy to handle and I like the pie bag for rolling it out thin and even.

pulled pork tacos and berry berry tart 003

Taken as I sprinkled the almond crumb topping over the raw fruit. 

pulled pork tacos and berry berry tart 005

Ready for the oven!

Berry Berry Tart

Crust:

1 c plus 2 tbsp brown rice flour mix (at bottom of recipe)

2 tbsp sweet rice flour

1 Tbps. granulated sugar

½ tsp xanthan gum

¼ tsp salt

6 Tbps. cold butter cut into 6 chunks

1 lg egg

2 tsp fresh orange or lemon juice

Crust directions: Mix dry ingredients in bowl of stand electric mixer.  Add butter and mix until crumbly and resembling coarse meal.  Add egg and juice.  Mix until it comes together into big chunks.  Shape into a ball with your hands. Put it on a crust sized piece of wax paper (14 x 14 inches more or less), flatten the crust ball some; put on top of it another piece of wax paper and chill it all in your fridge 15-20 minutes.

Roll out ball of crust into a circle; I use my pie bag or between the two sheets of wax paper, try to get the thickness even, no thick middle! Peel off one side of paper and place in 9 inch tart pan, centered.  Remove other slice of wax paper.  Crimp edges all around.

Filling:

2 1/2 cups mixed berries, mine were black sweet and sour red cherries, black berries, raspberries and blue berries if frozen let them defrost half way before using. I also chopped up the blackberries and bigger cherries.

1/2 cup peaches (or more berries)  defrost these too if frozen and chop into small pieces

Mix in a large bowl with:

1/4 cup granulated sugar

2 tbsp. minute tapioca

1/4 tsp. cinnamon

Crumb topping

Put all four ingredients in the same mixing bowl you made the bottom crust in and mix well with mixer paddle until crumbs form.

¾ c brown rice flour mix

½ c granulated sugar

½ tsp xanthan gum

1/3 c cold butter cut into six chunks

Use one cup crumbs mixed with ½ tsp. cinnamon and ¼ cup thin sliced almonds.

I keep the rest of my crumbs in a tupperware in the fridge; keeps a month for sure.

Assembly and baking:

Put the berries which have been mixed with tapioca, cinnamon and sugar into the pie shell, peaches too if used. It will just cover the bottom of the crust. Top with crumb mixture

Bake in a preheated 400 degree oven for 35 minutes until bubbly and the crust is light brown.  Cool at least 2 hours before serving warm or at room temperature. pulled pork tacos and berry berry tart 007

Note: I bake pies in my bottom heat pizza oven and it gives me a great browned crust.  If your oven isn’t bottom heat you might want to pre-bake the crust 10 minutes before filling and topping the fruit.

Great served with a scoop of vanilla ice cream. pulled pork tacos and berry berry tart 009

Brown Rice Flour Mix– (same as King Arthur gf basic flour blend)
2 c brown rice flour

2/3 c potato starch

1/3 c tapioca flour

Buckwheat Gnocchi with Clams and Rabe

Anyone who eats at my house knows my deep love of authentic Italian food.  I love many different dishes from spaghetti with meatballs to risotto to homemade pasta and sauce.  This post is about gnocchi. Specifically gnocchi made with ricotta cheese rather than potato.  I love their delicate flavor, light texture and how much easier they are to make than the potato version. I make plain ones with rice flour and will share that recipe some other post. Just don’t ask me how to pronounce gnocchi!

These are buckwheat gnocchi and are served with clams and broccoli rabe.  Yeah buckwheat.  No wheat in it; buckwheat is a relative of rhubarb and it has a homey flavor that somehow matches perfectly with the clams and bitter greens.  I have been making this dish for more than ten years; gf the past three years.  It is a traditional spring dish at my house and much loved by my daughter. Not that tricky, I promise you can make it, no fancy pasta machine required. No long process.  Roll, cut, press with fork and briefly boil.

It is a spring dish as broccoli rabe is best right now, bright green, snappy flavor and so good for you.  I cook it a few minutes in boiling water before draining and sautéing briefly in olive oil and garlic. Yumm!

You could use fresh clams but I never bother; if you do – please get tiny ones and save a bit of the cooking water to add to the sauce.  If you want to make it not gf; just use all purpose flour for the white rice flour. Most grocery stores now carry buckwheat flour; store the bag in your freezer please so it keeps longer.

giant muffin and buckwheat gnocchi 010

Gnocchi in my mini wok and ready to serve.

Buckwheat Gnocchi with Clams and Rabe

For the gnocchi

1/3 cup buckwheat flour mixed with

½ cup white rice flour or any blend

1 15 ounce jar of ricotta (whole milk is best)

¼ cup fresh grated Parmesan cheese; fine grater side

1 ½ tsp. sea salt

Sauce:

1 lb broccoli rabe

1 large can tiny whole clams or 2 small cans chopped/minced clams

¼ cup EVOL

2 garlic cloves minced

1 tbsp. butter

Salt and fresh ground pepper

Directions: Heat a big pot of salted water.  While it heats, rinse the broccoli rabe and remove any yellowed leaves.  Cut the very bottom of the stems off and discard.  Cut the stems into 1 inch lengths. Do the same for the rest of the rabe; I set aside the stems and cook them one minute extra.  Throw the rabe stems in the boiling water, cook one minute and add the rest.  Cook maybe 3-4 more minutes; you don’t want it overcooked but not firm either.  Drain and set aside.

Mix all the gnocchi ingredients in a small mixing bowl. Turn out onto a rice floured bread board, knead briefly to form a dough. Do not add a lot of flour or your gnocchi will not be light and pillowy. Take a half cup or so at a time and roll it out on a rice flour dusted bread board; as thick as your middle finger (read ¾-1 inch).  I usually only roll out 5-6 inch lengths at a time.  They don’t have to be perfect looking, a bit irregular is just fine. Cut into 1 inch lengths (one knuckle long).  Using two forks press gently on the top and bottom to form small ridges.  This will somewhat flatten the gnocchi but the ridges are to hold sauce. Lay on cutting board that you dusted with rice flour. Don’t pile them on top of each other; one layer so they don’t stick together. Form all the dough while a big pot of salted (1 tsp) water heats.  I like a wide pan so I can easily fish out the gnocchi with my flat skimmer.  Put ¼ of the gnocchi in the bubbling water.  Let them slowly rise to the top; I leave them in about 3 minutes. I put them into a glass mixing bowl as I do the batches.

While they are cooking, heat the olive oil in a big sauce pan. I like to use my mini wok for this.  It is great for finishing a lot of pasta dishes.  Add the garlic and stir, cook 1 minute.  Add the drained greens, cook 1-2 minutes, adding the clams as it cooks, all the can juices too. Add the cooked gnocchi, the butter and if they seem dry; add a bit of the pot water; maybe ¼ cup. Taste and add salt and pepper as desired.

Dive in! gnocchi 004

They warm up nicely for a meal the next day, keeps 1-2 days in the fridge.

The original recipe is from Italy Al Dente by Bibi Caggiano; adapted to be gf by me. I love this cookbook, use it often; my fav Italian cookbook.  SO many good recipes; has risotto in it as well as homemade pastas and sauces and recipes that use factory pasta.  It works quite well with gf pastas.