Turkey Posole Stew; Sort of Spicy and So Delish!

I am betting you have some roast turkey in the freezer, maybe a pint of gravy too?  Well, I have just the recipe for you, courtesy of Rachel Ray and foodnetwork.com.  It is nothing like most traditional turkey leftover recipes.  It is a slightly spicy Mexican stew; posole stew can easily be gluten free. Just use care choosing your chicken broth and your tortilla chips that accompany this savory soup. One of these years I will remember to buy an extra carton of gf turkey broth and use in instead of chicken broth; turkey broth disappears immediately after thanksgiving; a bit of a bummer….

I have been making it every fall after Thanksgiving and always look forward to a few bowls of it.  Spicy, crunchy, tangy; unlike any other soup I make.  Posole stew can be made with roasted pork and I have done so but I like it far better created with leftover roast turkey, especially the dark meat.  I have served this stew to many people, and it is always well received and enjoyed, even by my elderly mother.  I made a batch today and it was so delish! You can cut this recipe in half easily which I did this time; didn’t have enough turkey for a whole recipe and my fridge is pretty full anyway; my posole turned out great and I am thrilled to be enjoying it again. 

Notes:  I used most of a good-sized jalapeno pepper and one 15 ounce can of hominy in a half recipe. I used a cup of water for the beer and a carton of gf chicken broth. About 3-4 tablespoons of homemade turkey gravy this time: ate the rest on hot sandwiches. It was absolutely delish!

tomatillos

The more jalapeno pepper you add the hotter it will be. I have tried canned tomatillos, and they are not really a good substitute.  You can get them fresh (found near the fresh tomatoes) in many stores including Giant.  They are used in Hispanic and Mexican cooking and add a lot of flavor and tartness to the soup. I have heard that some folks use salsa Verde instead of tomatillos but it really isn’t hard to chop them up, so I recommend the real deal.

Hominy is a corn product; whole kernels soaked in lye to swell and soften.  The kernels have a mild corn flavor plus they soak up other flavors quickly and add a certain texture and body to the stew.

The wild turkey is native to North America and one turkey species is originally from Mexico.  So turkey is a natural component in this stew.  The Aztecs revered corn and liked to cook it with meat.  Tomatillos are native to Mexico, related to cape gooseberries.  They are used in salsa verde and other Mexican dishes. So this compilation of turkey, corn, tomatillos and lime is a natural combination that will be easy to make and fun to eat. Go on, be adventurous and enjoy a steaming hot bowl of delicious posole and use up that turkey in a totally different way!

Turkey Posole Stew

Ingredients

2 tbsp mild olive oil or canola oil

2 medium onions chopped

4 cloves garlic chopped fine

1-2 jalapeno peppers – seeded and chopped fine –use two if you like it spicy, I use one!

1 tbsp. ground cumin

1 cup GF beer (can use 1 cup water if you want but it gives more flavor)

Coarse salt and pepper

12-16 tomatillos; about 2 lbs, take off the paper cover, rinse and chop up.  Can coarsely chop in food processor

5-6 sprigs fresh thyme; chop it up off the stems.

2   15-ounce cans hominy

1.5 qt chicken stock (can be part gravy)

1 ½ to 2 lbs. chopped turkey meat; can be mixture of light and dark

1 lime juiced

Chopped cilantro leaves to garnish (optional)

Tortilla chips: the ones with lime go particularly well with this.

tomatillos

Cook first six ingredients about 5 min in a large stock pot.  Add beer or water, cook one minute.  Add chopped tomatillos and cook 5-6 minutes until softened.  Add hominy, thyme and stock and cook 15 minutes.  Add chopped turkey and lime juice, stir. Taste and add salt and pepper, stir well.  I never use cilantro; something I just don’t like, but feel free to add it as the original recipe uses a bunch of it.turkey posole soup

Then ladle the posole into bowls and serve lots of white tortilla chips to crunch over the top of the hot soup.  As the soup disappears from my bowl, I like to add more chips to keep the crunch going.


Butternut Squash, Pancetta and Chard Pasta

This colorful pasta dish is pretty healthy and very tasty. Not too tricky either. I have enjoyed it many times in the years. It makes 4 satisfying servings.

It showcases roasted cubes of butternut squash and tender melt-in-your-mouth Swiss chard. My amounts are somewhat approximate.  I used gf fettuccine noodles. Don’t overcook them! You could buy pre-peeled and cubed squash to save time. I used some I grew this fall and honestly it didn’t take long to peel and cube it. I suggest you roast the cubes from a whole squash and use as much as you think works for you. Valley Farms has great fresh Swiss chard; that’s where I get mine if I don’t grow it myself.  I have made this recipe with thick cut bacon, if that is what you have; go for it.  I got a package of chopped pancetta at Giant for a decent price. It will keep a few days in the fridge.

Butternut, Pancetta and Chard Pasta

Ingredients:

1 bunch Swiss chard, I like the red or white stemmed variety, rinsed off

3-4 tbsp. EVOL

1 cup or so of diced red onion; one decent sized one

1 lg garlic clove minced

1 medium butternut squash; peeled, seeded and cubed; at least a pound in weight

4 oz pancetta, diced

10-12 oz dried gf fettucine noodles.

Good quality Parmesan cheese to grate on plated entree

Directions:

Roast the squash; heat the oven to 400 degrees, spray a rimmed baking sheet with olive oil cooking spray; spread the cubed squash, drizzle with 1-2 Tbsp of EVOL and ½ tsp. kosher or sea salt, bake at 400 degrees for 45 to 60 minutes; turn cubes every 20 minutes with a metal spatula to help them cook evenly, a bit of crunch is nice! Start the rest of the recipe as they approach doneness or bake the squash a day before if that works for you. Have done it both ways. Crunchier if made right before serving

Heat a large pot of salted water for the pasta while you make the chard.  Chop it into 1 inch lengths; set the chopped leaves aside separately from the lower stem bits. Heat the EVOL in a large frying pan or smallish wok. Add the stems and cook 2-3 minutes, add garlic, stir, add the onion; cook 3-5 minutes until softening. Add rest of chard in 2-3 handfuls letting it cook down for a minute before stirring and adding the next third. Then push the veggies up the sides or to the edges and add the pancetta. Push the veggies gently back around and over the pancetta. Cook 2-3 minutes until the pancetta is hot and the chard is soft.  Meanwhile you have cooked the pasta to al dente. Add it to the pan with the chard, stir, add the roasted squash cubes. Stir. Serve with freshly grated Parmesan cheese on top; none of that pre-grated crappy cheese please! Enjoy!

swiss chard pasta plated

Not sure where I found this recipe, but it is a keeper; we generally enjoy it in the fall as chard and squash are fall harvest vegetables.

Butternut Squash, Pancetta and Kale Pasta Toss

This colorful pasta dish is pretty healthy and very tasty. It’s a version of a dish I make with Swiss chard. None of that around so I used fresh kale from my garden and some beet greens for that earthy note that is critical to the flavor. Not a difficult dish either. Have enjoyed the original many times in the past 8-10 years.

It showcases roasted cubes of butternut squash and tender kale as well as beet greens. My amounts are somewhat approximate. It will keep a couple days in the fridge. I used gf fettuccine noodles. Don’t overcook them! You could buy pre-peeled and cubed squash to save time. I used some I grew last fall and honestly it didn’t take long to peel and cube it. I suggest you roast the cubes from a whole squash and use as much as you think works for you.  I have made this recipe with thick cut bacon, if that is what you have; go for it.  I got a package of chopped pancetta at Aldi’s pretty cheaply and the flavor is awesome.

Butternut, Pancetta and Kale Pasta

Ingredients:

1 small- medium butternut squash; peeled, seeded and cubed; at least a pound

3-4 tbsp. EVOL

1 cup or so of diced red onion; one decent sized one

4 oz pancetta, diced

1 lg garlic clove minced

1 bunch tender young kale, rinsed off

A big handful of beet greens, preferably young tender ones

9-12 oz dried gf fettucine noodles.

Good quality Parmesan cheese to grate into the mixture and some on each plated entree

Directions:

Roast the squash; heat the oven to 400 degrees, spray a rimmed baking sheet with olive oil cooking spray; spread the cubed squash, drizzle with 1-2 Tbsp of EVOL and ½ tsp. kosher or sea salt, bake at 400 degrees for 30 to 60 minutes; if they are chubby they might take all 60 minutes. Mine this time were fairly skinny so 30 minutes was perfect. Do turn cubes every 15 minutes with a metal spatula to help them cook evenly, a bit of crunch is nice! Start the rest of the recipe as they approach doneness, let them stay warm in the oven with heat off or bake the squash a day before if that works for you. Have done it all three ways. Crunchier if made right before serving.

Heat a large pot of salted water for the pasta while you make the kale.  Chop it into 1.5- 2 inch lengths; set the chopped leaves aside separately from the lower stem bits. Heat the EVOL in a large frying pan or smallish wok. Add the pancetta first, cook 2-3 minutes, add the red onion pieces, cook 3-5 minutes until softening. Add the garlic and cook a minute. Add the kale in 2-3 handfuls letting it cook down for a minute before stirring and adding the next third. Add the beet greens with the last third of kale. Cook 2-3 minutes until the beet greens are soft.  Meanwhile you have cooked the pasta to al dente. Add it to the pan with the pancetta and veggies, stir, add the roasted squash cubes. Stir gently. Serve with freshly grated Parmesan cheese on top; none of that pre-grated crappy cheese please! Enjoy!

swiss chard pasta plated

Not sure where I found this recipe, but it is a keeper; we often enjoy it in the fall as chard and squash are typically fall harvest vegetables.

You could leave out the beet greens if you can’t find them.

Turkey Pot Pie 2.0 Version

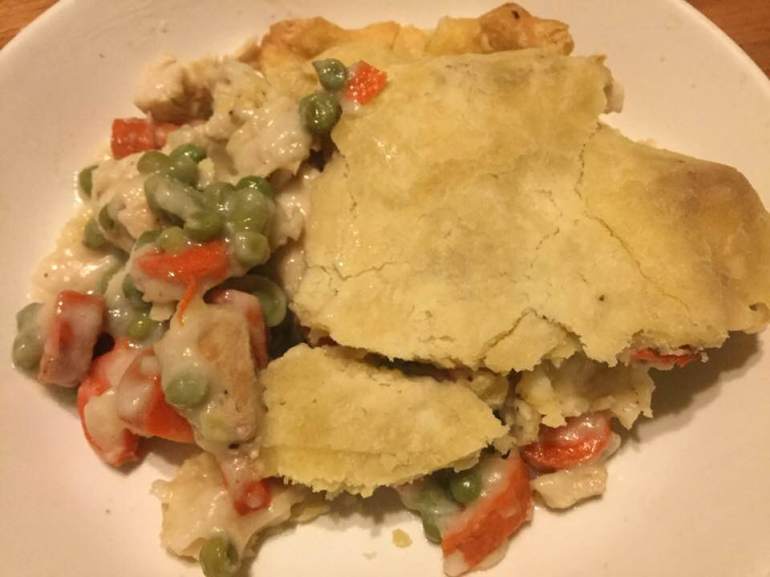
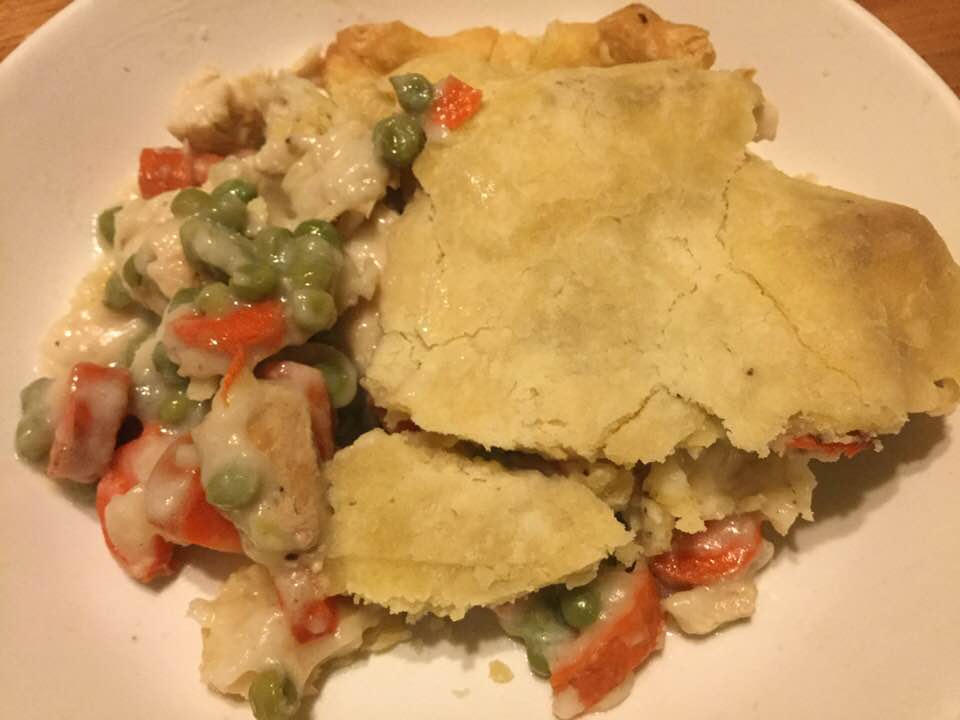
If you have any leftover turkey still lurking in the freezer this is an excellent way to use it up. You will need two cups of turkey to make this rib sticking entrée: turkey pot pie.  My version tracks pretty close to that you can find in a 1970’s Betty Crocker Cookbook.  Gluten free though…cause I must! You can toss it together in about 30 minutes and it bakes in 35 more. Your tummy will thank me. I put some celery seeds in the pie crust for extra flavor.  I generally make it with just a top crust which is less calories. If you want the full deal; double the crust ingredients and make a bottom crust too. Your creation will be a delicious and substantial meal for sure!

Notes: you can use light or dark meat or combo. I used baby carrots this time; cut them across into 4 little nibs; they were organic and had a delicious tender flavor.

Angie’s Turkey Pot Pie

Crust:

1 c plus 2 Tbsp. brown rice flour mix (at bottom of recipe)

2 Tbsp. sweet rice flour

1 tbsp. sugar (You will never know it is in there; it makes the crust more flakey)

½ tsp xanthan gum

¼ tsp salt

6 Tbsp. cold butter cut into 12 small chunks

1 large egg

2 tsp fresh orange or lemon juice

Directions: Mix dry ingredients in bowl of stand electric mixer.  Add butter and mix until crumbly and resembling coarse meal.  Add egg and juice.  Mix until it comes together into big chunks.  Shape into a ball with your hands. Put it on a crust sized piece of wax paper (14 x 14 inches more or less), flatten the crust ball some; put on top of it another piece of wax paper and chill it all in your fridge 15-20 minutes.

Pie filling

1/3 cup butter: I used ¼ cup plus some canola oil to reach 1/3 cup

1/3 cup white rice flour (or another gf flour)

½ cup finely chopped onion

½ tsp. sea salt

¼ tsp. black pepper, freshly ground

1¾ cup good quality gluten free chicken broth

2/3 cup whole or two percent milk

2 cups diced cooked turkey

4 large carrots, diced or 16 plus baby carrots

¾ cup frozen peas (or a ten ounce bag of frozen carrots and peas)

½ to 1  tsp. celery seeds (optional)

Heat butter/oil in large frying pan, add onion, cook 5-7 minutes until soft and translucent. While it cooks, cook the diced carrots for 4-5 minutes in a ¼ cup of water in a saucepan, lid on. Then turn off the heat, uncover it and throw in peas, set aside.

Add flour, salt and pepper to the fry pan with the butter and onions, cook 2-3 minutes, stir often. Add broth (I held back about 2 tbsp. to make sure it wasn’t watery) and while it heats keep stirring. Add the milk when the mixture is hot but not boiling, Stir well until it boils and then let it boil one minute, still stirring.  Add the turkey and then the drained carrots and peas, Stir well. Add rest of broth if needed.

Heat the oven to 425 degrees.

Roll out the pie crust thick; just big enough to cover the top of your 9 inch pie pan [about 11 inches] (I always use a glass pan but I am sure you can use a metal one). I like to roll it just 2/3 of the way out and then sprinkle with about ½ -1 tsp. celery seeds. Roll it the rest of the way and the seeds will be embedded in the crust. I like the subtle flavor they add, a touch of really old-fashioned tastiness my mom would approve of!

Pour the turkey mixture into the pie pan and top with the crust. Make sure no crust hangs down; trim to look nice. If you want to go whole hog double the crust recipe and roll half so you can put a bottom crust in before you pour in the filling. Top with your celery seed crust, seal to bottom crust (if you used one) and do cut a few gashes for venting… place pie on a pie drip catcher.  My pie pan is always very full, and that pie drip pan is wonderful for keeping the filling from dripping on my oven.

Bake 30-35 minutes until crust is light brown and the pie is bubbly.

Let the pie cool five to ten minutes before serving.

All you need is a salad, and you have a wonderful balanced meal. Enjoy!

turkey pot pie on plate


Brown Rice Flour Mix  (same as King Arthur basic blend)
2 c brown rice flour

2/3 c potato starch

1/3 c tapioca flour

The crust is from Annalise Roberts’ great cookbook: Gluten-Free Baking Classics.

Snowy Day Pasta Fagioli Soup

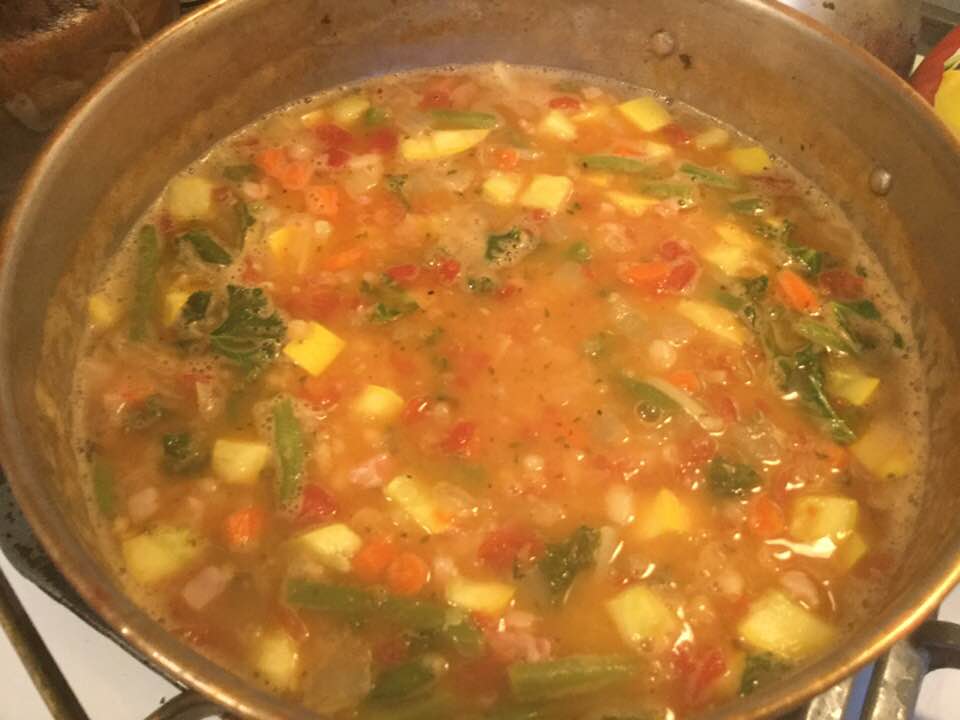
The soup I love to serve on a cold snowy winter day is pasta fagioli meaning pasta and bean soup, Neapolitan style.  It is full of veggies and a ton of fresh flavor.  Not to mention beans and pasta.  Yes, I make it now with gluten free pasta, use the same recipe as always.  I often use elbow pasta by Barilla; great flavor and holds its shape well.  Try not to overcook it though as gf pasta goes from done to mush easily if you are not paying attention!  This rib sticking soup will be a big meal if you add a salad and a slice of gf bread.  I will serve it tonight with a slice of homemade bread; the bread recipe is from a new cookbook of mine.  Warm, flavorful, satisfying and sure fills the tummy.  I made it with dried navy beans I cooked in my Instant Pot unsoaked; set it for 18 minutes but you can soak them overnight and then cook until pretty soft.  Any kind of white beans or even kidney beans work. You can even use a couple of cans of beans; I once made it with a can of cannelloni beans and a can of fava beans; very Italian…

My version has lots of veggies; if you don’t want them all; leave some out! I often use small cubes of turnip as they hold their shape well and add a subtle tasty flavor to the soup.  No one ever guesses they are in there; looks like cubes of potato.   Or add more veggies, what is in your fridge?  I have used green beans, summer squash cubes or peas.  Today’s version has yellow zucchini squash cubes, kale and fresh green beans. No turnips or celery. Just plain forgot the celery.  Oh well, next time…

Secret weapon: I always add a cheese rind or two saved from a chunk of Parmesan cheese. It really ups the flavor of the soup.  And if you get a bit of it in your soup bowl the oozy cheesy goodness will be your prize!

NOTES from 2024: I only used a bit of pancetta. Summer squash, no turnips.

Notes from 3/7/18. I did a quick heat and soak of the navy beans in a sauce pot and then I cooked them for 11 minutes in my Instant Pot. Great way to get it going quickly. I used broken up fettuccine pasta for that version. I used cut up pancetta I got at Aldi’s instead of prosciutto.

My version of Pasta Fagioli Soup

2 cups of dried cranberry, navy or kidney beans, soaked overnight in lots of filtered water.  Be sure to pick over them for foreign objects.

1 bay leaf

1 quarter inch thick slice of prosciutto (leave out for vegetarian version)

¼ cup EVOL (extra virgin olive oil)

1 cup chopped yellow onion

1 cup chopped carrot

½ cup chopped celery

½ cup chopped turnip or summer squash

3 minced garlic cloves

2 Tbsp. chopped fresh parsley

1 can plum tomatoes chopped (or 1 lb fresh ones chopped in the summer when they have decent tomatoes available)

¼ tsp red pepper flakes

1 to 1 ½ tsp sea salt

1 cup elbow macaroni, gf

Directions: Drain the soaked beans, rinse well, return to cleaned pot and cover with fresh filtered water, add bay leaf and cook 1-2 hours until soft. Add water if it gets low.  Turn off and let rest while you make soup.  Skip step if you use canned beans; do drain them and rinse. Just add them where you would add the beans you soaked and cooked yourself.

Heat EVOL in big sturdy soup pan, I like a thick bottom to keep the soup from burning easily. Add onion and cook 5-6 minutes, add garlic, stir and cook a minute, add prosciutto which you have diced up into small squares and the parsley. Cook for a couple minutes, add the tomatoes, carrots, celery, turnip, hot pepper and stir well.  Add a tsp. of salt.  Cook uncovered about 12-14 minutes.  Add any bean water in the pan. I often end up adding 1-4 cups of water during this point if there is no bean liquid. Mush up half the beans in a food processor or with a potato masher. Add to soup. Reheat and cook 5 minutes, add rest of beans, reheat and then add the pasta.  Cook just the length of time the box says, stirring it every 2-3 minutes. Taste and add more salt if needed and some fresh black pepper.  Turn off and let stand at least 10 minutes before serving. True Italians often let it stand for hours and they serve it room temp.  I sometimes drizzle some best quality EVOL on the top of each bowl before digging in. A big bowl of that will warm you up for sure! pasta faglioli soup

Originally posted by me in January 2015.