Summer Tomato Soup with Spaetzle

Summer always is tomato time around here.  But it’s now officially autumn and this day is distinctly chilly. I still have a few nice tomatoes, so I made my homemade tomato soup but added something special to it. Spaetzle; skinny egg dumplings which my mom made free form and tossed in her tomato soup often served for Saturday lunch. I got a lovely spaetzle maker for Christmas which I had not used too much yet and so I decided that I would try to replicate my mom’s luncheon soup. You don’t have to make spaetzles, but I highly recommend them. They really shine in the soup’s rich flavor; they are delicate and delicious.

I generally make Ina Garten’s tomato soup recipe but simplified a tad.  I made it today without the cream; I don’t think it goes as well with the spaetzles. So, if you don’t make spaetzles and don’t like it creamy leave out the cream or use half and half or whole milk for less calories.  If you are a vegetarian use veggie broth instead of chicken broth. I actually did half of each type of broth today as I had nearly a cup of veggie broth to use up.  You can strain or blend the soup. I never strain but sometimes I use my immersion blender to make it smoother. But I generally prefer it unstrained and chunky. Note: It has a good amount of garlic which you can reduce as wished.  I cut back on the salt, but you can cut it even further as you wish.

Your family will love this soup with a sandwich or salad. It is naturally gluten free.  GF croutons would bring a lovely crunch to it if you have any and aren’t doing the spaetzle dumplings. Enjoy!
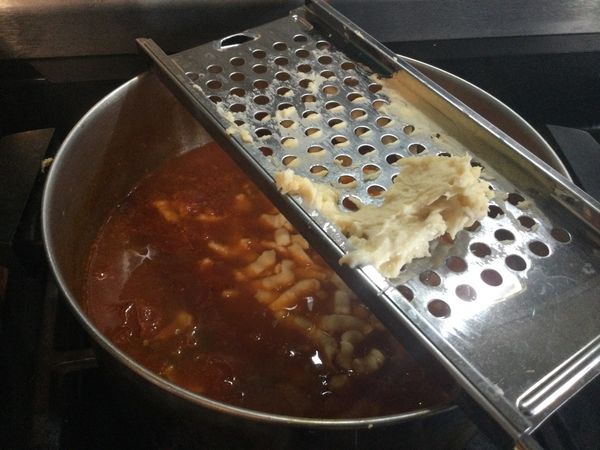
See my trusty spaetzle maker in action! Notice how thick the dough is,


Just after I added the dumplings and before I put the lid on for their 5 minute beauty bath.


Fresh Tomato Soup with Spaetzles

Ingredients
3 tablespoons extra virgin olive oil
1 1/2 cups chopped red or yellow onions (2 onions)
2 carrots, unpeeled and chopped
1 tablespoon minced garlic (3 cloves)
4 pounds vine-ripened tomatoes, coarsely chopped (5-6 large)
1 1/2 teaspoons sugar
1 tablespoon tomato paste
1/4 cup packed chopped fresh basil leaves

2-3 cups chicken stock, preferably homemade
1 tsp. kosher salt
1/4- 1/2 tsp. freshly ground black pepper
3/4 cup heavy cream/half and half or whole milk (optional)

Spaetzle Ingredients

1 large egg

100 grams of Better Batter gf flour

1/4 tsp. salt

1/4-1/3 cup 2 percent milk ( I believe I used a full 1/3 cup)

Soup Directions
Heat the olive oil in a large, heavy-bottomed pot over medium-low heat. Add the onions and carrots and sauté for about 10 minutes, until very tender. Add the garlic and cook for 1 minute. Add the tomatoes, sugar, tomato paste, basil, chicken stock, salt, and pepper and stir well. Bring the soup to a boil, lower the heat, and simmer, uncovered, for 30 to 40 minutes, until the tomatoes are very tender.

Or: use your Instant Pot Electric Pressure Cooker to make it; saute as per recipe in the pot, add the rest of the ingredients and put the lid on and cook under pressure 20 minutes.  You might have to blend it a bit with an immersion blender. I sometimes leave off the cream but my next paragraph is how to add that….

Spaetzles:  Beat the egg with a whisk in a medium mixing bowl. Add in the milk and then the salt mixed with the flour, Stir briefly until you have a very thick batter. Use a spaetzle maker to drop the dough in strands into the hot soup; I added it about 6-8 minutes before the soup was supposed to be done. I cooked it 5 minutes once all the dumplings were in and turned off the heat; let it stand 10 minutes. 
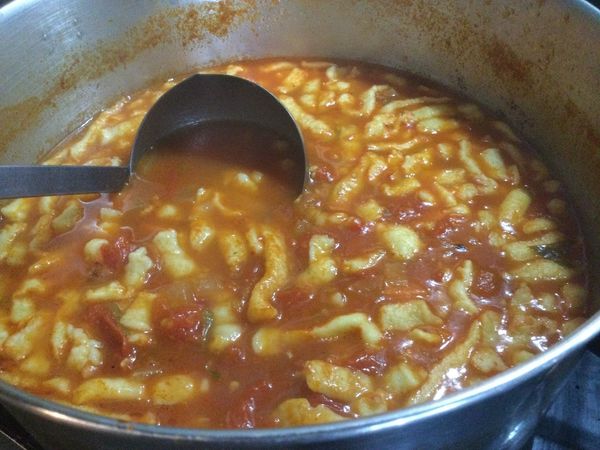
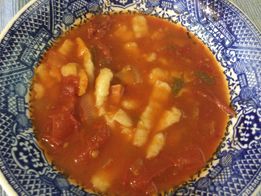
Thick, chunky and fragrant with EVOL and fresh basil as well as the ripe tomatoes. Heavenly.

Read more at: http://www.foodnetwork.com/recipes/ina-garten/cream-of-fresh-tomato-soup-recipe.

Original post of this was way back in the summer of 2014.  Minor changes and addition in this recipe of the spaetzle dumplings. Enjoy!
Swiss Chard Tacos

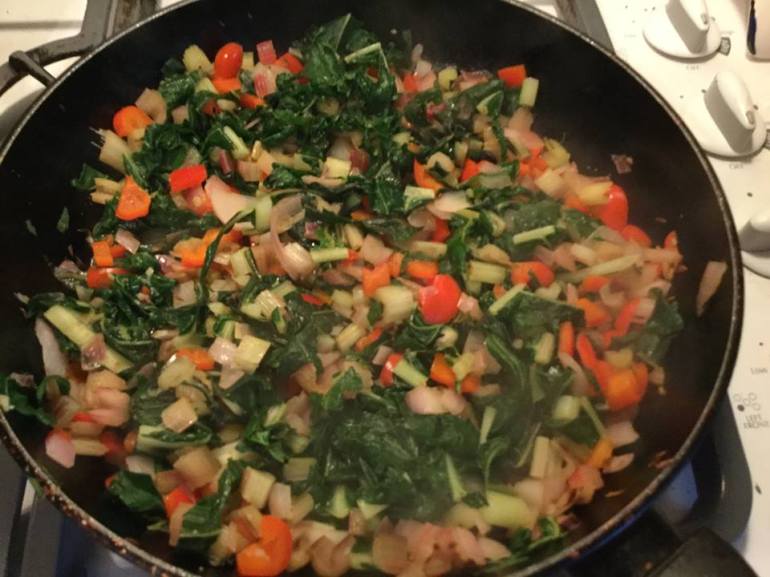
Tomorrow is Tuesday; taco Tuesday to be exact! Meatless meals don’t thrill me like those made with serious proteins, favorites like salmon, poultry, lamb or pork.  That said, I have a few delightful vegetarian items I make on occasion.  Time to add another to my roster; these Swiss chard tacos. My sister made these while I was up visiting her.  I was skeptical but found them to be really delicious and a great way to use up a lot of the Swiss chard growing profusely in my gardens!  No meat but you won’t miss it in these flavorful and filling tacos.

I sometimes use Mexican cheese but you can also use Monterey Jack as that is what the original recipe called for and what I currently prefer.  The recipe is out of an old Home and Garden magazine. I made a few changes….added some ground cumin for extra spice. Don’t forget the red wine vinegar, really a great finishing touch.

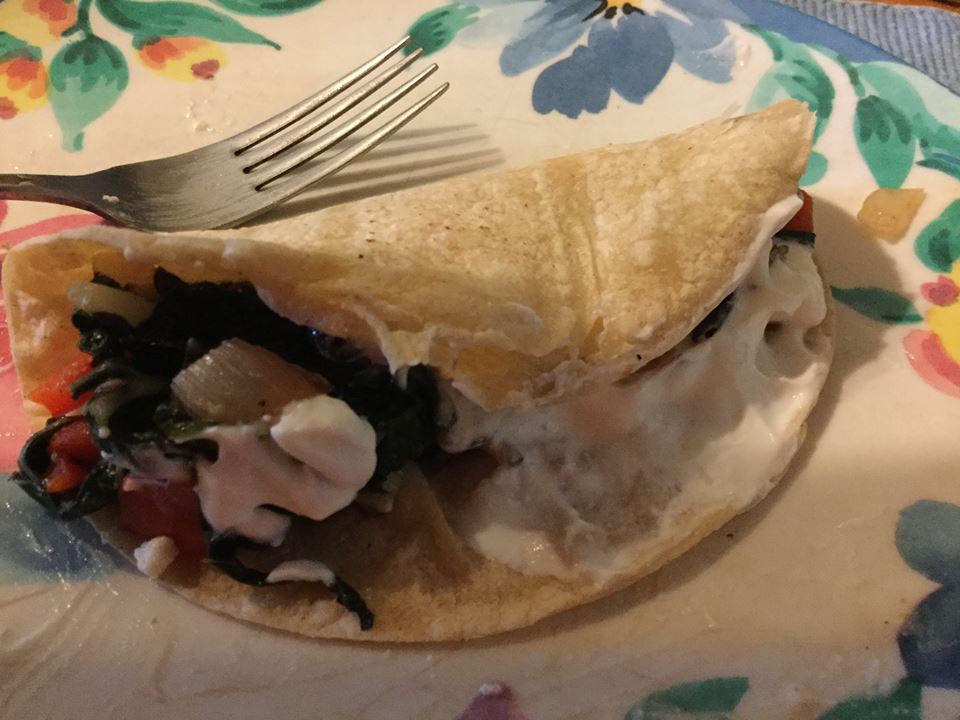
The white corn tortillas in these pictures (La Bandarita brand) came from Wegmans; they have one up near Boston.  There are three Wegman’s here near me. I got some light corn tortillas today at my local Giant; they work well. Enjoy!

chard taco

Sorry for the messy picture. I guess I should make a prettier taco!

Karen’s Swiss Chard Tacos

1 lb Swiss chard

½ tsp. cumin seeds

¼ tsp. ground cumin

½ a red onion, chopped

1 red pepper, chopped

1 tbsp. olive oil

1 clove garlic minced

1 Tbsp. red wine vinegar

1 can of black beans, rinsed and well drained

8 tortillas; corn flour

1 cup of Monterey jack cheese or Queso Fresca cheese; grated

1/3 cup sour cream, reduced fat is my preference

cilantro for garnish if desired

Directions:

Chop up the chard stems into half inch dice.  Rough chop the rest of the chard and set aside. Heat a large frying pan and add the cumin seeds; cook 1-2 minutes until fragrant.  Add olive oil then chard stems.  Cook 3 minutes until softening.  Add the chard leaves that you have rough chopped, ground cumin, onion, garlic and red pepper.  Cook 3 min, stirring.  Add the red wine vinegar and the black beans.  Stir well, cook 3-4 minutes longer. The greens should be wilted but they don’t need to be fully cooked down.

Meanwhile while the filling cooks; heat oven to 350 degrees.  Lay tortillas out on baking sheets.  Sprinkle grated cheese in the center of each.  Bake 4-5 minutes until cheese starts melting and tortilla is somewhat crisp. Remove from oven.  Place a generous amount of chard mixture on each tortilla.  Top with a spoonful of sour cream.  Sprinkle cilantro over top if desired.  I am not a fan but you might be…

Coconut Chicken and Rice

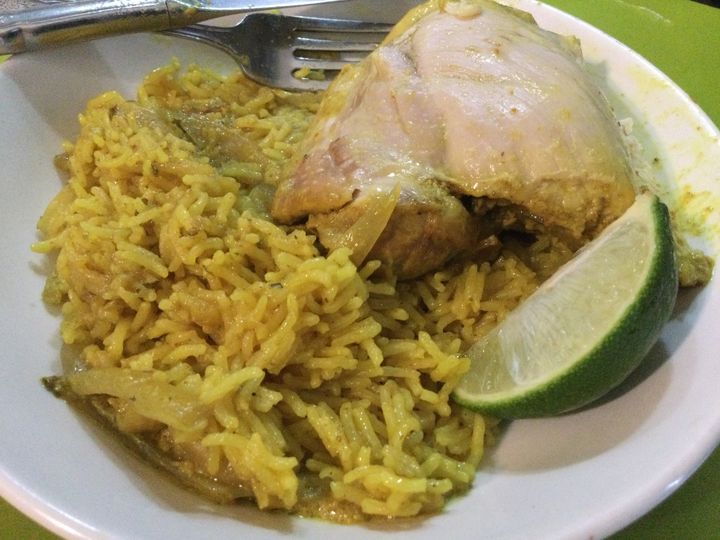
This yummy recipe is great for hot summer days as it is made in an Instant Pot. It doesn’t warm up the kitchen and allows me to do other things while my IP works hard to make a great dish that is quick, delicious and healthy. It is from my favorite Instant Pot cookbook The Instant Pot Electric Pressure Cookbook by Laurel Randolph. There are many excellent recipes in this book and most of them can be gluten free; either naturally or with a little tweeting of the ingredients. I highly recommend it for great recipes and it is well designed for easy use.

My notes: I do not like cilantro so I just sprinkled some parsley in the pot and it was fine. It has a lot of curry powder but I found it to be well balanced and not too spicy; if you really want to, cut it back by a third. I used frozen ginger as it keeps so well and chops/grates easily. Don’t forget the lime to squeeze over the plate; really adds a fresh note.

Yummy Coconut Chicken and Rice

Ingredients

1 Tbsp. EVOL

1 large onion sliced vertically into 1/4 inch strips

a 1 inch length of ginger, peeled and sliced into fine sticks

2-3 garlic cloves minced

1 Tbsp curry powder

1 tsp. ground tumeric

kosher salt

ground black pepper

1 14 oz can light coconut milk

4 chicken thighs; bone in, skin on

1/2 cup water

1 1/3 cup jasmine rice

1-2 Tsp. parsley or cilantro leaves, chopped fine.

1- 1 1/2 tsp. sugar

1 lime cut in wedges

Directions: set IP on sauté, add EVOL. When hot add the sliced onions, stir for a minute, add the ginger, cook 2 minutes, add garlic, cook 30 seconds and add the two spices, stir well. Add the chicken thighs, turn over to coat with spices. Add salt and pepper to taste; I did 1/2 tsp. salt and just a few turns of pepper. Add the water and coconut milk, stir around, put the lid on and set for 13 minutes. When timer goes off, set to quick vent. Remove chicken to a plate and add the rice, parsley and sugar, stir. Close lid and set to 4 minutes. When done hit cancel and let stand 10 minutes, then vent and open. I served mine in a wide shallow bowl; removed the skin and squeezed lime juice over it all. Enjoy!

Strawberry Rhubarb Crumb Pie

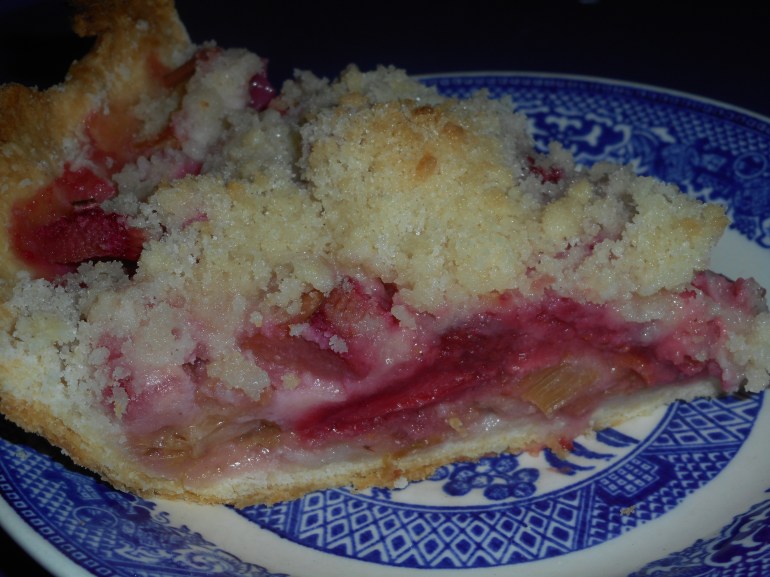
Strawberry season is here and rhubarb is plentiful right now so let’s make a pie with these spring fruits. This is a crowd favorite and you will certainly get a few compliments if you make it for your family.

This is an easy pie to construct and you can store any leftover crumb mixture in a sealed container in the fridge; it keeps a few weeks.  The GF crust will work for any pie and the GF crumb topping is perfect for any crumb pie.  If you prefer a solid crust just double the crust part and top your pie with it.  Be sure to cut some slits for steam escape!

Please make every effort to use local strawberries; can get at most farm stands.  This pie really showcases the strawberries more than the rhubarb which is a silent partner so that is why I suggest you get the best; locally grown sweet ripe strawberries to make your perfect pie. If you don’t get local, at least get organic berries. They are much healthier for you and probably more flavorful.

Bake and enjoy an early summer pie in just a few minutes of work.  Don’t eat it hot; it should be cooled to room temperature or even chilled. I eat it both ways and love it either way.  I am sure you could top this with vanilla ice cream for even more yumminess.

Angie’s GF Strawberry Rhubarb Crumb Pie

Crust:

1 c plus 2 tbsp brown rice flour mix (at bottom of recipe)

2 tbsp sweet rice flour

1 Tbsp. granulated sugar

½ tsp xanthan gum

¼ tsp salt

6 Tbsp. cold butter cut into 6 chunks

1 lg. egg

2 tsp fresh orange or lemon juice

Spray 9 inch metal pie pan with cooking spray, dust with white rice flour.

Mix dry ingredients in bowl of stand electric mixer.  Add butter and mix until crumbly and resembles coarse meal.  Add egg and citrus juice.  Mix until it comes together into big chunks.  Shape into a ball with your hands. Put it on a crust sized piece of wax paper (14 x 14 inches more or less), flatten the crust ball some; put on top of it another piece of wax paper and chill it all in your fridge 15-20 minutes while you chop the rhubarb into ½ inch chunks and hull/slice the strawberries.

Filling:

2 cups fresh strawberries, hulled and cut in thick slices

2-3 cups cut up fresh rhubarb – place in medium bowl

Mix with

½ to 2/3  cup sugar ( I used ½ cup but you might like it sweeter.)

1/3 c gluten free flour mix (see below recipe or Better Batter flour works great.)

I sometimes add a tsp. of orange zest to the filling; a great pairing with these fruits.

Crust: Roll out pie crust in a pie bag or between the two sheets of wax paper; try to get the thickness even, no thick middle! Peel off one side of paper and place in pie pan, centered.  Remove other slice of wax paper.  Crimp edges all around.  Fill with dry strawberry – rhubarb mixture

Crumb topping

Put all four ingredients in the same mixing bowl you made the bottom crust in and mix well with mixer paddle until crumbs form.

¾ c brown rice flour mix

½ c sugar

½ tsp xanthan gum

1/3 c cold butter cut into six chunks

Continued directions: Sprinkle the top of the pie with crumb mix; use as much as you like.  I like about ½ to 2/3 of the mixture.  Up to your personal taste… It sinks partially into the fruit mixture and adds lots of sweetness and eye appeal.

Bake in a preheated 425 degree oven for 40-50 minutes until bubbly and the crust is light brown.  I have a bottom heat oven so my crust gets nice and brown.  If that is an issue for you, bake the empty bottom crust ten minutes before filling so it gets a head start.

Cool at least 2 to 4 hours before serving at room temperature.

Brown Rice Flour Mix (Same as King Arthur Basic GF Blend) {Not Measure for Measure]
2 c brown rice flour

2/3 c potato starch

1/3 c tapioca flour

This post was originally shared in July 2015.  Slight changes to the text were made but the recipe is pretty much the same.

Un-stuffed Cabbage ‘n Beef Stew in my IP

Stuffed cabbage rolls are definitely a Pennsylvania treat. But making this recipe can be time consuming and complex; you have to cook the whole cabbage leaves and separately cook the filling and roll up it inside the half cooked leaves, sauce it and bake it. This is just way, way easier and pretty much better in my opinion. Less work, less heat in my kitchen (I did it in my Instant Pot but you could use a slow cooker or bake in the oven.) It isn’t a pretty dish to photograph and I frankly forgot to take pictures of making it. I debated even sharing it due to this but the flavor is so delish I knew I was gonna make it again so I wanted you to have the option to give it a try.

cabbages

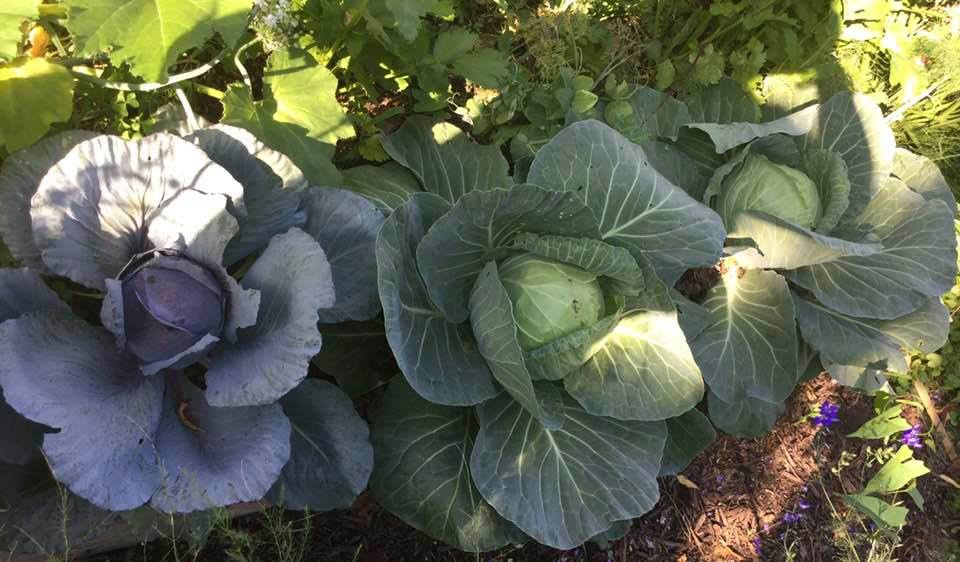
Here is my entire cabbage crop. These fat leaves will make a great batch of this casserole.

This recipe is very homey; great in these trying times. I used some outside cabbage leaves but any fresh cabbage will do.  I used ground chuck but lots of people swear by ground pork or even ground turkey. The amount of spices is variable and you can use any sort of tomato product you wish to get that wonderful tomato flavor in there. I added some smoked paprika and a few raisins to make it like my old recipe. Sometimes I add a tablespoon of red wine vinegar to zip it up a bit. Fiddle with the ingredients as you wish. It will still be a comfort meal your family will appreciate. Makes about 6 servings.

cabbage n rice casserolle

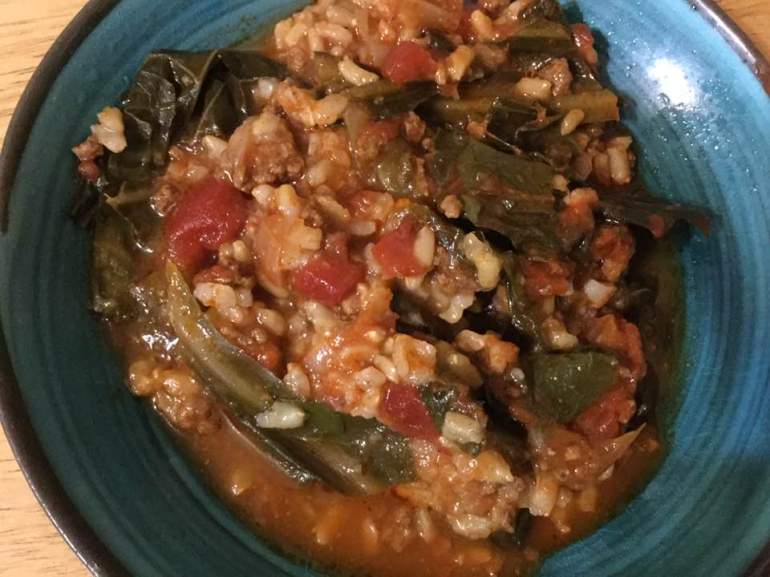
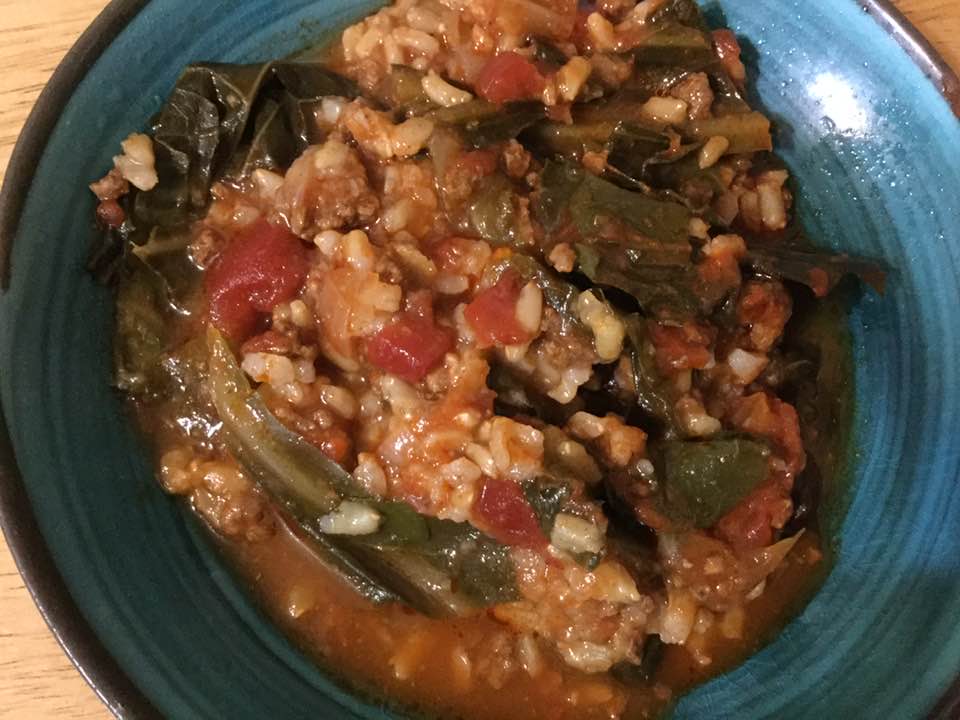
Told you my photo was lousy! Trust me it tastes better than it looks. And it looked better the first time we had it.

Angie’s Unstuffed Cabbage Casserole

Ingredients:

1 lb ground beef

3 big garlic cloves, minced

1 med-large onion diced

2 bay leaves

About 4-5 cups of cabbage cut into 1-2 inch squares/chunks

1 can (13.5 oz) diced tomatoes in juice

8 oz can plain tomato sauce (can leave out and use another cup of broth)

2 to 3 cups beef or chicken broth (Do 3 cups if you want it soupier)

2  tsp paprika

½ tsp. smoked paprika

1/4 tsp. oregano

A Tbsp brown sugar (optional…some folks love, some hate this) or 2 tsp. regular white sugar

2/3 cup long grain white or parboiled brown rice (package will say cook time is 20 minutes), uncooked

1.5 tsp kosher salt

¼ tsp ground pepper

1 Tbsp. balsamic vinegar

1 Tbsp. Worcestershire Sauce

1 Tbsp. tomato paste

¼ cup raisins (optional)

Directions: In instant pot or big pan brown ground beef: I sprayed it with cooking spray before starting. Or use a tsp or two of mild olive oil. While it browns chop the onions, the cabbage, open the can of tomatoes and get the spices out. After the beef is half browned add the onions, stir a couple minutes; add the garlic too.  Add the spices, bay leaves and stir. Add the tomatoes, broth, tomato sauce and paste, vinegar, Worstershire sauce and cabbage, stir, then add the sugar, rice and salt/pepper. Stir well so nothing is stuck to the bottom. Cook in IP under pressure for 9 minutes. Let rest 10 min before depressurizing and adding optional raisins. Correct seasoning; add more salt and pepper as desired and serve. You can bake it in oven for 45 minutes. Slow cooker for maybe 6 hours? I don’t use that function often but I am sure it would work fine for this recipe.

Enjoy!

Originally published in 2020. This is an updated version with a number of ingredient additions and less cooking time.