Delicious GF Tiramisu

There is this lovely Italian dessert that I haven’t had in a decade, it was my favorite back when I didn’t have to worry about gluten. Sure do miss it…. Well, while we were on vacation in Delaware we discovered Schar gf ladyfingers in a grocery store. Immediately my brain thought tiramisu! So, we snagged that package and brought it back to my kitchen.

I understand there are various ways to make tiramisu; this is the way I did mine; with fresh real whipped cream, some folks use beaten egg whites. Maybe next time. Just know that my tiramisu was just so creamy and rich…. It was addictive in all ways possible.  You could make your own ladyfingers but it was easier to use store made. ones.

Notes: I used a single use coffee bag and about 2/3 cup boiling water; let it stand 10 minutes and it was ½ cup which is what I needed. Easy! Or make some expresso and go full Italian! And one last important tip: do not warmup the mascarpone cheese at all before using; it will turn to butter in the blink of an eye! Trust me!

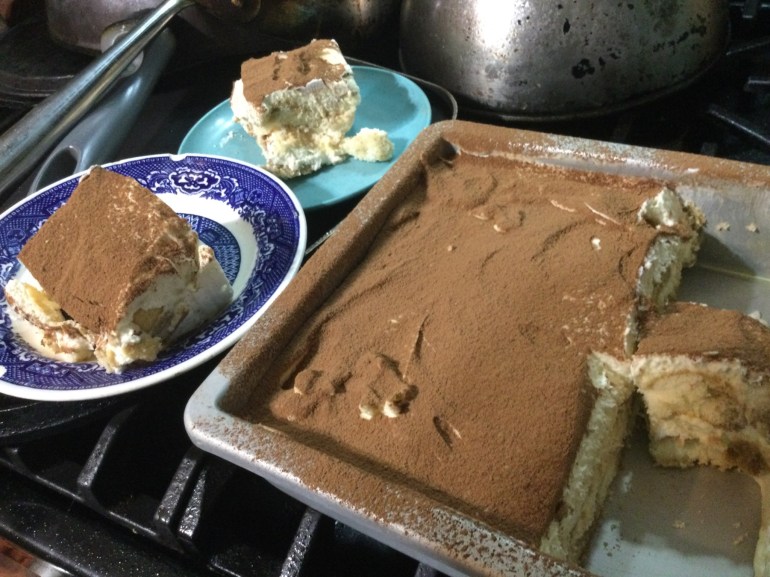
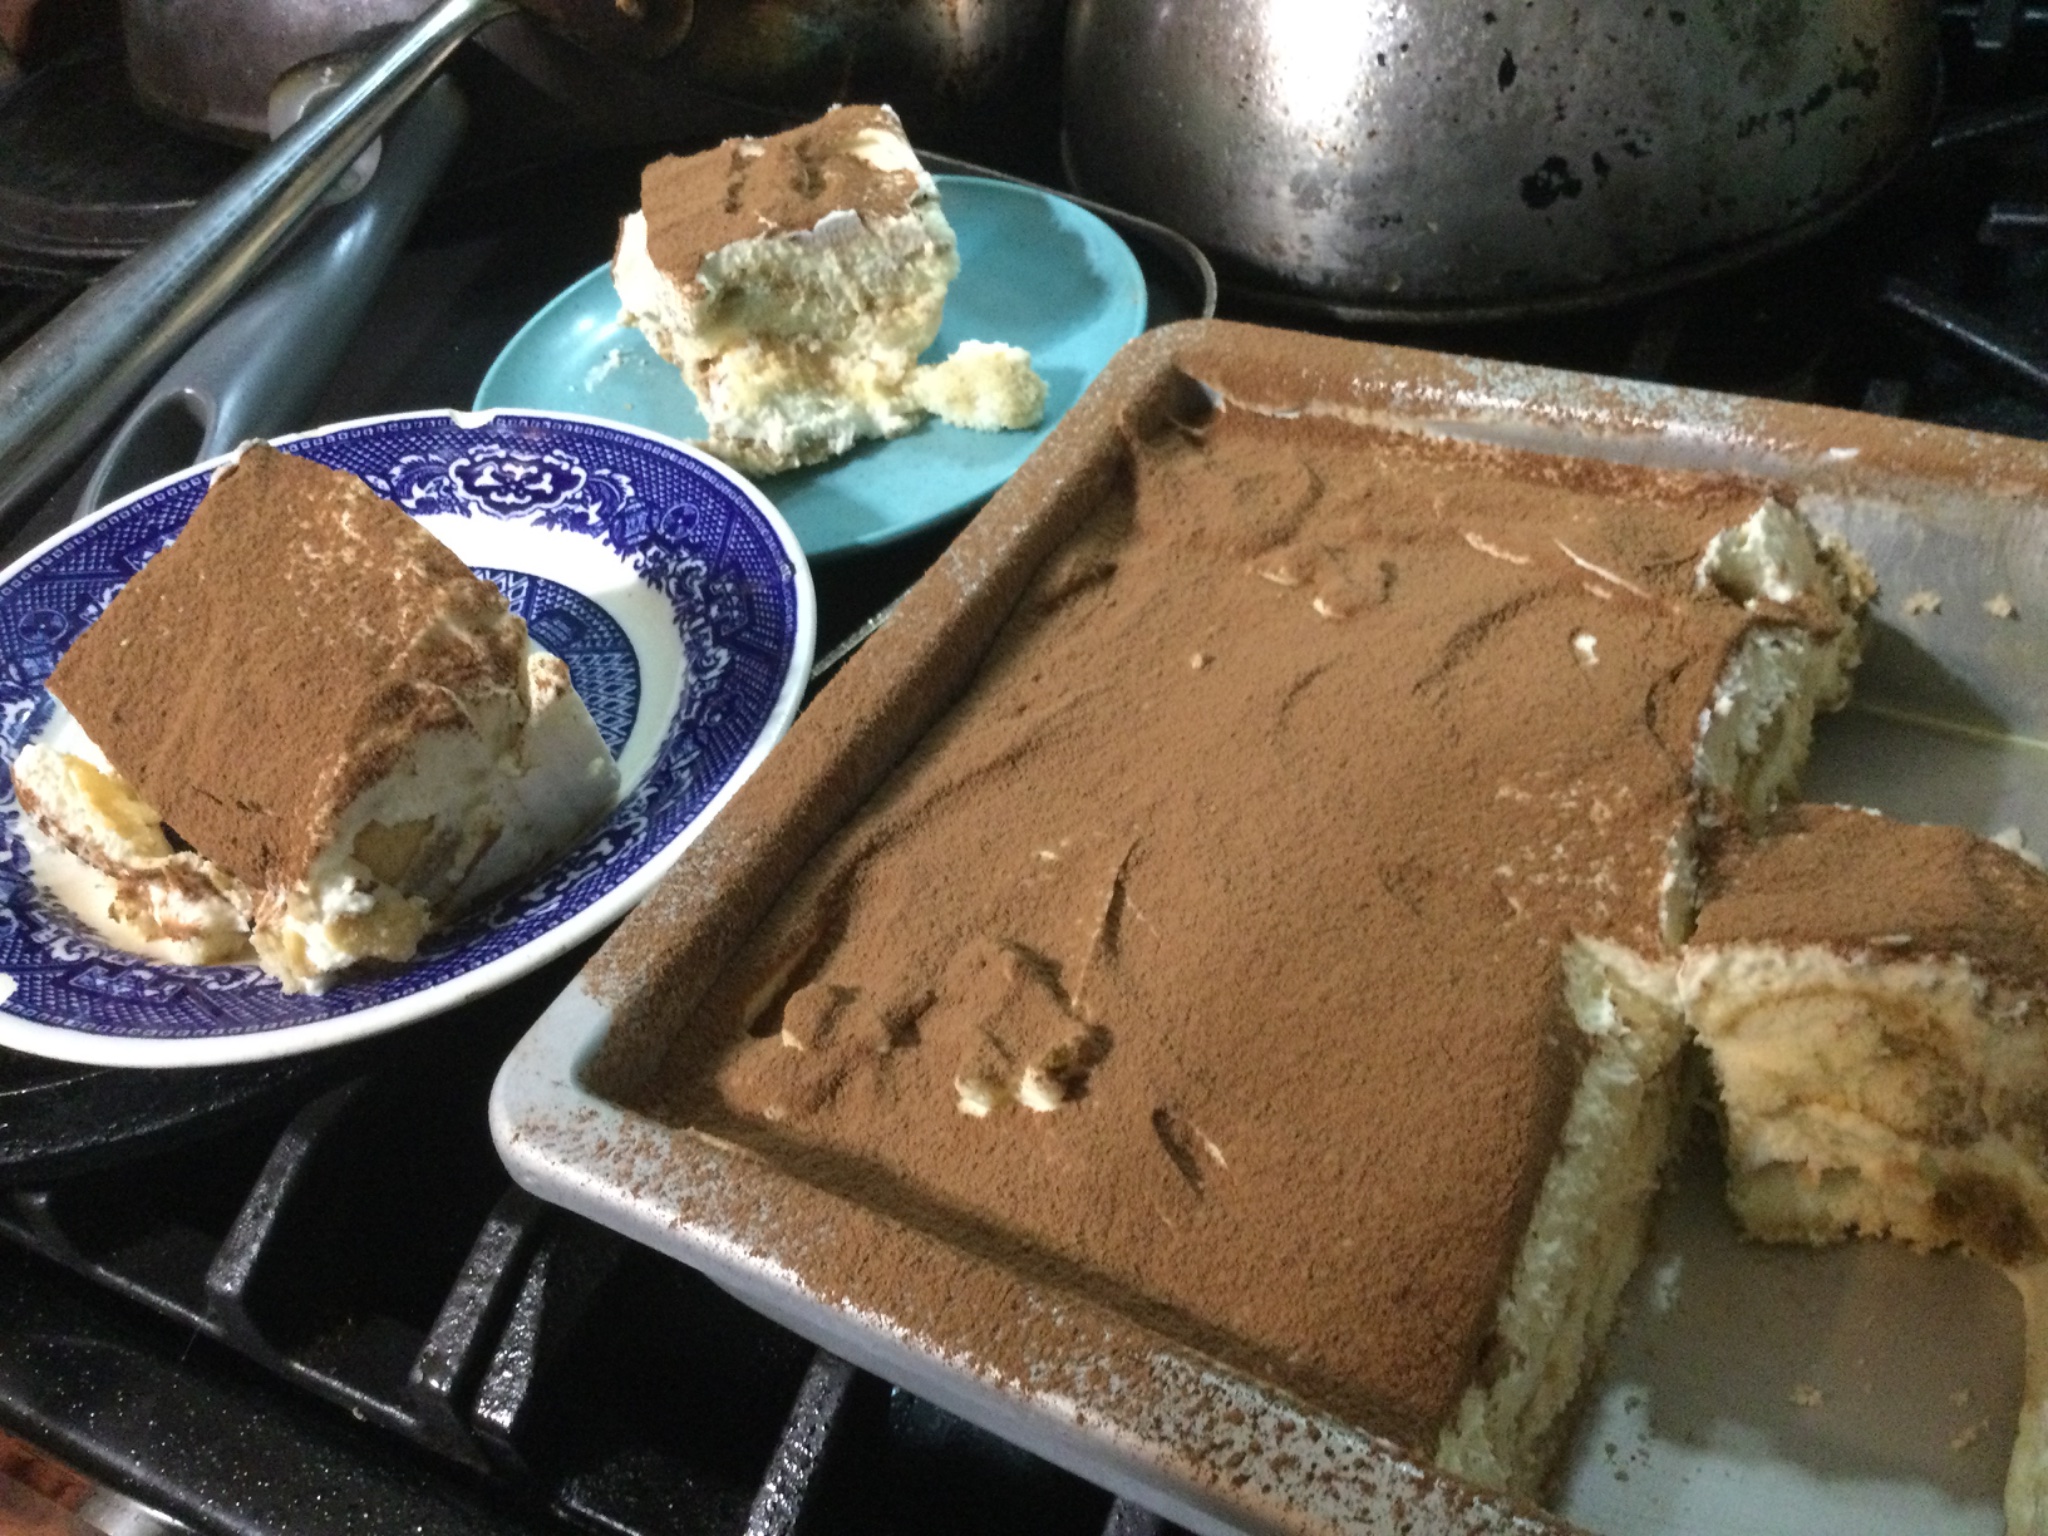
Kinda drab looking in the pan but it is a delightful treat for dessert!

GF Tiramisu; makes 9 medium sized servings

Ingredients

1 package gf ladyfingers

2 egg yolks

3 Tbsp. sugar

2 Tbsp marsala for the egg mixture

1 cup mascarpone cheese

———–

¾ cup COLD heavy whipping cream

½ tsp. vanilla

————

½ cup strong coffee cooled to room temp- could use up to 2/3 of a cup should be cold

1 Tbsp. marsala for the coffee mixture

1 Tbsp cocoa powder

Instructions:  Make the coffee and let it cool. Put the sugar and egg yolks in the top of a double boiler. Do not let the water in the bottom half reach the top pan. Stir constantly with a whisk until the sugar is totally dissolved in the egg yolk 4-5 minutes on low heat. It should be a pale yellow, silky smooth when done Add the marsala and whisk. Remove from heat, cool to room temperature.

When the egg mixture and the coffee are both cooled you can put it together. I used a 7 inch square pan; I think an 8 inch will work too; will be thinner. Spray the pan lightly with cooking spray. Put the mascarpone cheese in a large bowl, beat briefly to make it smooth. Add the whipping cream and beat until stiff peaks form; 3-4 minutes. Add the vanilla and mix in briefly. Fold in the egg/sugar mixture until smooth; do not beat any more than necessary

Put the coffee in a low wide bowl; mix in the marsala. Doing one ladyfinger at a time dunk in the coffee briefly and lay in the pan to cover the bottom. Pour half the pudding mixture on top of the ladyfingers and smooth the top. Repeat the ladyfinger layer and top with the rest of the pudding. Put in fridge for 6-10 hours before serving. Sift cocoa on top with a sieve before cutting and serving. Enjoy!

A less than stellar photo but we were eager to taste this treat!

Zucchini and Tomato Quiche in a Potato Crust

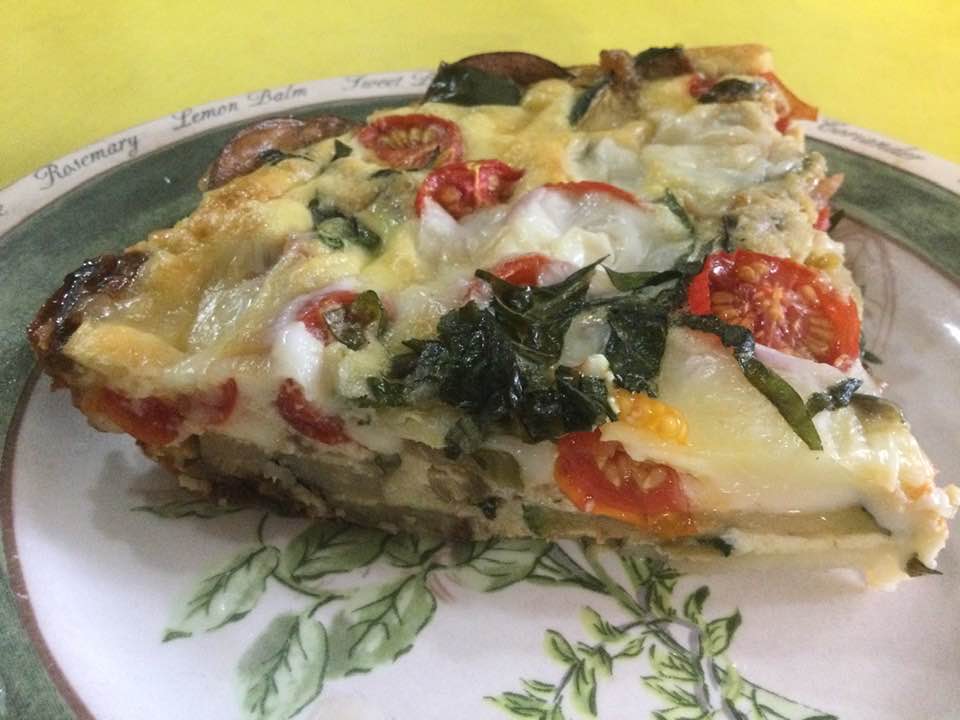
Sometimes you just don’t feel like making a traditional crust. This was one of those times. I had a homegrown zucchini, some cherry tomatoes, cheese, eggs, and 2 potatoes. Quiche for supper! This is a different filling recipe than my usual one; it is more eggs, half and half instead of milk and no cottage cheese; cubed mozzarella cheese. It was a delicious change of pace especially with the julienned fresh basil leaves sprinkled all over the top. You could use other veggies; I went with what I had. The garden’s bounty and it didn’t fail me.

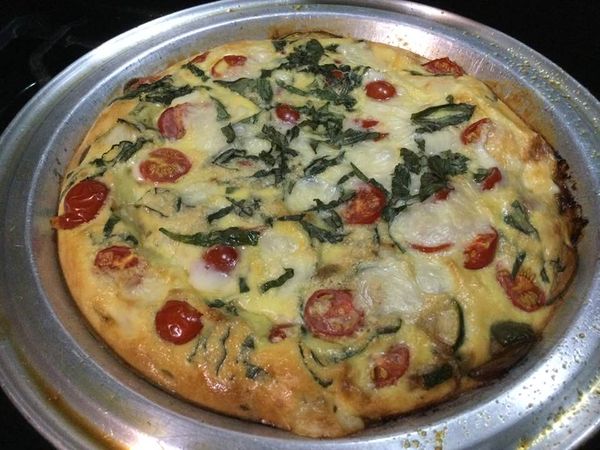
Just baked, still pretty hot.

Angie’s Zucchini and Tomato Quiche

Ingredients

2 large russet potatoes, washed well and sliced very thin: about 1/8 inch thick.

cooking spray

5 large eggs

1/3 cup half and half

about 4-5 ounces cubed mozzarellla cheese

about 1/3 cup sliced onion; I used one small onion

2 Tsp EVOL

approximately 1 to 1-1/2 cups sliced zucchini

1/4 tsp garlic powder

1/2 cup or so cherry tomatoes, halved

6-7 large basil leaves Jullianned

Directions:

Heat oven to 375 degrees. Spray a 8.5-9 inch metal pie pan with olive oil cooking spray. Line it with potato slues on the bottom and half way up the sides. Spray again all over with the olive oil cooking spray. Bake 20 min; don’t let it get really brown. Turn oven down to 350 after removing pie shell.

Mix eggs and half and half in blender; 10 seconds or so.

Sautee the onion rings in some EVOL; maybe 2 tsp of it. Add squash after 2-3 minutes. Cook until softening; maybe 5 minutes. Sprinkle with garlic powder. Pour into warm potato crust. Sprinkle with tomato halves and cheese cubes. Pour egg mixture gently over it Sprinkle with basil leaves.

Bake in 350 degree oven 30-35 minutes; if it looks like it is browning too much turn heat back to 335 degrees.

Cool to lukewarm before cutting. Enjoy!

Blueberry Rhubarb Custard Pie

Surprisingly blueberries and rhubarb really do go together so well. Blueberries are uncooked: with milk or cream or baked in a cobbler or a fruity crisp. Rhubarb is called the pie plant for good reason; it makes a lovely pie from a humble plant stem. But this, this is my current obsession, the two together in a custard pie. Not just any old custard but one made with Greek yogurt and eggs. Easy to throw together, creamy, never runny textured and a lusciously fruity flavor that may make you have to eat a second slice! The blueberries do tend to take over the rhubarb flavor of this pie. Of course, there are more than twice as many blueberries by volume and they are just a stronger flavor than rhubarb which gives a bit of a tart under taste to this pie. You could play with the proportions of the two fruits; this is the amounts which I used. This pie will be tasty to even the biggest rhubarb dissenter. Really!

WARNING: This pie goes soft in 2 humid days so plan to gobble it down within that time frame or face the soggy crust syndrome. Inevitable with gf crust and a custard filling in hot/humid weather.

I don’t recommend frozen or canned fruit for this pie, simply not good enough and you must use plain, unsweetened Greek yogurt in the filling, plain yogurt is too runny. And no, it can’t be made without the eggs it just wouldn’t work as a custard if there are no eggs. The version with peaches uses 3 yolks in there. I tried it with two whole eggs beaten up: success! And one last warning; applicable to 100 percent of my recipes: Please don’t try it with Measure for Measure gf flour; this is calibrated for using King Arthur’s Basic GF Blend.

I hope you give it a try; super easy and super delicious. Best pie of the summer hands down! Make one Saturday morning…we couldn’t wait for a slice still faintly warm……. I thought I took a picture of a slice; no luck there and it is all gone. Next time! It does look pretty much like the blueberry peach custard pie I posted last summer.

Naked pie! About to go in and bake for 25 minutes and then the crumbs go on top.
Just out of the oven….cooling…a molten mass of fruit and custard and sugary crumbs!

Angie’s Blueberry and Rhubarb Custard Crumb Pie

CRUST:

1 c plus 2 tbsp brown rice flour mix (at bottom of recipe)

2 tbsp sweet rice flour

1 Tbps granulated sugar

½ tsp xanthan gum

¼ tsp salt

6 Tbps cold butter cut into 6 chunks

1 large egg

2 tsp fresh orange or lemon juice

Spray 9 or 10 inch metal pie pan with cooking spray, dust with white rice flour.

Mix dry ingredients in bowl of stand electric mixer.  Add butter and mix until crumbly and resembling coarse meal.  Add egg and juice.  Mix until it comes together into big chunks.  Shape into a ball with your hands. Put it on a crust sized piece of wax paper (14 x 14 inches more or less), flatten the crust ball some; put on top of it another piece of wax paper and chill it all in your fridge 15-20 minutes while you prepare the filling.

Filling:

2-3 cups sliced fresh rhubarb cut in half inch slices (2 cups if 9 inch pie, 3 cups for 10 inch pie)

4 cups blueberries; rinsed

2/3 cup sugar, sweeter if you like it that way or if peaches are not fully ripe

2 Tbsp. tapioca starch

Mix in a medium bowl the following ingredients:

1 cup plain Greek yogurt, I prefer whole milk, and let it warm up a bit

2 whole large eggs or 3 egg yolks, close to room temp.

1 tsp. pure vanilla extract

2 tbsp. brown rice mixture flour (King Arthur Basic GF blend)

Crumb topping

¾ c brown rice flour mix (King Arthur Basic GF Blend)

½ c sugar

½ tsp xanthan gum

1/2 tsp. cinnamon

1/3 c cold butter cut into six chunks

Put all five ingredients in the same mixing bowl you made the bottom crust in and mix well with mixer paddle until crumbs form.

+++++++++++++++++++++++++++++++++++++

Directions: Turn oven on to 400 degrees. Put the oven rack on the closest to the bottom shelf position. Once the crust is chilled some but not hard, Roll it out and fit into the pie shell. Trim off excess crust. I like to chill those crumbs of crust and roll out to make a jam filled hand pie. Anyway, put the sliced rhubarb and blueberries in a bowl and add the sugar and tapioca. Let stand 5 minutes. Then pour into the pie shell in a fairly even layer, as the filling and crumbs will hide it there is no need for a pretty design. Then pour the filling that you just mixed up over it , tap the pie on the counter sharply 2-3 times to settle in the filling and bake for 25-30 minutes. I turned down my oven to 375 after 15 to 20 minutes. While it bakes those 25-30 minutes make the crumbs. When your timer goes off, carefully remove the pie from the oven and sprinkle the top of the pie with crumb mix;  I used about 3/4 of it but you could use a bit less if you don’t want a thick crumb layer or all of it for a really heavy crumb. Bake an additional 15-20 minutes until crumbs are lightly browned. Let stand at least 1 to 11/2 hours before slicing and serving. Enjoy!

Strawberry Rhubarb Custard Crumb Pie – Long Name – Yummy Pie

This is a variation on my favorite rhubarb custard pie which is my go-to recipe for a great spring dessert. I added strawberries to please my guy who isn’t a huge rhubarb fan. The strawberries add their special flavor and he really enjoyed this pie this past weekend. So did I! Our new favorite pie…

This is an easy pie even though it has several steps.  It is different from the usual rhubarb pie because the texture is a bit closer to a crumb cake, no wet (aka slimy texture) and no ultra-sour flavor.  I think this new strawberried version is great for those who doubt the power of rhubarb!  This GF crust will work for any pie with a traditional dough and the GF crumb topping is a great choice for any crumb pie topper.  This is my mixture of three recipes with some modifications which come together to create one of my favorite GF pie recipes.  I know it has several steps but each one is easy and you can use these crust and crumb techniques for other pies.

I like it because it has a great texture and the flavor is complex but subtly rhubarby.  It isn’t really soft or all that custardy (if I didn’t say the word custard you would never know) but has a more cake-like texture. It is a game changer of a pie. I promise you that!

Fruit in the unbaked pie shell.

Angie’s GF Strawberry Rhubarb Custard Pie

Crust:

1 c plus 1 tbsp brown rice flour mix (recipe for blend at bottom of pie recipe)

2 tbsp sweet rice flour

1 Tbsp. granulated sugar

½ tsp xanthan gum

¼ tsp salt

6 Tbsp. cold butter cut into 6 chunks

1 lg egg

2 tsp fresh orange or lemon juice

——————

Spray a 9 inch metal pie pan with cooking spray, dust with white rice flour. I must confess I forget this step a lot of the time and it doesn’t seem to matter much….

Mix dry ingredients in bowl of stand electric mixer.  Add butter and mix until crumbly and resembling coarse meal.  Add egg and juice. Do not leave out the juice; it is critical to the crust texture and structure!  Mix until it comes together into big chunks.  Shape the sticky mess into a ball with your hands. Put it on a crust sized piece of wax paper (14 x 14 inches more or less), flatten the crust ball some; put on top of it another piece of wax paper and chill it all in your fridge 15-20 minutes while you chop the rhubarb into ½ inch chunks.

This pie is ready to bake!

My sister Karen bought me one of those pie crust plastic bag thingies; has a zipper around the edge.  By OXO: I love it; it works better than wax paper which can get soft and tear as you roll out the crust.  King Arthur Flour sells an inexpensive one on line. I highly recommend you get the OXO version for making scratch pie crust.  Or maybe improvise with a sheet of heavy duty plastic! Strong enough to work with the rolling pin and better than wax paper.pie crust bag

Filling:

4-5 cups cut up fresh rhubarb – place in medium bowl

1 1/2-2 cups sliced fresh strawberries

Mix with dry mix made of

2/3 – 1 c sugar (depends on how sweet you like your pie) I go with 2/3 cup

¼ c brown rice flour mix (see below recipe)

1/4 tsp nutmeg

Sprinkle cinnamon

Roll out pie crust in a pie bag or between the two sheets of wax paper, try to get the thickness even, no thick middle! Peel off one side of paper and place in pie pan, centered.  Remove other slice of wax paper.  Crimp edges all around.  Fill with dry rhubarb mix.  Pour the following wet mix evenly over this mixture:

Liquid mix: 3 large eggs beaten lightly with 1/3 c milk (not skim), and ¼ tsp almond extract.

Crumb topping

Put all four ingredients in the same mixing bowl you made the bottom crust in and mix well with mixer paddle until crumbs form.

¾ c brown rice flour mix

½ c sugar

½ tsp xanthan gum

1/3 c cold butter cut into six chunks

Sprinkle the top of the pie with the crumb mix; use as much as you like.  I like about 2/3 of the mixture.  Up to your personal taste… It sinks into the rhubarb and wet mixture to create an almost cake like texture and the crumb crust adds lots of sweetness and eye appeal.

Bake in a preheated 375 degree oven for 55-60 minutes until bubbly and the crust is light brown.  Cool at least 3 to 4 hours before serving at room temperature.

The pie is just out of the oven, hot and smells wonderful!

Brown Rice Flour Mix (same as King Arthur’s Basic GF Blend)
2 c brown rice flour

2/3 c potato starch

1/3 c tapioca flour

Afternoon snack; still faintly warm. Delicious!

Mango Blueberry Muffins

unbaked mango and blueberry muffins.

I love muffins for their great flavor, texture and how easy they are to make.  Plus they are really portable and they freeze like a dream. Homemade snacks have the great feature of no chemical preservatives or additives like snack bars you buy which is a great attraction for me.  Plus, if you have never baked gluten free these muffins are a super easy starter recipe. I make them on the small size as when they are big they are too much of a snack; I just want a medium to small muffin to keep my blood sugar level.

This is a riff on my past version of a muffin recipe out of Annalise Robert’s cookbook; Gluten-Free Baking Classics.  It is very similar to her blueberry muffins but with some mango cubes and oat flour.  You can just use only the flour blend and no oat flour; tjey won’t be quite as tender. I left off the toppings as I wanted a more low calerie/healthyish muffin.

These muffins will not disappoint: delicate texture, a great blueberry flavor and bursts of mango too and they have just enough sugar for me.  I used about 1 cup of drained cubed canned mango flesh (you could use fresh mango cut into 1/3 inch cubes) and a heaping 1/2 cup of frozen  blueberries. Or the opposite proportions…use any proportion of fruit that you prefer. I used frozen blueberries and canned mango; so convenient, don’t defrost any frozen fruit before adding. Peaches could be subbed in for mango; be sure to cut in small cubes and drain them well. You could add a coarse sugar topping to insure that they look fancy if that is your desire.

I used coconut palm sugar so not much guilt in eating one of these treats! You can swap the coconut palm sugar for plain sugar if you want.  I liked coconut palm sugar which is very low as far as raising blood sugar.  Just increase the milk by 2 tbsp if you do the coconut palm sugar.

It is smart to freeze any you won’t eat in two days’ time; a zip lock freezer bag works great.

 Mango Blueberry Muffins

1 1/2 cups brown rice flour mix (see below)

1/2 cup oat flour

1/2 cup granulated sugar or coconut palm sugar

1 tbsp. baking powder

1 tsp. baking soda

¾ tsp. xanthan gum

¼ tsp. salt

1/4 tsp cinnamon

1 cup drained mango cubes (canned ones are like 1/3 inch cubes; a good size)

heaping 1/2 cup fresh or frozen blueberries 

2 large eggs

½ cup milk, 1 or 2 percent

½ cup canola oil

1-2 tbsp. coarse sugar if you want a sugar topping 

——-

Directions: Heat your oven to 425 degrees, placing the rack in middle of oven.  Spray muffin pans with cooking spray.  One batch makes 14-16 muffins.  I got 16 when I made them yesterday.

Mix all dry ingredients in bowl of stand mixer or big bowl. Combine milk and oil in measure cup and add. Beat in eggs, add vanilla.  Add fruits; stir just until fully blended.  It is a very thick batter. Let stand 10-15 minutes now or in the muffin pans.

Fill muffin pans 2/3 full.  I use a big serving spoon and fill it about half way to dump in each muffin space. Sprinkle the top with the coarse sugar if desired. Bake 5 minutes and lower heat to 350 degrees and bake 15-18 minutes more until golden brown. Do not over bake or they will taste dry.  Remove immediately from the pans and cool on a rack.  They freeze well for a few weeks, if they last that long.  Keeps in fridge (well wrapped) or an airtight cookie jar for 2-3 days.

Cut in half you can see they are more tan in color than most muffins. That is the coconut palm sugar’s doing. You can see the bits of fruit; every muffin is different in each bite; might be blueberry or you might get mango!

Brown Rice Flour Mix base mix 

(This mix is the same as King Arthur’s basic gf blend)2 c brown rice flour

2/3 c potato starch

1/3 c tapioca flour

Alternate Streusel Topping: A tasty alternative. Mix the following in a bowl, make sure the butter is in tiny pebbles; use your fingertips to blend.

½ cup rolled oats

¼ cup brown sugar

2 tbsp. almond meal

1½ tbsp. butter

¼ tsp. cinnamon

Sprinkle on top; press in lightly to help it adhere.

Baked and cooling. These mango and blueberry muffins are ready to snack on!