Meyer Lemon Tartlets

Winter suddenly is upon us and I always look forward to all the fresh winter citrus. I was lucky enough last week to get a small shipment of fresh Meyer lemons from my brother who lives in Texas and has a tree in his back yard. He didn’t send a lot as he had somewhat of a crop failure but a box came my way when I thought none were going to be shared so I am thrilled at my horde of smallish, greenish lemons. He was heading out of the country and picked them a tad early due to his eminent departure.  They are relaxing safe in my fruit bin of the fridge and I decided to make a special dessert yesterday.

I have made plenty of full sized lemon tarts but not so much in my small 3 inch across flat bottomed tartlet pans. I have two 4 piece pans so I could make 8 at a time. I chose to make 4 yesterday and the rest today.  That way my crust for tonight is incredibly fresh so I can present them with the perfect contrast of the flaky buttery crust and the lightly sweetened but tangy lemon filling.

We ate a couple last night for dessert and I served them with full fat plain Greek yogurt from Aldi’s which has great flavor and a thick smooth texture. It is rich and still somehow light.  A better topping than ice cream which melts…unfortunate in a lemon tart and less work than making whipped cream. I suppose you could top with some spray whipped cream but I chose something healthier and I happen to love it used as a pie topper.  High end plain yogurt is also really good for this purpose; StonyField Organic Low Fat is my preferred choice.

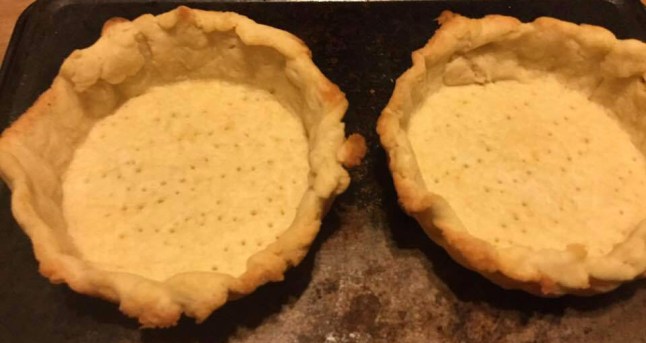
I make my standard pie crust dough and chill before rolling out chunks of it. I didn’t make thick fancy edges; smaller edges being better for the putting of the lemon flavor as the forward taste of these tartlets. I ended up with six shells and I took the leftover crust bits and make a hand pie filled with homemade pawpaw jam. Can’t wait to try that treat!

Notes: You can make these tartlets with regular lemons that you freshly juice. You might want to up the sugar by ¼ cup if you do that.  Also, these tarts should be stored in the fridge until serving. Enjoy!

tartlet shells

lemon tartlet

Meyer Lemon Tartlets  makes six

Crust:

1 c plus 2 Tbsp. brown rice flour mix (at bottom of recipe)

2 Tbsp. sweet rice flour

½ tsp xanthan gum

¼ tsp salt

6 Tbsp. cold butter cut into 6 chunks

1 large egg

2 tsp fresh orange or lemon juice

Directions: Mix dry ingredients in bowl of stand electric mixer.  Add butter and mix until crumbly and resembling coarse meal.  Add egg and juice.  Mix until it comes together into big chunks.  Shape into a ball with your hands. Put it on a crust sized piece of wax paper (14 x 14 inches more or less), flatten the crust ball some; put on top of it another piece of wax paper and chill it all in your fridge 15-20 minutes.  Roll chunks of it out to thin circles and fit into tartlet pans. Mine have removable disc bottoms and I highly recommend them. Prick the bottoms with a fork to prevent puffing up and bake at 375 degrees for about 11 or 12 minutes until lightly browned. Let cool.  You need six tartlet shells as the filling is just fill six. You should have enough crust for 7: hence my hand pie.

Lemon Filling:

¾ cup sugar

2/3 cup fresh lemon juice

The zested rind of 1 and a half Meyer lemons, of just one lemon if you use regular lemons

4 large eggs

2 egg yolks (freeze whites for use later)

½ tsp. lemon extract

¼ cup butter cut into 4-6 small pieces

Directions: combine sugar, lemon juice, eggs and yolks in heavy bottomed medium sauce pan; 1 quart size works perfectly.  Heat over medium low while stirring constantly with a whisk. Heat until it thickens a lot and coats the spoon thickly.  Will take 8-10 minutes.  Do not stop stirring or it will boil and overcook! No boiling…. An instant read thermometer will be at 175 degrees. Add the cut up butter, as it melts in stir a bit and add the lemo extract. When butter is melted pour the filling into a mixing bowl, cover the surface with plastic wrap and cool in fridge at least until lukewarm. It will look a lot like the filling for a lemon meringue pie but soft and almost pudding-like. Spoon into tartlets and chill at least an hour or two before serving; the tartlets should be icy cold when you plate it. Top with a spoonful of high quality Greek yogurt or freshly whipped cream and maybe a thin wedge of lemon. Enjoy!

The filling and crust are out of Annalise Roberts’ great cookbook; The Heirloom Collection. I just adapted it to small tartlet pans.  The flour is King Arthur’s basic blend or you can make it at home; see any pie recipe I have posted for the proportions of flours; easy as there are only 3 ingredients to it.

Gallery

Apple Cranberry Holiday Pie

apple-cranberry-crumb-pie.jpgJust made this today with a crumb topping. Yummy and super easy! I used 6 cups apple and 1 cup fresh cranberries. Fall dessert tonight.

Angela Drake's avatarMy World Without Wheat

I had a few last apples from our fall orchard expedition and a bag of fresh cranberries in my fridge bin.  Needed a tasty and different holiday pie, saw this recipe and knew it was just the ticket.  I revised some: simplified and made my version gf (of course!)  It is a much brighter in flavor and color than an apple pie but you can definitely taste those apples.

This is my mixture of a couple of recipes. I know it has several steps but each one is easy. Note that I cook the fruit briefly so it smushes down a bit and you don’t have crust issues due to fruit settlement.

I call this top crust my cherry cheater crust as I love it for a cherry pie so you can see the bright red filling. But, because making a woven lattice gf crust is a lot of work…

View original post 647 more words

Turkey Pot Pie For Dinner

If you have any leftover turkey still lurking in the fridge this is an excellent way to use it up. You will need two cups of turkey to make this rib sticking entrée; turkey pot pie.  My version tracks pretty close to that you can find in a 1970’s Betty Crocker Cookbook.  Gluten free though…cause I must. You can toss it together in about 30 minutes and it bakes in 35 more. Your tummy will thank me. I put some celery seeds in the pie crust for extra flavor.  I generally make it with just a top crust which is less calories. If you want the full deal; double the crust ingredients and make a bottom crust too. Your creation will be a delicious and substantial meal for sure!

Angie’s Turkey Pot Pie

Crust:

1 c plus 2 Tbsp. brown rice flour mix (at bottom of recipe)

2 Tbsp. sweet rice flour

½ tsp xanthan gum

¼ tsp salt

6 Tbsp. cold butter cut into 12 chunks

1 large egg

2 tsp fresh orange or lemon juice

Directions: Mix dry ingredients in bowl of stand electric mixer.  Add butter and mix until crumbly and resembling coarse meal.  Add egg and juice.  Mix until it comes together into big chunks.  Shape into a ball with your hands. Put it on a crust sized piece of wax paper (14 x 14 inches more or less), flatten the crust ball some; put on top of it another piece of wax paper and chill it all in your fridge 15-20 minutes.

Pie filling

1/3 cup butter: I used ¼ cup plus some canola oil to reach 1/3 cup

1/3 cup white rice flour (or another gf flour)

½ cup finely chopped onion

½ tsp. sea salt

¼ tsp. black pepper, freshly ground

1¾ cup good quality gluten free chicken broth

2/3 cup whole or two percent milk

2 cups diced cooked turkey

4 large carrots, diced

¾ cup frozen peas (or a ten ounce bag of frozen carrots and peas)

½ to 1  tsp. celery seeds (optional)

Heat butter/oil in large frying pan, add onion, cook 5-7 minutes until soft and translucent. While it cooks, cook the diced carrots for 4-5 minutes in a ¼ cup of water in a saucepan, lid on. Then turn off the heat, uncover it and throw in peas, set aside.

Add flour, salt and pepper to the fry pan with the butter and onions, cook 2-3 minutes, stir often. Add broth (I held back about 2 tbsp. to make sure it wasn’t watery) and while it heats keep stirring. Add the milk when the mixture is hot but not boiling, Stir well until it boils and then let it boil one minute, still stirring.  Add the turkey and then the drained carrots and peas, Stir well. Add rest of broth if needed.

Heat the oven to 425 degrees.

Roll out the pie crust thick; just big enough to cover the top of your 9 inch pie pan [about 11 inches] (I always use a glass pan but I am sure you can use a metal one). I like to roll it just 2/3 of the way out and then sprinkle with about ½ -1 tsp. celery seeds. Roll it the rest of the way and the seeds will be embedded in the crust. I like the subtle flavor they add, a touch of really old fashioned tastiness my mom would approve of!

Pour the turkey mixture into the pie pan and top with the crust. Make sure no crust hangs down; trim to look nice. If you want to go whole hog double the crust recipe and roll half so you can put a bottom crust in before you pour in the filling. Top with your celery seed crust, seal to bottom crust (if you used one) and do cut a few gashes for venting… place pie on a pie drip catcher.  My pie pan is always very full and that pie drip pan is wonderful for keeping the filling from dripping on my oven.

Bake 30-35 minutes until crust is light brown and the pie is bubbly.

Let the pie cool five minutes before serving.

All you need is a salad and you have a wonderful balanced meal. Enjoy!

turkey pot pie on plate


Brown Rice Flour Mix  (same as King Arthur basic blend)
2 c brown rice flour

2/3 c potato starch

1/3 c tapioca flour

The crust is from Annalise Roberts’ great cookbook: Gluten-Free Baking Classics.

Gallery

Fig and Raspberry Galette

Just made this Saturday; it was even better than I remembered. The almond filling is so easy and so tasty!

Angela Drake's avatarMy World Without Wheat

Figs are a favorite of mine in the fall. Pricy though. This year my fig trees came through with several dozen figs over about a months time. Some were stuffed with goat cheese and drizzled with honey, and eaten raw.  Some were roasted briefly with that same yummy cheese. Heavenly.  A lot were just popped in my mouth for a sweet treat.  I made a super delicious fig and yogurt cake last weekend. Now for a fig based dessert in the pie family.  Saw this recipe on Tasting Table a while ago and immediately knew I just had to make it. FYI: a galette is a free form flat round French tart. Now you know!

I used my favorite gluten free crust recipe plus some cinnamon.  Lacking almond paste I made some; see my blog post for that recipe: https://myworldwithoutwheat.wordpress.com/2014/12/24/almond-paste-holiday-joy/.  The filling was fairly close to the recipe. You…

View original post 555 more words

Stuffed Peppers..2.0 Version

Stuffed peppers are a great homey fall supper. I made them a few weeks ago and my recipe is just about the same as my mom used to make, comfort food for sure.  My garden produced more bell peppers….not sure I wanted the same flavor so I went looking for a different take. I found this vegetarian recipe by Robert Irvine on Food Network.  I changed it by adding ground chicken and removing some veggies to make room for that chicken. The result was just a great combination of flavors and very satisfying. I will put my version here.  If you want it vegetarian look for his recipe on the website. It got five stars and they are well deserved. I guess you could use any ground meat for this recipe.  I got my dark meat ground chicken at Valley Farm Markets in Bethlehem.

I don’t cook with tarragon that often but it really makes the flavor of this dish so delightful and different. Just try it.

Notes: I used cooked brown rice, the original choice was wild rice. You can use whatever rice floats your boat or is in your pantry; just cook it and cool somewhat before mixing with the other filling ingredients.  This is a naturally gluten free meal and I never got tired of it – ate all the servings up in a week and know I will be making it again for sure.


Angie’s Italian Stuffed Peppers   makes six


6 green, red or yellow bell peppers; nice sized

3-4 Tbsp. olive oil

1 lb ground chicken; dark meat if you can find it

1 yellow onion, diced

2 garlic cloves minced

1-2 cups diced summer squash

2 cups cooked brown rice

1 14 oz can diced tomatoes

½ cup diced red pepper

2 tbsp. tomato paste

Salt and pepper to taste

2 tsp. fresh tarragon chopped

½ cup Asiago cheese freshly grated (Parmesan would also work)

Directions:

Cut the lids off the peppers, discard seeds, I cut about ½ inch down the pepper so the center and stem stays part of the lid.  Heat a cup of water in a big pot with a steamer in it. Add the peppers and their lids, cook about 8 minutes, remove lid and let cool.

In a large skillet pour half the olive oil, heat, add the chicken and cook until no longer pink.  After it is cooking a couple minutes add the onions and garlic.  Cook a minute or two and add the diced squash and red pepper.  Do not overcook the squash. I used a firm variety of squash(tromboni) so it stayed together and didn’t get mushy.  Add the tomato paste and tomato; don’t add all the juice in the can of tomatoes; reserve about half for adding to the baking pan later on. Stir and cook until onions are soft.  Total cooking time; no more than ten or twelve minutes.  Heat the oven: 375 degrees.

Dump the cooled rice in a big bowl, add the skillet’s contents. Season with salt and pepper to taste and fresh tarragon.  Mix up gently. Stuff the cooled and drained peppers, do not pack in filling. Put a bit of filling in the bottom of a large oval baking dish that will hold your six peppers and stand the stuffed peppers upright in there.  Sprinkle them with the grated cheese, put the pepper lids on the peppers, I would add that reserved tomato juice from the can to the stuffing loose in the pan to keep it moist.  Bake at 375 for 35-45 minutes or until hot and bubbly. Let cool 5-10 minutes before serving. Enjoy  stuffed pepper