Chicken Tenders, Crunchy Meal Treat

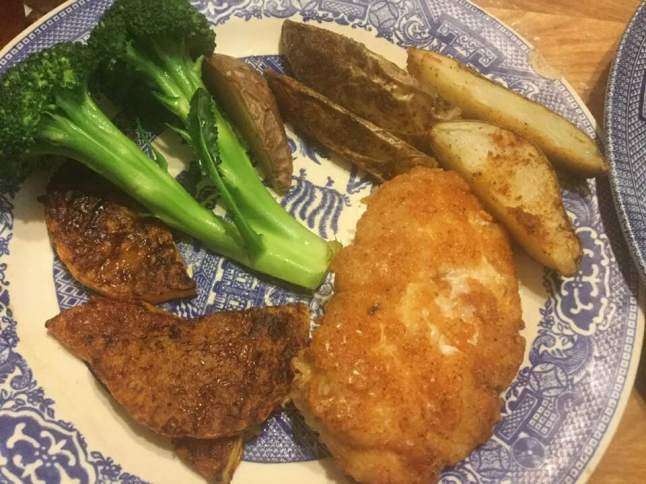
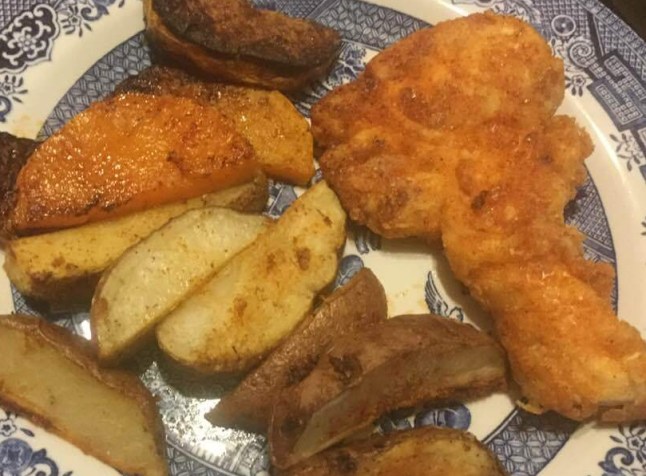
If  you like chicken tenders fried to a crunchy turn this recipe is for you. It is a riff on the spicy chicken tender recipe I have posted before.  I reduced the spiciness to cater to a 7 year old.  Easy and yummy.  We had it with oven wedge fries, baked slices of butternut squash and broccoli.  Great supper last night.

There are a lot of commercial food items that I don’t get to eat anymore, specifically most fast food being a major no no.  I miss crispy chicken like I used to enjoy at Wendy’s.  I make my spicy version but when my grandson moved in we needed something just a bit less spicy.

If you look on Glutenfreeonashoestring there is a recipe for making your own gf Bisquick; it is attached to a recipe for mini breakfast pancake bite muffins. I had the flours needed; white rice, potato starch and tapioca flour plus the add ins of baking powder, baking soda, salt, and sugar.  Easy peasy to put a double batch together; I will keep it in my freezer in a Ziplock freezer bag; sure have been wanting some of that Bisquick!

I lowered the hot sauce even more; ditto for the cayenne powder as I was pretty sure I didn’t want it quite so spicy; do as you wish. It was simple to do; mix the spices with the Bisquick, mix the hot sauce with the water, dip the chicken in the spices, then the hot water and back in the spiced flour and fry. I used a non stick frying pan and 1/4 inch canola oil.  It was almost like deep frying but not quite.

chicken tenders

You can also cut the chicken up into chunks, pound them briefly and you have lovely fingers that are somewhat smaller, great for kids. Fried chicken tenders are not something I would eat every week but it sure was yummy! I think this recipe is well worth trying even if you just buy some gf Bisquick.

Gluten-Free Chicken Tenders

1 Tbsp. Frank’s Red Hot Sauce

1/2 c Water

1/2 c Gluten-Free Bisquick

1 Tsp. Sea Salt

1/4 Tsp. Cayenne Pepper

1/8 Tsp. Fine Ground Pepper

1/2 Tsp. Paprika

1/4 Tsp. Garlic Powder

1 lb. Chicken Breast tenders – pound them a bit if they are very fat; you want it ½ inch or thinner.

Mix together the Gluten-Free Bisquick, Salt, Cayenne Pepper, Pepper, Paprika and Garlic Powder in a low bowl.  I used a wide soup bowl.

In a separate small mixing bowl mix together Frank’s Red Hot Sauce and water. In a  high-sided sauté pan heat 1 cup of canola oil – it should come up about 1/2 inch the side of the pan depending on the size of your pan. I started it on medium heat and put in a candy thermometer to regulate the temperature; I got it pretty hot; 350 degrees before putting in the chicken.  Or use my frying pan method I described above; less oil for that and no thermometer needed. Take one chicken breast tender at a time and dredge it in the GF Bisquick mixture, then roll it in the hot sauce/water mixture and then put it back in the Bisquick mixture and roll it to coat.  This can get messy; try to keep one hand dry and one for the water/hot sauce part. Or, if you want less coating start the raw tenders in the hot sauce water bath and just put one at a time into the seasoned flour to coat; one dip unlike first version. Let rest a few minutes to dry somewhat. Slide one into the hot oil and then a second one. Cook chicken for about 4-5 minutes, until they are golden brown and no longer pink in the center (I used a meat thermometer just to make sure).

Remove from the oil and drain on paper towels to blot any excess oil. If you have the oil hot enough they shouldn’t be greasy. If you want a sandwich, serve on a gf bun and top with mayonnaise, tomato and an additional piece of lettuce.

chicken tenders 2

Go ahead, indulge in this delicious chicken and I promise you it will be a hit with your family!

Adapted from creativecookinggf.wordpress.com, February 2011.

Adapted from my spicy tenders post in May 2017.

Hot and Sour Chinese Chicken Soup

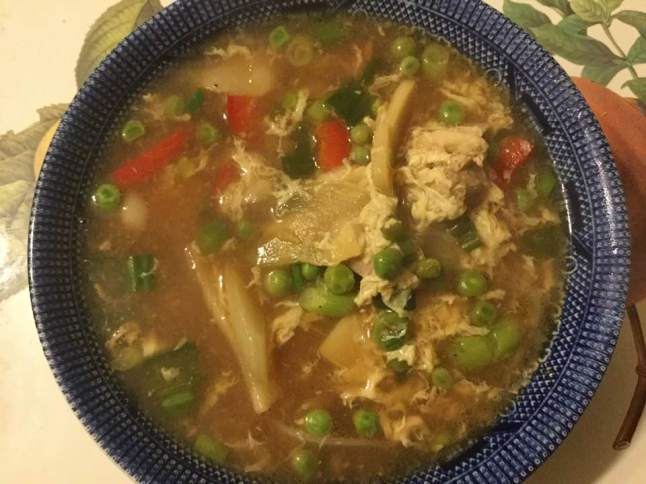
Leftover roasted chicken, a can of bamboo shoots, freshly made chicken broth and scallions.  What to make?  Ah hah! Chinese hot and sour soup; even better than take out ever was when I could eat it and super simple.  Lots of stuff in it but just measure and dump basically.

Notes: you can use leftover roast chicken or pork as the protein or tofu if you want to be vegetarian. I like all the vegetables but leave any of them out if you wish. You can even leave out the noodles; I would use the cornstarch then to help it be a tad thicker.

hot and sour soup in pot

Hot and Sour Chinese Chicken Soup

Ingredients:

5 cups homemade chicken broth

about 3/4 cup broken rice noodles; I prefer extra wide size

2 garlic cloves

about 2 tsp. freshly grated ginger root

1 Tbsp. balsamic vinegar

2-3 Tbsp. rice wine vinegar; can use red wine vinegar

1 Tbsp. chili sauce

3 Tbsp. gf soy sauce

1/4 tsp. sriracha sauce

2 tsp. brown sugar

1 stalk celery cut on the diagonal into thin slices

1/2 cup thinly sliced red pepper; I cut it into 1 inch lengths

4 oz mushrooms; shiitake are traditional but you can use any fresh mushroom, sliced

1 8 oz can bamboo shoots; drained

1/2 cup petite frozen peas

1/2 tsp. black pepper

2 cups roasted chicken cut in small chunks

2 eggs

2 tsp. toasted sesame oil

4 green onions (scallions)

Pour the broth into a large saucepan. Start it heating on medium.  While it heats heat 3 cups of water to boiling and add 1/2-3/4 cup broken rice noodles; I used extra wide size. Let stand 9 minutes. Add minced garlic, grated ginger, two vinegars, chili sauce, soy sauce, sriracha sauce, brown sugar, celery slices, red pepper strips, bamboo shoots and mushrooms to the heating broth. Cook 5 minutes. Add peas, black pepper and roasted chicken. Then the rice noodles which you have drained. Beat the eggs up and add them, and then the sesame oil and the scallions. I like to add the white part of my scallions a minute earlier than this as I don’t like them raw; up to you! Stir as you add the eggs.  Turn off heat. Taste and adjust seasoning.  Pour into bowls; makes about 5 servings.hot and sour soup in bowl

Notes; some folks add corn starch mixed with cold water to thicken it. I like the broth thin and brothy but you can do the cornstarch; 2 Tbsp. mixed with same amount cold water; add after the initial 5 minutes of cooking. This recipe is the one where you really need that homemade chicken broth; it is critical to the perfect flavor but use what ever you have and all will be amazed at your Chinese cooking skills. Enjoy!

Turkey Posole Stew; Different and Delish!

I am betting you have some roast turkey in the fridge or freezer, maybe a pint of gravy too?  Well, I have just the recipe for you, courtesy of Rachel Ray and foodnetwork.com.  It is nothing like most traditional turkey leftover recipes.  It is a Mexican stew.  Posole stew can easily be gluten free. Just use care choosing your chicken broth and your tortilla chips that accompany this savory soup.

I have been making it every fall after Thanksgiving and always look forward to a few bowls of it.  Spicy, crunchy, tangy; unlike any other soup I make.  It is called turkey posole. It can be made with roasted pork and I have done so.  I like it far better with roast turkey.  I have served this stew to many people and it is always well received and enjoyed, even by my elderly mother.  I made it tonight and it was so delish!

Ingredients

2 tbsp mild olive oil or canola oil

2 medium onions chopped

4 cloves garlic chopped fine

1-2 jalapeno peppers, seeded and chopped fine –use two if you like it spicy, I use one!

1 tbsp. ground cumin

1 GF beer (can use 1 cup water if you want but it gives more flavor)

Coarse salt and pepper

12-16 tomatillos; about 2 lbs, take off the paper cover and chop up.  Can coarsely chop in food processor

5-6 sprigs fresh thyme; chop it up off the stems.

2   15 ounce cans hominy

1.5 qt chicken stock (can be part gravy)

1 ½ to 2 lbs chopped turkey meat; can be mixture of light and dark

1 lime juiced

Chopped cilantro leaves to garnish (optional)

Tortilla chips; the ones with lime go particularly well with this.

tomatillos

Cook first six ingredients about 5 min in a large stock pot.  Add beer or water, cook one minute.  Add chopped tomatillos and cook 5-6 minutes until softened.  Add hominy, thyme and stock and cook 15 minutes.  Add chopped turkey and limb juice, stir. Taste and add salt and pepper, stir well.  I never use cilantro; something I just don’t like, but feel free to add it as the original recipe uses a bunch of it.turkey posole soup
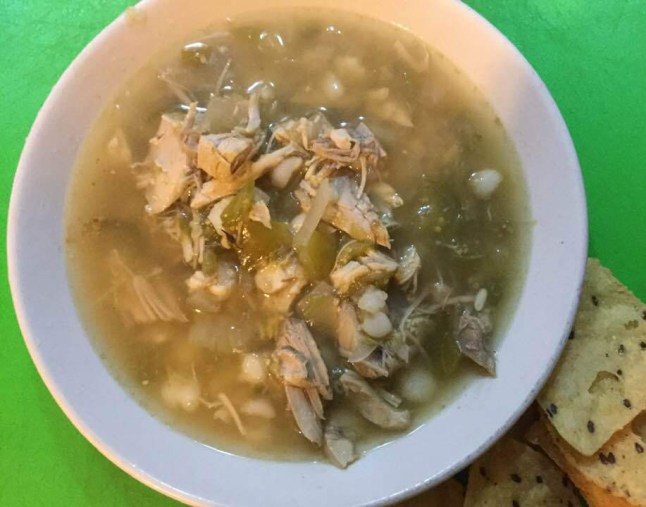
Then ladle the posole into bowls and serve lots of white tortilla chips to crunch over the top of the hot soup.  As the soup disappears from my bowl I like to add more chips to keep the crunch going.

Notes:  I halved the garlic and tomatillos this time. Used most of a good sized jalapeno pepper and one can of hominy. I used a cup and a quarter of water for the beer and 3/4 of a carton of gf chicken broth. About a cup of homemade turkey gravy this time.  It was delish!

tomatillos

The more jalapeno pepper you add the hotter it will be. I have tried canned tomatillos and they are not really a good substitute.  You can get them fresh (found near the fresh tomatoes) in many stores including Giant.  They are used in Hispanic and Mexican cooking and add a lot of flavor and tartness to the soup. I have heard that some folks use salsa verde instead of tomatillos but it really isn’t hard to chop them up so I recommend the real deal.

Hominy is a corn product; whole kernels soaked in lye to swell and soften.  The kernels have a mild corn flavor plus they soak up other flavors quickly and add a certain texture and body to the stew.

The wild turkey is native to North America and one turkey species is originally from Mexico.  So turkey is a natural component in this stew.  The Aztecs revered corn and liked to cook it with meat.  Tomatillos are native to Mexico, related to cape gooseberries.  They are used in salsa verde and other Mexican dishes. So this compilation of turkey, corn, tomatillos and lime is a natural combination that will be easy to make and fun to eat. Go on, be adventurous and enjoy a steaming hot bowl of delicious posole and use up that turkey in a totally different way!

Coconut Shrimp Stew

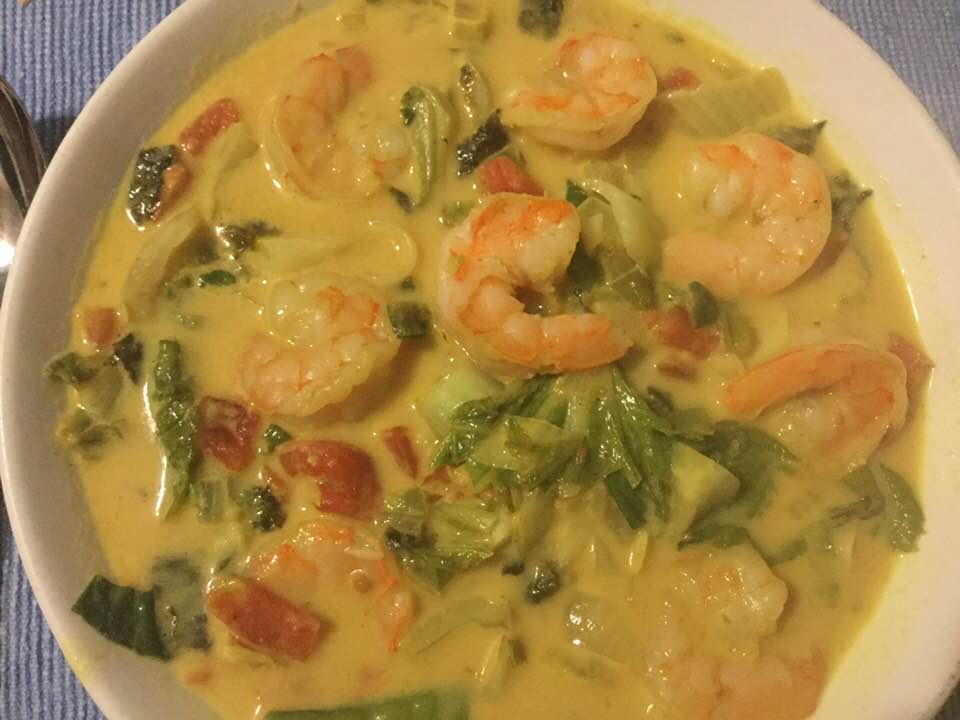
I was not been feeling so great last week. So, I was searching for a healthy soup or stew for supper one night. I took a cauliflower turmeric soup recipe from realfarmacy.com and changed it quite a bit to fit the ingredients I have. I love and it feels so healthy. It even has some seaweed in it, yeap I went there and it worked; just one sheet of nori seaweed chopped up with a scissors. Adds complexity and it is good for skin care which is what I need right now.  You can alter it as you like. I used shrimp as I had them. If you prefer chicken go right ahead and swap out for that. Or use cauliflower and make it more veggie driven. I think this is a flexible stew; thick and very flavorful. Great on a cold day especially if you feel ill or sluggish. It will perk you up!

Shrimp and Coconut Stew

Ingredients:

1 medium onion chopped

2 Tbsp. coconut oil

1 tsp. cumin seeds

2 lg garlic cloves

1 can (15 oz) diced tomatoes

2 tsp. ground cumin

2 tsp. ground coriander

1 tsp. turmeric

2 tsp. finely chopped fresh ginger

1 can unsweetened coconut milk

1 cup chicken broth

1 cup finely sliced Chinese cabbage

1/2 cup shredded snow peas

1 tsp. sea salt

1 sheet nori seaweed

Big handful of dry rice noodles; maybe a cup of them; I used large width.

3/4 lb large raw shrimp; peeled or not!

Directions: heat oil in large soup pot, add cumin seeds and stir for a few moments; add onion and cook for 2-3 minutes; add garlic; cook a minute and then add all the dried spices and chopped ginger. Stir and cook a minute; add the tomatoes and cook for 3-4 minutes until they soften. Add the Chinese cabbage, coconut milk and broth. 

Meanwhile; heat 2 or 3 cups water to a boil in a separate dish and add the noodles; turn off heat and let stand 8 or 9 minutes. I heat the water in my microwave but you can do it on the stove of course.

Add the shrimp and snow peas to the soup once the mixture had come nearly to a boil. While it is heating you can add the seaweed. I folded my sheet up and cut it into narrow strips with a scissors and dumped it all in. Turn down heat so it doesn’t boil, and simmer 5-6 minutes. Don’t over cook those shrimp! Add the cooked rice noodles and salt at the end of this time, stir and add  water or more broth if it has gotten too thick. Make sure it is hot, and that you have tasted to see if there is enough salt to your tastes. Serve in a wide shallow bowl. Enjoy!


Notes: I generally break up the rice noodles into 2-4 inch lengths; they come in a packet of long strips; hard to measure. I just grab out a big chunk and break them up somewhat before dumping in the very hot water. You can use any width you prefer.  You can use any type noodle you prefer but rice noodles are most authentic.

If you don’t like shrimp use another seafood like scallops or a white fish like cod. If you don’t like seafood/fish you could add cooked chicken in slivers or go with no protein at all. To make it vegetarian use vegetable broth instead of chicken broth. To “beef up” your vegetarian version try adding some small flowerets of cauliflower; maybe a cup or two when you add the tomatoes.

If you shiver at the very thought of the nori; just leave it out. It adds flavor and protein and does increase the authenticity of the flavors. Enjoy!

Grilled Cheese and Fig for Lunch


With company last weekend, I needed a quick but tasty lunch. Figs were plentiful in my garden so how to use them. I never make sandwiches, well hardly ever. Grilled cheese; honestly I just never think of it; so little sliced bread hanging out in my kitchen.  But, for some reason it was what I wanted. I made a simple grilled cheese using Aldi’s multigrain bread as the base. I sliced mild cheddar cheese, slathered one side with some brown mustard. The secret ingredient was a couple of ripe brown figs sliced thinly added before the grilling. The cheese got gooey and the figs softened even more. It was delicate and delicious. Use the cheese you prefer as long as it is good quality; no plastic cheese!  Ditto as to your bread. My choice bought at my local Aldi’s worked perfectly. Ditch the mustard if you wish. I used it in moderation; you don’t want it to be the prevalent flavor. This is a fig and cheese symphony!

grilled cheese

Grilled Cheese and Fig


2 slices gluten free sandwich bread

1 tsp brown mustard

2 tsp. butter

Enough cheddar cheese to make a solid layer on one slice of bread, like 5 chunks

2-3 ripe figs.

Directions: Super easy, super quick. I use a Teflon grill pan; melt 1-2 tsp. of salted butter; lay out the two slices; one plain and one with the mustard topped with cheese slices and topped with thinly fig.  When the bottom (you gotta peek!) is browned gently lift the solo slice and carefully place it on top. I like to put a domed lid over it and cook another minute on low heat to cement the two parts into one delish sandwich. Slice in half on the diagonal and enjoy!