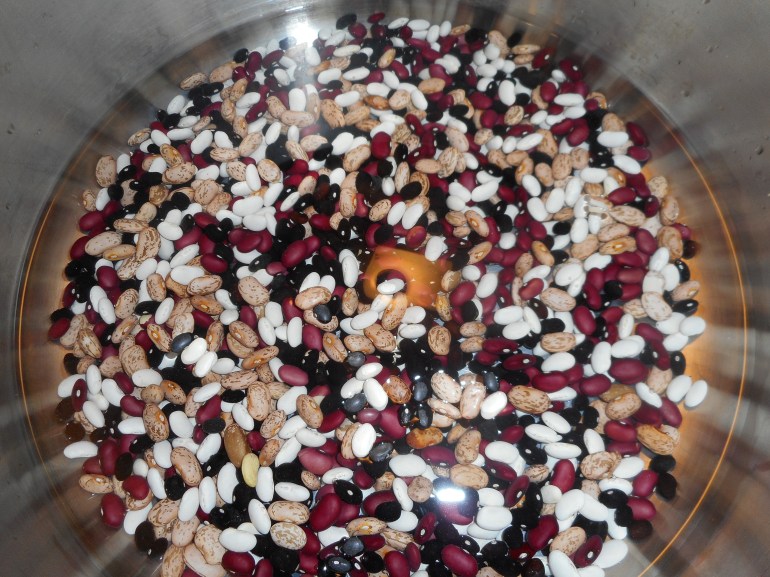
15 Bean Storm Soup

Another stormy day!  It’s time for another hearty one pot meal.  This one is my multi-bean soup with Italian sausage.  I started with a 1.3 lb bag of 4 bean mix and added two kinds of lentil and a bit of a few others.  The thing is, if you have celiac most 16 or 15 bean mixtures for soups contain barley which we are hugely allergic to.  I found a four bean mix out at Echo Hill country store (Berks County) and added some French lentils; maybe ¼ a cup and some red lentils; another ¼ cup plus a ¼ cup of dried garbanzo beans and a sprinkling of dried limas.  You can use what ever blend you like but I like a good mix for a rich thick stew.  (NOTE: this most recent version used a 15 bean blend I found at Giant grocery store that was marked gf.  I did not use the seasoning packet that came with it.)

My soup has Italian sausage but you can leave that out if you want a vegetarian version. I personally love sausage in a bean stew. Gives you lots of meaty flavor and a healthy dose of protein. I am guessing you could use other things like smoky ham chunks or maybe a ham hock? In this latest version I used smoked bratwurst instead of Italian sausage,  good but I really love it with Italian Sausage.

I enjoyed a hot bowl of this pottage with a slice of toasted multigrain gf bread.  It made a full meal without anything else being necessary.   A fresh crunchy salad would go well if you want to round your dining experience out with some greens!

Ten or Fifteen Bean Soup with Sausage

Soak 1 pound 4 oz (typical bag size) of dried mixed beans in filtered water to cover.  Soak it for an hour or try the overnight treatment.  If you use separate types of beans, follow these directions as lentils don’t need a soak.  I set the lentils aside and added them after the soaking as they don’t need the same treatment the other beans need.  Either bring to a boil and let stand an hour or just let stand in the cold water overnight.  I did the quick version.  Be sure to drain them well and rinse before returning the swollen legumes to the rinsed pot.  Cover with fresh filtered water and add a bay leaf.  Cook 1 hour, pour in more water as needed and stir so it doesn’t stick or burn.  Then, add the lentils and cook another hour until the beans are nearly tender.  It is hard to say when beans get done, depends on a number of factors, taste often to check for tenderness. And stir that pot! As they approach that almost done spot start the rest of the dish, get everything chopped up and ready to toss in when the beans have reached the two hour mark.

Chop into dice:

3 sizable carrots

1 large onion

Mince: 2 big garlic cloves

Add the veggies to the pot, stir and cook 10 minutes. Stir occasionally. Add water if needed.  I like the soup thick but it can’t be solid so add water.

As that cooks, start the sausage.  Sauté one lb Italian sausage: brown in a Teflon pan with a touch of olive oil until top and bottom are browned and sausage is mostly done. Let cool a bit and slice into rounds or chunks, set aside.  In my latest version I used fully cooked smoked bratwurst and so I skipped this step; just cut it into rounds and added it in the last 15 minutes of cooking.

Add the following to the soup:

½ a 14 ounce can of spicy diced tomatoes

½ tsp. dried oregano

Sprinkle dried basil

¼ tsp smoked paprika

1 beef bullion cube

½ bunch of kale leaves cut into big shreds; I cut off the bigger stems as they can be tough.

1-2 tsp sea salt

Some fresh ground black pepper

Cook ten minutes, add more water if it gets too thick. Stir occasionally.  Taste and add more spice if you think the soup needs more. Add the sliced sausage or bratwurst and cook five – ten minutes more.  A total cooking time could be from 2.5-3 hours, depending on your beans.  If they have been sitting in the pantry for many months they take longer to cook to a tender texture.

Taste and add more salt/pepper as you see necessary.  Let stand 5-10 minutes before ladling out.  Now that is comfort food that is good for you too!

Originally posted February 2015


GF Product Review Roundup


Finally I got to try the much vaunted Canyon Bakehouse  7 Grain bread.  It looked kinda small when I pulled the loaf from the Wegman’s freezer case.  No matter, it is the taste that matters I thought as I yanked out a bag of Against the Grain sesame bagels.  There were already a few new crackers in my pantry that are being tested…and eaten. Comments below.Canyon bakehouse 7 G bread

Later that day I made a slice of the bread, toasted and half butter and half with homemade lemon marmalade.  It was small but tasty.  Maybe the best store bread I have had but not earth shatteringly good.  I was somehow expecting to feel just that OMG taste after reading reviews and comments on it. But, I wasn’t blown away.  I have made gf multigrain bread that tasted as good if not better.  So I now feel okay about my own baking; it doesn’t have to be a huge slice to be successful.  Nor is the flavor of my own bread lacking in comparison. I just prefer homemade.  No preservatives. And I get the pleasure of mixing up my dough and of smelling it bake.  Not saying this was bad bread, not at all.  Just that my homemade is comparable and I am not missing a lot by making my own.

againstthe grain bagelsSecond item; the bagel.  I had bought Utz gf bagels long ago and was not impressed, they were like an old stiff sponge and had minimal flavor.  This bagel; it is more open and has more flavor.  Very light in weight and lots of holes; sort of like airy French bread as a bagel.  I made homemade bagels last year and they were better in the chew department especially when really fresh.  Still, it was hugely appealing to have a toasted bagel with no effort.

skinny quinoa sticks

Third item; A huge bag of Skinny Quinoa Sticks given to me a while ago by a friend.  They are sweet onion flavor and made with ancient grains per the label.  Only 140 calories per serving and incredibly crunchy and rather addictive. Can’t eat just one, or ten.  Yumm!  I think she got them at Sam’s Club or Costco.  Big bag, still eating. Not stale and not tired of them.

hummus crackersFourth item: Hummus crackers by Mediterranean Snacks, roasted garlic flavor. Thin, crisp and mild.  Made with garbanzo beans and pretty edible if not outstanding.  I believe they were from Aldi’s. Their bland flavor will not compete with your dip or cheese.  They are somewhat delicate; break easily if used to dip; say in hummus. Great with guacamole

breton crackers

Fourth item: Breton gf crackers.  I tested the black bean and found it tasty, very delicate meaning it kept breaking in half just getting a cracker out of the box but somehow I kept wanting yet one more.  I have another box not opened yet but a friend says it is a super great cracker, can’t wait to crack that box…

rye bread and cassoulet 022

In conclusion, I liked all of the above but really loved the Skinny Quinoa sticks and I did enjoy both the convenience and the flavor of the bagels and breads.  I use these crackers with cheese, guac, hummus and all on their own. All worthwhile to purchase.  Still, I just made scratch “rye” bread this afternoon and am blown away by the flavor and crust.  Homemade is best in my book!

Meyer Lemon Tart: Tarts are Pies with No Lid

My brother Robert sends me a big box of, just picked, fat and juicy Meyer lemons from his trees late every fall.   This year he sent me a second box this past weekend; 24 big fat lemons! Homegrown, juicy: they are a cooks dream.  Their flavor is sweet; not that usual tart of lemons, with a gorgeous floral scent.  They are perfect in cookies like the lemon squares every one loves, which I make gf now a days. I also make lemon meringue pie, lemon marmalade, lemonade, a classic French lemon tart and this delicate buttermilk tart with a baked filling which I am sharing with you today. Yes, another in my year of pies.  Did I mention that tarts are just shallow pies with no lids? Yeap. They count as pies….in my world anyway!

This tart is very simple to construct; far and away the easiest lemon item I bake. I use a shortbread cookie style gf press and pre bake it and the filling is just whisked together and poured into the partially baked crust.  So easy to make and it goes great with a big spoonful of fresh real whipped cream.  Although I actually prefer a dollop of plain organic low fat yogurt, just about as tasty and hugely more healthy. Sometimes I lay slices of Meyer lemon down the length of it when I use my special rectangular tart pan.  Sensational looking and as yummy as it looks.  A round tart pan works great too. I have used a regular gf pie crust which is a tasty alternative to the cookie crust.

Simple, tasty,  and impressive looking – you could make it with regular lemons but I suspect it would need more sugar to make it sweet enough as Meyer lemons are far sweeter than the grocery store lemons. Maybe 2/3 cup of sugar instead of a half cup. Don’t be scared off by the buttermilk.  You will never know it is even in the filling; totally blends in.

If you want to use all purpose flour in your crust and in the filling – go right ahead.  I have been making this tart long before I went gluten free.

Meyer Lemon Buttermilk Tart

Cookie Tart Crust

1 cup brown rice flour mixture (recipe below)

¼ cup sugar

1 tsp. xanthan gum

5 tbsp. cold butter cut up into 6 or 7 chunks

1 tsp. vanilla extract

1-2 tsp. water

Directions:

Mix the dry ingredients in your stand mixer, add the butter, blend with the paddle blade until the butter is small pebbles.  Add the vanilla and water.  Press into a tart pan with a removable bottom, be sure to first spray the pan with cooking spray.  Par-bake 10 minutes in a 350 degree oven.  Cool 10-20 minutes before filling and baking.

Filling

¾ cup low fat buttermilk: let it warm up for 15 minutes before mixing

½ cup granulated sugar

2 lg eggs, warm them to room temperature

6 tbsp. Meyer lemon juice

2 tbsp flour (I use sweet rice, white rice flour or a blend)

1-2 tbsp finely grated Meyer lemon peel

Mix all filling ingredients in a mixing bowl until smooth.  Pour into crust and bake at 325 degrees for 25-30 min; until just barely set.  Cool completely and refrigerate until chilled.  Can decorate tart with thin slices of Meyer lemon leaves. Serve slices topped with a dollop of this lightly sweetened cream.  Or a spoonful of organic low fat yogurt; very healthy but surprisingly satisfying.  Pairs well with the tangy sweet of the tart.

——-

Topping:

1 cup heavy cream

2 tbsp powdered sugar

Beat cream, add powdered sugar.  Serve a dollop with each slice of tart. Or top with a healthy spoonful of Stonyfield Organic Yogurt, 2 percent or whole milk yogurt.

——

Brown Rice Flour Mix
2 c brown rice flour

2/3 c potato starch

1/3 c tapioca flour

——

Filling recipe modified slightly from one found on food network.com, flour mix and crust from Annalise Roberts’ great cookbook: Gluten – Free Baking Classics.

Reposted from mt original post in December 2014.

Cranberry Orange Muffins for Beginners

Gluten free baking can be fraught.  You put all your energy and a lot of expensive ingredients into a baked good that can turn out like a lead brick. I just did that with a lemon pound cake.  Yeap; it was very bricklike.  So I wanted to share a new recipe that I feel is pretty fool proof.   Cranberry nut muffins….muffin mania strike again!

I won’t go far from my best recipes to make these treats. This is a riff on a 2015 blueberry muffin post which was my riff on a muffin recipe out of Annalise Roberts’ cookbook; Gluten-Free Baking Classics. Her gf quick breads are delicious and we enjoy them often. I love that they seem foolproof if you follow the basic format carefully.  I have made many variations and they all turn out great.  So I recommend them to those just learning to bake gluten free. You can do these muffins, I promise, even if you are totally new to baking gluten free.

Never been a big fan of cranberries until last winter when I decided to experiment with them and found that they work very well with a variety of fruits/nuts for muffins, tarts, pies and crisps.  The cranberries brighten the flavor and add a lovely rosy color.  Do look beyond your prejudices to their sharp flavor and give them a try.  I am so glad I did.

These muffins did not disappoint: delicate texture yet slightly crunchy outside with a great cranberry orange flavor and just enough sugar for me.  The streusel topping adds a cinnamon flavor and insures that they look straight from the bakery. I made a 3×5 mini loaf as well as muffins and it was delightful sliced thick and served with a cup of tea.  I baked it a bit longer; 35-40 minutes should do it.

lemon blooms and beef with broccoli 003lemon blooms and beef with broccoli 004lemon blooms and beef with broccoli 005lemon blooms and beef with broccoli 007

There are walnuts in there to so you get some really great nutrients from the fruit and nuts. I swap the white sugar I used to use for coconut palm sugar which is very low as far as raising blood sugar.  Not much guilt in eating one of these treats! Note: You need a little extra milk if you use the coconut palm sugar; at least two extra tbsp. maybe three.

Cranberry Nut Muffins

2 cups brown rice flour mix (see below)

2/3 cup granulated sugar or coconut palm sugar

1 tbsp. baking powder

1 tsp. baking soda

¾ tsp. xanthan gum

¼ tsp. salt

1/2 tsp cinnamon

grated zest of one orange

1 1/3 cup fresh or frozen cranberries

1/3 cup chopped walnuts

2 large eggs

½ cup (plus 2 tbsp. milk if you use coconut palm sugar,) 1 or 2 percent

½ cup canola oil

———

Topping: Mix the following in a bowl, make sure the butter is in tiny pebbles; use your fingertips to blend.

½ cup rolled oats                    1½ tbsp. butter

¼ cup brown sugar                 ¼ tsp. cinnamon

2 tbsp. almond meal

——-

Directions: Heat your oven to 375 degrees, placing the rack in middle of oven.  Spray muffin pans with cooking spray.  One batch makes 12-16 muffins.  I got 16 when I made them yesterday.

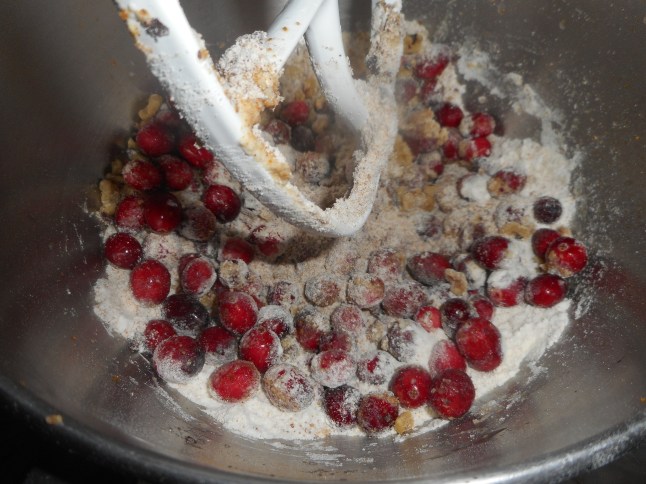
Mix all dry ingredients in bowl of stand mixer or big bowl Add fruit and walnuts; stir to coat them with dry mix.  Combine milk and oil.  Beat in eggs, add vanilla.  Add liquids to big bowl; stir just until blended.  It is a very thick batter.

Fill muffin pans 2/3 full.  I use a big serving spoon and fill it about half way to dump in each muffin space. Sprinkle the top with the topping. Press it in a bit so it won’t flake off after baking. Bake 21-23 min until golden brown. Do not over bake or they will taste dry.  Remove immediately from the pans and cool on a rack.  Keeps in fridge (well wrapped) or an airtight cookie jar for 2-3 days. It is smart to freeze any you won’t eat in two days time; a zip lock freezer bag works great.

Brown Rice Flour Mix base mix 

(This mix is the same as King Arthur’s basic gf blend)
2 c brown rice flour

2/3 c potato starch

1/3 c tapioca flour


Mongolian Beef Stir Fry: Awesome!

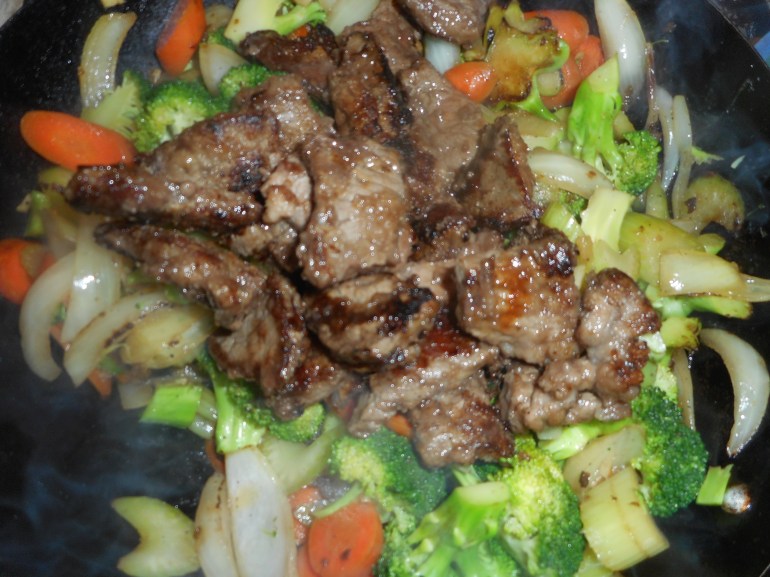
Don’t know why but I’ve been totally craving Chinese food lately.  Quick stir fry meals served over rice, with rice noodles.  With lots of veggies.  With beef, chicken, tuna.  You name I crave it!  And I make it ‘cause there isn’t any gluten free Chinese restaurant within easy reach of my house. So when I saw this recipe for Mongolian stir fried beef I knew I wanted to re-create it.  I confess I made changes.  Yeap; I did.  Honestly, I almost always change recipes some.  Just the way I roll. This time I added lots of veggies and took out the deep frying aspect.  Oh, and I took most of the brown sugar out.  ¾ of a cup of brown sugar is close to insane in a stir fry. Just trying to keep things healthy folks.  lemon blooms and beef with broccoli 009

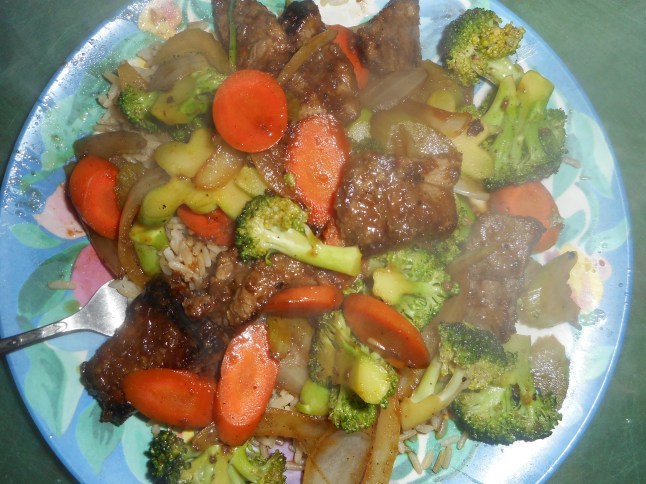
And it worked.  Yummy meal over rice and no guilt because low in fat, sugar and full of healthy vegetables.  Sure there is beef in there but not that much and it is lean rather than fatty meat. I used beef sirloin but the original recipe off of food.com used flank steak.  Use whatever cut of beef you like, if it is too chewy it will give you a chewy result; this is not a low braise but a fast stir fry.  I used plain sesame oil (not toasted!) but canola or mild olive oil both work well in rapid stir fries.

lemon blooms and beef with broccoli 010

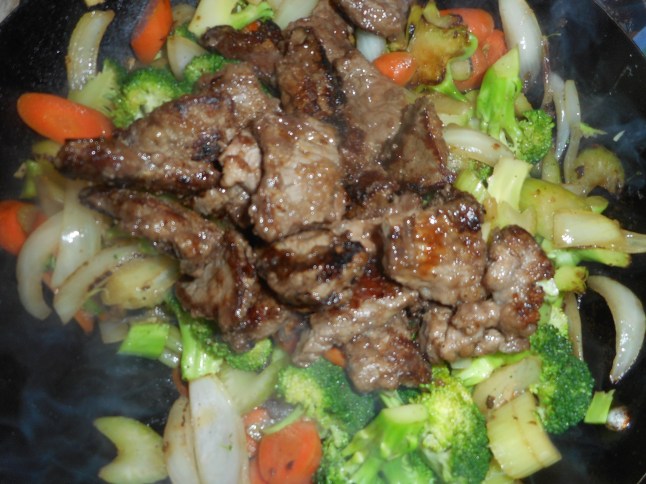
So stop whining about there being no P.F. Changs around here.  You can do this, it’s not that difficult.  You do need a wok if you want to do it half decently. And yes, a gas range works hugely better for woking. I have a big one but my favorite kitchen pan is my baby wok.  Makes up to four servings in it easily and fits on burner a heck of a lot better than my big old wok from years gone by.  You can use a big one but honestly, my baby wok does 99 percent of my stir frying.  If you need to double this recipe, well then maybe you need a full sized wok.  But for 4 or less; small is best! lemon blooms and beef with broccoli 011

You may wonder why I need to make this recipe myself and call it gluten free when there is no naturally occurring gluten in it.  Well, a lot of soy sauces have gluten in them.  And a lot of Chinese restaurants do not prevent cross contamination.  If you have celiac even a tiny amount of gluten is a serious problem.  So I really can’t chance eating food from a Chinese take out place or most restaurants unless I am sure they understand this issue fully and can make truly safe food for me. Annoying for sure as sometimes I do miss eating Chinese take out…. For now though, I am more than satisfied by the authentic flavor of my new fav stir fry dish!

Angie’s Mongolian Beef with Veggies
Serves 3-4

¾ lb of beef round sliced into ¼ inch thick by 1 inch pieces

3-4 tbsp. corn starch

1 tsp. ginger

1 tbsp. oil for stir frying

1 large onion sliced top to bottom into long segments

2 cups or so of raw broccoli florets; make them like 1 inch wide and I cut the lower parts of the stems into 1/8 inch slices

2 carrots, cut on the bias to make long ovals. 1/8 inch thick

2 celery stalks cut on the bias to make long half moon slices; 1/8 to 1/4 inch thick

1 tbsp canola or sesame oil

2 garlic cloves, minced

1 tsp. fresh ginger minced or grated frozen ginger

1 heaping tbsp. brown sugar

1-2 tbsp. gf soy sauce or tamari sauce

3-4 green onions cut into slivers, optional

Directions

Sprinkle the ginger powder over the cornstarch on a sheet of wax paper, stir around. Roll the beef pieces around to coat them well.

Let stand while you cut up the veggies, up to ten minutes.

Heat the cooking oil in a wok to almost smoking hot.  Add the beef.  Cook a couple of minutes on the first side, stir up and cook a couple more minutes.  The heat should be fairly high to cook things fast. You want the meat to get crusty but not hugely overdone.  Remove to a plate; cover to keep warm.

Add another tbsp. of oil to the same pan.  Throw in the cut up onion and carrots.  Stir a minute. Add the celery slices.  Stir another minute. Add the broccoli stems, stir and then throw the rest of the broccoli on top. Add 2-3 tbsp. of water and let steam a minute or two uncovered.  Add the garlic and fresh ginger.  Cook a minute. Return the beef to the pan, dump the brown sugar on top, add the soy sauce.  Add the green onions if you want some, I went without this time but I plan to add them next time I made this yummy meal. Stir a minute or two.  Add more water to create sauce if there isn’t enough.

Serve over brown rice or white rice.

Note, these stir fry times and amounts are flexible.  If you don’t want one of the veggies leave it out or sub in something else.  If you want more soy sauce or more sugar; add more and taste to see how you like it.  I like things a tiny bit crunchy; taste and see if you need to cook another minute or two before you turn off the burner. I find stir frying rather freeform and fun.  It can use what you have available in your fridge and pantry.  I also would like to try this dish made with chicken.  Enjoy!

Original recipe inspiration from food.com.