Golden Gazpacho…Cold Tomato Soup for Summertime Dining

Hot summer days mean I need a cool recipe. One with minimal cooking: gotta be easy and totally tasty.  Plus I gotta use some of my garden produce.  Gazpacho is the classic Spanish cold soup. I make it every summer out of ripe red tomatoes. This time I made it from some golden yellow tomatoes; they had some bad spots and couldn’t be included in a free produce give away due to that. I believe the actual variety is Kelloggs Golden; think big fat heirloom tomaters. They are especially nice for some people as this variety is lower in acid; we grow it in our church community garden for seniors who have trouble with regular tomatoes.  Using yellow tomatoes changed nothing else about this recipe but it sure looks different! The flavor is mild and delightfully tomato-y.golden tomatoes in bucket

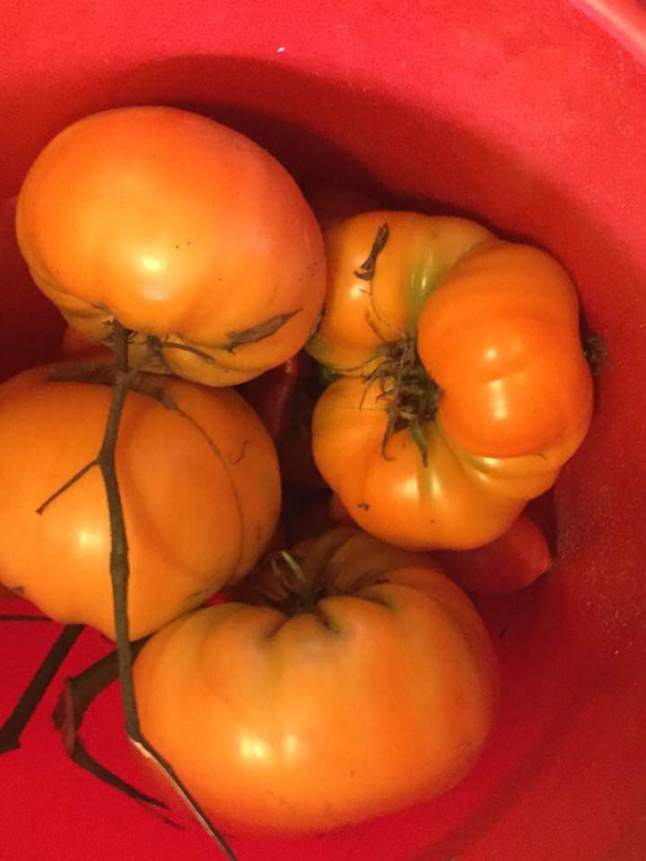
So, this recipe is perfect for using excess tomatoes and I love it on a hot day. It absolutely must be made with ripe summer tomatoes, never ever attempt it with any less than the best vine ripened fruit.  You can get great tomatoes at farm stands, farmer’s markets and even the grocery store; look for the grown local label for the best flavored tomatoes. Please do not use greenhouse tomatoes grown far away and shipped while not really ripe. Your soup will not be full of tomato flavor and it will taste disappointing.  These ripe locally grown tomatoes are vital to the flavor of gazpacho.  If you can’t find golden tomatoes just use red ones; a more traditional looking gazpacho.

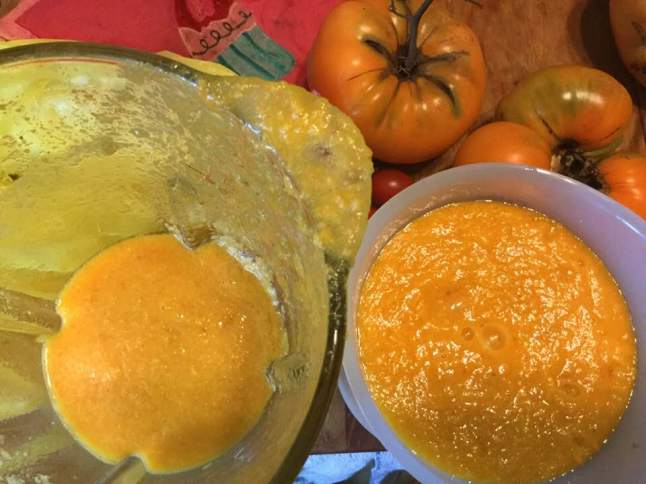
I make my gazpacho in the blender but I believe a food processor works okay too.  No heat,  minimal fuss.

golden gazpacho in blender

My version allows you to add chopped raw veggies in the amount you prefer just before you slurp it down. I prefer its fresh pure flavors to those soulless restaurant versions that are often gelatinous and terminally crammed full of assorted chunky veggies…uggh.

golden gazpacho toppings

Warning: you do need to peel the tomatoes but that goes pretty fast.  I heat about a wide sauce pan filled 3 inches deep with water to a boil and pop the ripe tomatoes in for 2 to 3 minutes. I put in two big ones at a time; done in a couple batches.  Let them cool a bit and then peel off the skin and cut out the blossom end (top) and they are ready to use. Saying large tomatoes is kinda vague; just think about how many will fill your blender about 2 times 2/3 of the way full. For me it was about 4 or 5 huge tomatoes.  I had a bit extra I put in a bowl and sprinkled with white balsamic vinegar to eat as a tomato salad; good way to use up extra  tomato slices. golden tomatoes in pot

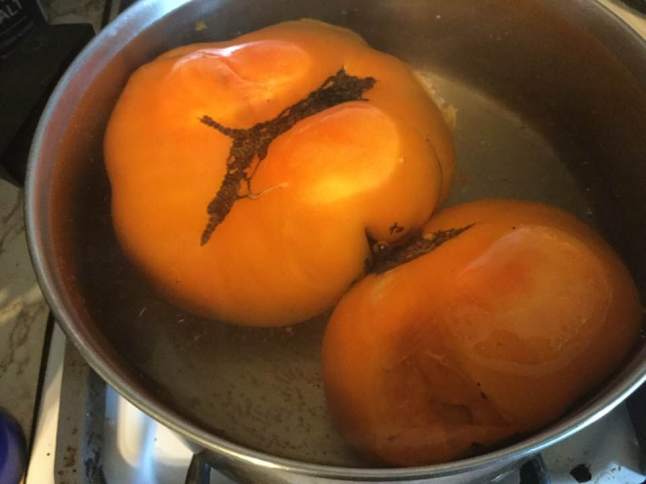
One important instruction: gazpacho just HAS to chill really good; make it early in the morning to serve as a late lunch or better yet; for supper. The colder the better, I always put my soup bowls in the freezer for 15 or 20 minutes and yank them out just before filling and serving this cold summer delight.

It is a flexible recipe; depends on the size of your tomatoes. This should make close to 50 ounces or nearly a  quart and a half.  It will keep 3-5 days in the refrigerator.

Golden Gazpacho

Soup ingredients:

3 to 6 ripe fat golden tomatoes (large ones)

About ¼ cup EVOL; best quality you can afford: I used some from Aldi’s

2 slices white bread (GF if you have celiac)

1 lemon

2 large garlic cloves, peeled

1 to 1 ½ tsp. sea salt

Toppings:

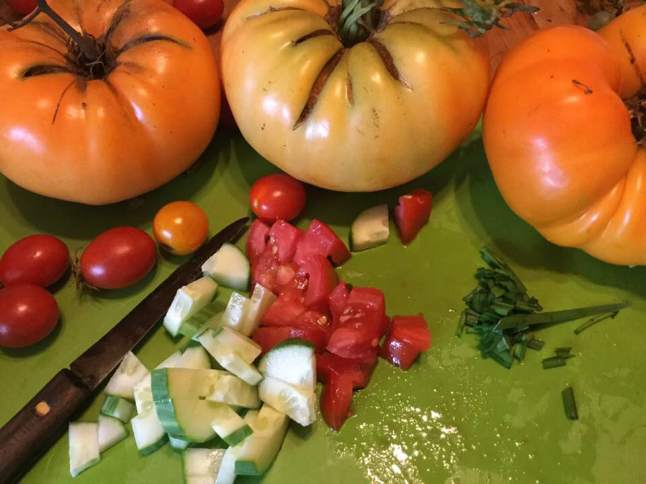
2 tomatoes diced, heirloom if possible

1 cup diced burpless cucumber

2 scallions, sliced thin, green and white parts. Chives work okay too.

Directions: peel the tomatoes as described above.  When I peel them I do it over a bowl to capture the juices and seeds. I save them, strain off the seeds and I add back the juice as needed to thin the finished soup.    Put half of your cut up tomatoes in the blender; add a slice of bread broken up, 2 tbsp. olive oil, the juice of half a lemon and one garlic clove.  Put the lid on and blend well.  Note: do not fill the blender more then ¾ full. Taste; add salt; ½ to ¾ tsp. Pour in a glass bowl.

Repeat entire process with the rest of the ingredients and thin with reserved tomato juice – it should be thick but not porridge thick.  Mix the two batches together in a big glass bowl; never metal because of the acidity of tomatoes and cover tightly with plastic wrap.  Then chill it at least 3 to 4 hours.

Serve with bowls of toppings to sprinkle on top of the thick soup; diced ripe tomatoes, scallion slices and cucumber ( preferably burpless) cut in small dice.  If you want to guild the lily, top with croutons (gf ones if you have celiac), I don’t often bother. golden gazpacho in bowl


Note: gluten free bread often gives a slightly different texture to the soup; somewhat less smooth in the look of it and the taste.  It’s okay as it doesn’t affect the flavor: it still is delicious and a bowl of it is so very refreshing on a hot day.  Serve with a small sandwich and you have a perfect summer lunch.

Stuffed Squash Blossom Fritters


Zucchini season is here.  The blossoms are plentiful and I am expecting many zucchini this season.  I now make my stuffed blossoms with gf beer batter. I have made them gf before; this is a repeat post with some new information.  I used seltzer thinking it could function like the beer;none of that in the house. So I whipped up a batch for lunch today.

I usually use Monterrey Jack cheese to fill them but in a pinch some sharp cheddar worked excellently.  Or whatever cheese floats your boat; can use almost anything that is not too hard or is really runny before cooking. I used sharp cheddar this time; perfect.

My go to in past has been GF Redbridge beer. I left it rest once beaten, for about one hour.  UPDATE: I used seltzer water this time very successfully. Use a tad less than you would of beer; seems thinner than beer makes the batter. Even flavored seltzer works; not sweetened though.

No need to deep fry in a quart of oil, I fried mine in a non stick pan with a good coating of light olive oil.  I like to turn them twice; resulting in a sort of three sided fritter. They are best consumed right away the same day they are made, eaten warm with a sprinkle of salt and a squeeze of lemon juice.  My twenty something daughter loves them. My grandson at two and a half enjoyed one!  They have a mild squash taste but I think the crisp batter coating is the predominate flavor. My GF version is pretty much identical to the old wheat version: they taste fantastic! The cheese is melted and creamy, the fritter exterior is crisp yet tender. I ate half of them and had to restrain myself from any more….I sprinkled some fresh dill on the plate. Perfect.


Stuffed squash Fritters

Ingredients

7-12 fresh squash blossoms, remove stamen

1 medium egg

2/3 cup white rice flour or any gf flour blend

Sprinkle sea salt, a few grinds of fresh pepper

1 ½ tsp light olive oil plus more for frying

3 ounces GF beer; I measure it midway between ½ and 2/3 cup or about 1/2 cup seltzer water

Approx 1 inch chunk of cheddar cheese cut into small rectangles

¼ a fresh lemon or lime

DIRECTIONS: Separate the egg and put the yolk in a medium bowl, ditto for the white.  Add the oil, salt, pepper and white rice flour to the yolk.  Then add the beer.  Stir well, cover with plastic wrap and let stand an hour or two.  Even thirty minutes works. Beat that reserved egg white until fairly stiff. Add to the batter and stir gently but thoroughly. It will lose some loft but don’t over beat; should be thick and puffy in texture.

Slit open the side of each squash blossom and break off the pollen stamen.  Insert a 1 inch by ½ inch chunk of cheddar cheese.

Heat a 10 inch non-stick skillet; add about 2 or 3 tbsp light olive oil.  Take 3 blossoms and gently roll in the batter to coat; making sure the cheese doesn’t fall out.  Lightly lay them in the hot olive oil and fry until golden, carefully turn twice with spatula and fingers; about 5 or 6 minutes total. Do a few more if you have room or fry in two batches.  Do not keep turning; maximum of two turns.  Lay on a couple paper towels to absorb any excess oil if they are oily. Mine were really not at all oily this time.  Plate, sprinkle with coarse sea salt and a squeeze of fresh lemon juice.

They are a lovely appetizer. I made 7 this time of them; that was how many blossoms I had; the batter should do at least 12 of them.  Even the bit of stem will taste good so don’t worry if you have ½ inch or so of stem.  The blossoms are best if you pick them yourself that day. Some fancy farmer’s markets sell squash blossoms so they are the first place I suggest you look for some if you don’t have access to a few squash plants.  I have used pumpkin or butternut squash blossoms in the past; they taste fine.

squash blossoms on plate

I squeezed lime juice on these and sprinkled with fresh dill; perfection!

Do try them; a real conversation starter, not that hard to make and really delicious.

Original post in summer of  2015 or thereabouts. Minor text changes and recipe variations.


Bratwurst in a Crepe!

This post came as a result of me buying some uncured German bratwurst at Aldi’s and I didn’t know what to make with it.  Then I saw a blog post; for a meal of bratwurst served in a “galette” which is basically a buckwheat crepe. Bratwurst is a quick cooking meat; about 10-11 minutes in fry pan. The crepes took far longer. I used dark buckwheat flour.  You will need some water, a bit of coconut oil or butter, salt and an egg. You beat it up and refrigerate it for an hour or more; up to overnight.  I made the whole recipe which should make 8 crepes; I got about 6-7.  I have made crepes before, long ago; they are a bit smaller; these were made in a 12 inch non stick frying pan.  They are harder to turn as they are so large. The crepe is thin, fairly flexible especially when it is just made. I reheated one tonight on a plate; for about 35-30 seconds.

I cooked the brats and then opened a can of sauerkraut and got out the mustard. It goes especially good with country style mustard; aka stone ground mustard.  One time I had it with a pickled okra added in and second time with some caramelized onions added.  Both tasty.

So here are my hints.  I made the batter in a 4 cup flexible measuring cup; measure the water and dump in flour and rest of ingredients. Mix it well.  Put in fridge while you do something else. When you measure batter to make a crepe, go for a touch less than a ladle full. I found that the first one was crap; just as the author said it would be.   Then I got out the cooking spray and changed from coconut oil to butter and sprayed the pan as well; Much less sticking. You have to rotate the pan around quickly to spread the batter into a thin big crepe. Be patient to turn and be careful not to flip it onto itself; sticks together and cannot be separated again; mutant crepe! Let it get some brown spots on the bottom. The edges might be all feathery; they look pretty when that happens.

I think you could use these to make wrap sandwiches; far better tasting and more flexible than any gf wrap bread I have found. They are fairly easy once you get the hang of making them. I love that there is no baking and in an hour of batter resting plus 15 or 20 minutes I can have 6 wraps to use with brats, hot dogs, lunch meat or whatever! Six is plenty for me; not sure they freeze so don’t want a ton of them. This is definitely a keeper recipe I will be able to use in many meal situations.

Here is the link to Margaret’s recipe: http://www.kitchenfrau.com/buckwheat-galettes/

Enjoy!!

Squash, Pancetta and Chard Pasta


This colorful pasta dish is pretty healthy and very tasty. Not too tricky either. Have enjoyed it many times in the past 5-7 years. I actually thought it was on my blog; not so. Hence this post. I made it this week and it made 4 lovely servings.

It showcases roasted cubes of butternut squash and tender melt in your mouth swiss chard. My amounts are somewhat approximate. It will keep a few days in the fridge. I used gf fettuccine noodles. Don’t overcook them! You could buy pre-peeled and cubed squash to save time. I used some I grew last fall and honestly it didn’t take long to peel and cube it. I suggest you roast the cubes from a whole squash and use as much as you think works for you. Valley Farms has great fresh swiss chard; that’s where I get mine if I don’t grow it myself.  I have made this recipe with thick cut bacon, if that is what you have; go for it.  I got a package of chopped pancetta at Aldi’s pretty cheaply.


Butternut, Pancetta and Chard Pasta

Ingredients:

1 bunch swiss chard, I like the red stemmed variety, rinsed off

3-4 tbsp. EVOL

1 cup or so of diced red onion; one decent sized one

1 lg garlic clove minced

1 small- medium butternut squash; peeled, seeded and cubed; at least a pound

4 oz pancetta, diced

12 oz dried gf fettucine noodles.

Good quality Parmesan cheese to grate on plated entree

Directions:

Roast the squash; heat the oven to 400 degrees, spray a rimmed baking sheet with olive oil cooking spray; spread the cubed squash, drizzle with 1-2 Tbsp of EVOL and ½ tsp. kosher or sea salt, bake at 400 degrees for 45 to 60 minutes; turn cubes every 15 minutes with a metal spatula to help them cook evenly, a bit of crunch is nice! Start the rest of the recipe as they approach doneness or bake the squash a day before if that works for you. Have done it both ways. Crunchier if made right before serving


Heat a large pot of salted water for the pasta while you make the chard.  Chop it into 1 inch lengths; set the chopped leaves aside separately from the lower stem bits. Heat the EVOL in a large frying pan or smallish wok. Add the stems and cook 2-3 minutes, add garlic, stir, add the onion; cook 3-5 minutes until softening. Add rest of chard in 2-3 handfuls letting it cook down for a minute before stirring and adding the next third. Then push the veggies up the sides or to the edges and add the pancetta. Push the veggies gently back around and over the pancetta. Cook 2-3 minutes until the pancetta is hot and the chard is soft.  Meanwhile you have cooked the pasta to al dente. Add it to the pan with the chard, stir, add the roasted squash cubes. Stir. Serve with freshly grated Parmesan cheese on top; none of that pre-grated crappy cheese please! Enjoy!

swiss chard pasta plated


Not sure where I found this recipe but it is a keeper; we often enjoy it in the fall as chard and squash are fall harvest vegetables.

Pizza….GF and Homemade…AND Yummy!

ImageSince my last pizza post; that the local pizza place has stopped carrying gf pizza…sad face.

The best tasting GF pizza for me is one I make myself.  It is out of my favorite GF cookbook, G-F Baking Classics by Annalise Roberts. It has some millet flour in it which keeps it from shrinking as much and adds some flavor/texture.  I love that I can actually make it the night before, store it well wrapped overnight and then just top it and bake to melt the cheese and blend the toppings.  The recipe says you can make several and freeze them half baked.  Great idea!!

So give this easy recipe a whirl and see what you think.  It is relatively easy, just be sure to take the time to flatten the top of the dough when you spread it in the pizza pan.  If you get a hill in the center your sauce will slide down it! Not so good.

This is better than the stuff pizza parlors sell.  They tend to buy it completely made, sealed up and just pop it in their oven.  Not a fresh pizza.  Take the time to whip this up.  A stand mixer makes it happen fast and painlessly. Your family who eats GF with you will like its crunchy crust and fresh taste.  And you can personalize it with the toppings of your preference to replicate pizzas you always enjoyed before going wheat free.

GF Pizza Crust

Ingredients:

1 cup brown rice flour mix

½ cup millet flour

1 tsp xanthan gum

½ tsp salt

2 tsp sugar

2 tsp dry yeast granules

1 tsp olive oil

¾ cup warm water, maybe up to a tbsp more (110 degrees F)

Directions:

Spray pizza pan with cooking spray, lightly sprinkle cornmeal over entire pan.  (You could skip this if you are not a cornmeal fan.)

Mix all dry ingredients in your stand mixer bowl.  Pour wet ingredients in there, mix until just blended, scrape down bowl.  Beat at high speed for two minutes.

Spoon dough onto prepared pizza pan.  Use a metal cake spatula to move it around and make it smooth. Try not to get the center any thicker than the edges.  Push dough so it gets all the way to the  very edge of the pan.  Cover with a light cotton cloth and let rise in a warm place 30-40 minutes until doubled in height.  I warm my smaller oven to about 105 degrees and put it in there.

Sauce

I use an 8 ounce can of tomato sauce and add olive oil, some minced garlic, dried basil and oregano and cook 5-8 minutes, covered. Let cool a bit before using.

Baking

Move oven rack to lower third of oven.  I have a pizza oven so I use that (great bottom heat for a super crisp crust!) Preheat oven to 425 degrees.   Bake it for 15-16 minutes.  Remove from oven.  [This is the moment when you can let it cool and freeze it or chill in fridge if using the very next day. Be sure to wrap it tightly in plastic wrap.] If using now, flip over and put tomato sauce, then toppings and cheese of choice.  I like both mott and Parmesan cheese on mine! Bake 8-10 more minutes more or less until it is bubbly and browning.  Be sure the bottom is browned.

Cool a minute and cut with your pizza cutter. Enjoy!

FYI: Don’t freeze the shell for more than three weeks.

PS: I have been told that Matey’s Pizza in Fountain Hill makes a gf pizza; will have to try it.

Originally posted on my blog in 2014.