Rhubarb Crisp For Dessert…or Breakfast.

It’s still rhubarb season, at least at my house and garden! The last three desserts I made were this recipe. It was super easy and super yummy. I swear it tasted like there were cherries in there! My brain can hardly believe I never made rhubarb crisp; make apple crisp all the time in the fall and winter…so glad I tried it this spring. Hence, my sharing of this tasty quick dessert with you.  Makes a yummy breakfast too!

It keeps about 3 days depending on humidity. I have a glass baking dish with a plastic lid for keeping things fresh; works great.

Notes; any gf flour blend will do, I use King Arthur blend.  You can use sliced or slivered almonds. Or no nuts! Tried it with both nuts and I prefer walnuts.  I think the walnuts add a hint of cherry flavor to the result. But great with no nuts too…

Rhubarb Crisp

Ingredients

Fruit layer

4-5 cups rhubarb cut into ½ inch bits (I do 5 cups)

¾ cup sugar (could use up to a cup if you like it sweeter)

¼ cup tapioca starch (or cornstarch if you chose)

3/4 tsp. cinnamon

Topping

½ cup gf flour blend

1 cup gf oats (not quick ones!)

½ cup brown sugar

½ tsp. cinnamon

¼ cup brown sugar, not packed

¼ cup butter, cold

½ cup walnuts (optional)

DIRECTIONS:

Heat oven to 350 degrees. Spray inside of 8×12 glass baking dish; any dish roughly that size will do. In a large mixing bowl dump all the dry ingredients; sugar, starch and cinnamon. Mix a bit; add rhubarb, mix well. Dump into baking dish.

Dump all dry ingredients left except nuts into bowl of stand mixer, blend briefly. Add butter which you have cut up into about 12 or more tiny bits; a few cuts with a knife do it quick. Blend a minute or so until you can’t see the butter. Add nuts. Pour over the rhubarb. Bake on middle shelf for 35 to 40 minutes; the thicker the layer of fruit is the longer it takes; you want it bubbling and the top lightly browned. Let cool at least 15 or 20 minutes.  Great with vanilla ice cream or plain Greek yogurt on top. Store with a tight lid on top. Enjoy! rhubarb crisp in dish

Chocolate Chip Banana Nut Muffins

I love trying new versions of things; a few years ago I cam up with this magical idea: I combined my chocolate chip muffins with my classic banana nut muffins.  Muffin heaven is here and I baked this afternoon so there are a couple in my muffin jar for snacks!  The rest go in the freezer to stay fresh for a sweet chocolatety banana muffin treat.

goodbyes and choco chip banana nut muffins 013

goodbyes and choco chip banana nut muffins 012

They are perfect in texture, moisture and totally yummy. I put a streusel topping on them but a good measure of it fell off; do try to press it in firmly, I guess I wasn’t firm enough!  They are good even without the streusel topping if you like less on top, could instead sprinkle with chunky sugar for a nice finished appearance.  And if you only have one kind of chocolate chips I am sure they will still be fantastic. I just loved the contrast of big dark chips with small semi-sweet ones.

goodbyes and choco chip banana nut muffins 006goodbyes and choco chip banana nut muffins 007goodbyes and choco chip banana nut muffins 008goodbyes and choco chip banana nut muffins 010goodbyes and choco chip banana nut muffins 011

Chocolate Chip Banana Nut Muffins

2 cups brown rice flour mix (see below)

2/3 c granulated sugar or coconut palm sugar

1 tbsp. baking powder

1 tsp. baking soda

¾ tsp xanthan gum

¼ tsp salt

1 tsp cinnamon

3/4 c packed ripe mashed banana

½ c coarsely chopped walnuts

¼ cup mini chocolate chips

¼ cup dark chocolate chips

2 lg eggs beaten

½ c milk plus 2 tbsp extra if you use coconut sugar, 1 or 2 percent

½ c canola oil

————————————-

Topping

½ cup oats

¼ cup brown sugar

2 tbsp. almond flour

½ tsp. cinnamon

2 tbsp. butter

Mix topping dry ingredients, rub butter in with your fingertips.

Or just use 1/3-1/2 cup gf oats sprinkled on top; this lower calorie topping is my go to these days.


——————————–

Muffin directions:

Heat oven to 350 degrees, placing the rack in middle of oven.  Spray muffin pans with cooking spray.  One batch makes about 16 or 17 muffins.

Mix all dry ingredients in bowl of stand mixer or big bowl.

Add bananas and walnuts; stir to coat them with dry mix, then add the chocolate and stir briefly.

Combine milk and oil.  Add liquids and the two eggs to bowl. Stir on low until well blended.

Fill muffin pans 2/3 full.  Sprinkle with topping and press in carefully if you do the streusal. Bake 20-24 min until golden brown. Do not overbake or they get dry.  Remove from oven and let cool 2-3 min before gently turning them out from the pans to cool on a rack. I use a butter knife to release them by running it around the edge once before tipping them out. They freeze well for up to 3 weeks.  They keep in my ceramic muffin/cookie jar for a few days. muffins 001

Brown Rice Flour Mix *same as King Arthur’s GF flour blend
2 c brown rice flour

2/3 c potato starch

1/3 c tapioca flour

Note: This muffin recipe is my version of the muffins from Annalise Roberts’s wonderful cookbook: Gluten Free Baking Classics.

Post originally put up by me in 2015, minor changes to text.

Bratwursts From Aldi’s are the Best!

This post is an addendum to my buckwheat crepe post of the other day. I neglected to tell you how delish the bratwurst were in my crepe wrap entree. I bought the package of 4 uncured Bavarian bratwurst at Aldi’s. They were kinda pale and unexciting looking in the shrink wrap but when I pan fried them in a bit of olive oil they browned up nicely. Each brat was still juicy and tender with a delicate flavor I was very impressed with. bratwurst

I have bought brats before at other grocery stores and found them rather dull and pedestrian. These are thinner, longer and far tastier.  bratwurst package
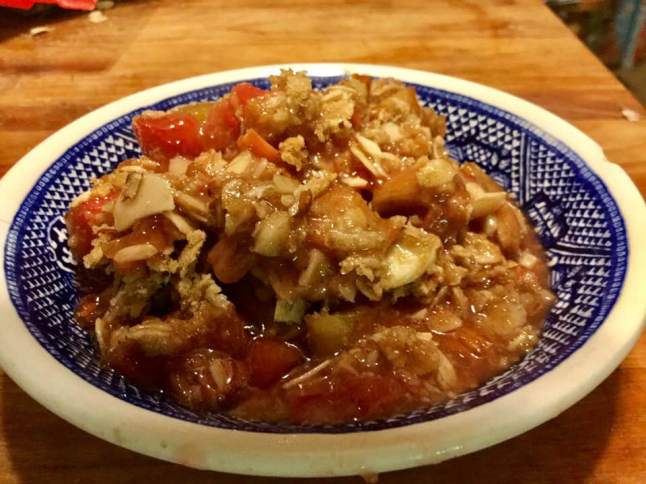
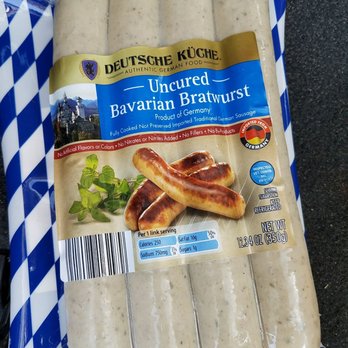
Uncured means they have less junk added in the curing process of many sausages.  Definitely a yummy and healthyish choice for sausage in any recipe. They cook in about ten minutes.  And grilling them is on the package as an alternative to the frying pan. Next time I will try them on my grill. Maybe for camping…

They are imported from Germany so I am guessing they are very authentic compared to stuff made in the USA. I give these an A plus in every category. Enjoy!

Addendum: I have not been able to find these yummy brats in many months. I still look for them most every time I visit Aldi’s and hope they will have become available again.

UPDATE: have found them recently at Aldi’s and at Lidls. So yummy!  5/2021.

Bratwurst in a Crepe!

This post came as a result of me buying some uncured German bratwurst at Aldi’s and I didn’t know what to make with it.  Then I saw a blog post; for a meal of bratwurst served in a “galette” which is basically a buckwheat crepe. Bratwurst is a quick cooking meat; about 10-11 minutes in fry pan. The crepes took far longer. I used dark buckwheat flour.  You will need some water, a bit of coconut oil or butter, salt and an egg. You beat it up and refrigerate it for an hour or more; up to overnight.  I made the whole recipe which should make 8 crepes; I got about 6-7.  I have made crepes before, long ago; they are a bit smaller; these were made in a 12 inch non stick frying pan.  They are harder to turn as they are so large. The crepe is thin, fairly flexible especially when it is just made. I reheated one tonight on a plate; for about 35-30 seconds.

I cooked the brats and then opened a can of sauerkraut and got out the mustard. It goes especially good with country style mustard; aka stone ground mustard.  One time I had it with a pickled okra added in and second time with some caramelized onions added.  Both tasty.

So here are my hints.  I made the batter in a 4 cup flexible measuring cup; measure the water and dump in flour and rest of ingredients. Mix it well.  Put in fridge while you do something else. When you measure batter to make a crepe, go for a touch less than a ladle full. I found that the first one was crap; just as the author said it would be.   Then I got out the cooking spray and changed from coconut oil to butter and sprayed the pan as well; Much less sticking. You have to rotate the pan around quickly to spread the batter into a thin big crepe. Be patient to turn and be careful not to flip it onto itself; sticks together and cannot be separated again; mutant crepe! Let it get some brown spots on the bottom. The edges might be all feathery; they look pretty when that happens.

I think you could use these to make wrap sandwiches; far better tasting and more flexible than any gf wrap bread I have found. They are fairly easy once you get the hang of making them. I love that there is no baking and in an hour of batter resting plus 15 or 20 minutes I can have 6 wraps to use with brats, hot dogs, lunch meat or whatever! Six is plenty for me; not sure they freeze so don’t want a ton of them. This is definitely a keeper recipe I will be able to use in many meal situations.

Here is the link to Margaret’s recipe: http://www.kitchenfrau.com/buckwheat-galettes/

Enjoy!!

Jam and Almond Tart

European jam tarts.  Heard of them. Never had a taste of one. Have a lot of jam/jellies so I thought it was the right time to give it a whirl. I also had some almond paste, just a bit but it proved enough to make a touch of frangipane filling.  I think you could leave out the frangipane part but why? It definitely adds to the flavor of the finished tart. Honestly it felt like I got it from a really high-end bakery.  Gluten free too.

Yes, I know of the famous British Bakewell  Tart, this is sort of the reverse of that: with more of a tart and less of a cake result – next time I crave jam I may well try my hand at a Bakewell  Tart.  It is sort of like jam topped with a rich thin cake.  Stay tuned!

There are just a few simple steps to this; if you want the jam or jelly sweeter you can cook it down a bit with a half cup of sugar added. I did do that but honestly, I think it was not really necessary. Once it was thickened I put it in a new bowl and chilled it in my freezer as it was too darn hot! Extra work. Next time, just gonna stir up the jam and go with it.

Angie’s Almond and Jam Tart

Crust:

1 c. and 2 Tbsp. brown rice flour mix (at bottom of recipe)

2 Tbsp. sweet rice flour

1 Tbsp. granulated sugar

½ tsp xanthan gum

¼ tsp salt

6 Tbsp. cold butter cut into 6 chunks

1 egg, room temp

2 tsp. lemon juice

Mix dry ingredients in bowl of stand electric mixer.  Add butter and mix until crumbly and resembling coarse meal. Add the egg and juice; blend until it clumps into a ball. Chill in fridge for 15 minutes.  Roll out  between plastic sheets or wax paper and lay in pan: press onto the sides of a 9 inch tart pan with removable bottom. Set in fridge to cool while you make the filling to 1 1/3 cup fruit jam/jelly; I used homemade red currant jelly

2-3 Tbsp. almond paste

½ cup sugar

¼ cup gf flour

½ tsp. almond extract

2 ¼ ounces sliced almonds


Directions:

Make crust; chill.  Stir up jam/jelly.  Put the almond paste, sugar, extract, and flour in a food processor; mix until well blended. Sprinkle over crust. Glop on the jam and smear around with a large spoon or butter knife. Sprinkle with the sliced almonds.  Bake at 375 degrees for about 40 minutes; until the crust is lightly browned.  Cool at least an hour before slicing. Great  with a dollop of whipped cream or plain yogurt. Stores for about 2 days (tightly covered) – if it lasts that long… Enjoy!

jam tart slice

Brown Rice Flour Mix (same as King Arthur basic gf blend)

2 c brown rice flour

2/3 c potato starch – not potato flour!

1/3 c tapioca flour

The crust recipe is from Annalise Roberts great cookbook, GF Baking Classics, Second Edition.